


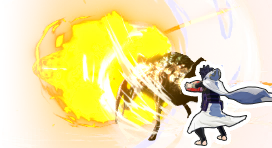
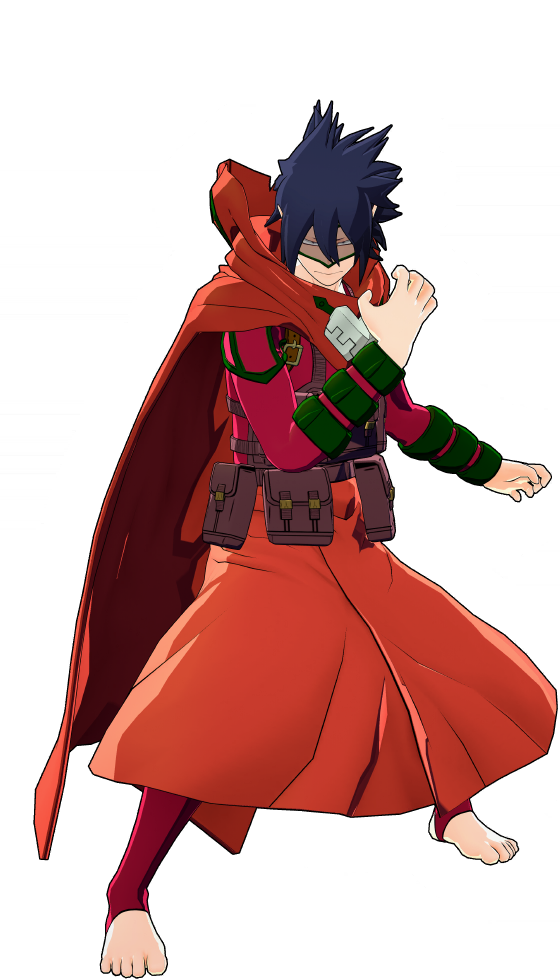
Festival Outfit (Dangerous)
Good enough normal tuning slots to leave room for a deadly double red special tuning combo, I’d suggest Willpower and Crushing PU Charge to be offensive-focused.

Last Update: January 17th 2026 3:28 PM UTC
Last Change: Updated Tamaki's combo DMG tags to reflect his last balance changes.
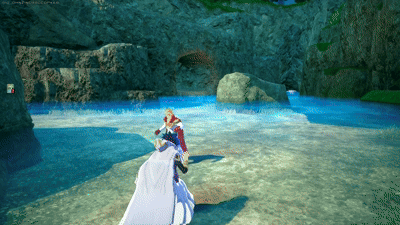
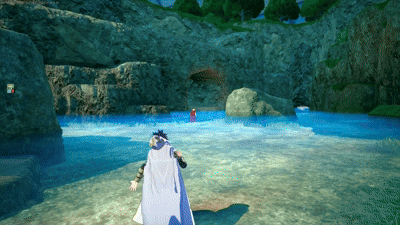
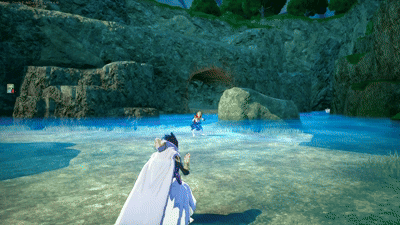
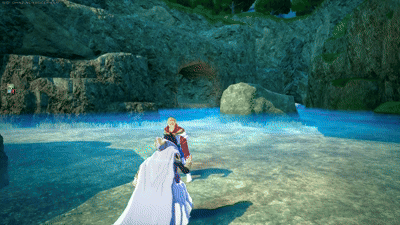
Tamaki Amajiki is a disruptor character who excels at adaptive control and precision zoning. While he has strong tools for punishing and escaping, he isn’t a frontline fighter who can brute-force his way through fights. Tamaki thrives as a reactive fighter, using his Beta vanish, pull, and wall-piercing plasma cannon to disrupt enemies and protect his team from a distance when needed. He’s especially effective at punishing careless opponents who overextend or underestimate his ability to reposition and counterattack.
Tamaki has significant technical depth, with conditional mechanics that reward players who master his timing and spacing. His Alpha skill offers ranged pokes and flexible grabs, his Beta provides an evasive vanish, and his Gamma beam controls the space from far away. However, because Tamaki lacks sustained forward mobility and has tight cooldowns, positioning and skill management are critical. Along with holding smart angles, these three qualities are often the key to surviving and winning fights.


Marlin Rapier is a precision-based projectile attack that fires a piercing strike resembling a marlin’s horn. It rewards players who can land hits with the tip, dealing significantly more damage and downpower when the strike connects at max range. It is ideal for mid-range poking, and is especially effective at finishing off low-health enemies or pressuring revives from a safe distance. Skilled players will maximize its tip damage by maintaining optimal spacing and timing.
This ability can also pierce through players, meaning that if many are aligned in a straight line, you can hit them all. Although niche, this is an excellent way to utilize good timing skills and seeing the opportunity to lay down consistent damage on everybody on a team.
In Tamaki’s Aim Mode, his marlin is replaced by an octopus tentacle, with which he pulls enemies towards him, disrupting positioning and setting up combos. It is a powerful tool for isolating targets or peeling for teammates. It’s especially effective when used from high ground, allowing Tamaki to control engagements while air stalling, and without overcommitting.
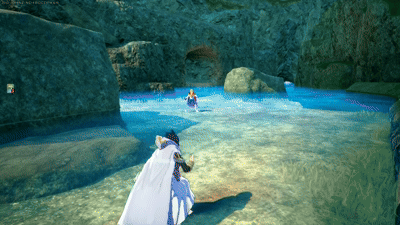
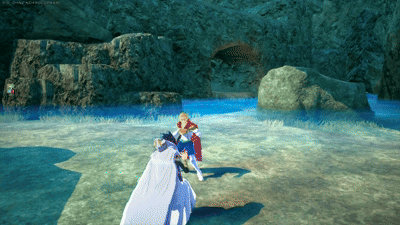
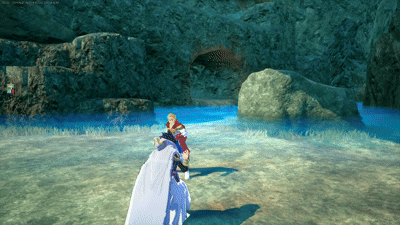
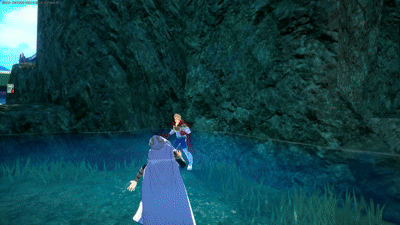
Octopus Mirage is a sweeping dash attack that deals high damage and applies massive downpower, which also has tracking. On hit, Tamaki vanishes using octopus mimicry, temporarily increasing his movement speed in the process. He reappears either after a short delay or when activating another non-Beta skill. This vanish mechanic makes Octopus Mirage a powerful tool for baiting enemies or escaping pressure during fights. Skilled players will use it to reposition mid-combat, or for stalling when waiting for a group heal with sporadic movement.
While vanished, Tamaki becomes almost invisible, allowing him to safely rotate or set up his next move. It’s especially effective when used to reposition for escaping unfair matchups or dangerous zones in combination with his Special Action. Overall, this move maximizes his survivability and counterplay potential. It should be noted that while you see yourself as reddish while vanished, enemies will see no color, but keep in mind that you're not fully invisible either.
Plasma Cannon is a multi-shot energy beam that Tamaki fires in a wide arc, capable of piercing through walls and obstacles. It consumes ammo in bursts and can be held to charge, increasing its damage and range. It is effective for zoning, finishing off downed enemies, or pressuring revives from far away. The beam’s ability to hit through terrain makes it a powerful tool for punishing grouped up enemies. The cannon can be turned slowly towards any direction, however, at lower FPS the turning speed is faster.
When held, Plasma Cannon builds up energy and releases a stronger blast that deals increased damage and maintains the same down power, making it ideal for consistent long-range pressure. To note, if Tamaki is hit by Nejire’s skill while charging, the beam instantly reaches full charge, allowing for surprise snipes.
Be extremely careful when using this ability, as using it leaves you very vulnerable, which can be fatal in the open and often what kills inexperienced Tamaki players.
As Tamaki’s vertical mobility tool, Wing Claw launches him high into the air with a swift upward strike using bird talons. It consumes one ammo and has a short 4-second reload, making it a reliable escape or repositioning option. Its height and speed allow Tamaki to disengage from close-range threats and gain high ground in the process. This move also functions as an attack. He kicks the enemy up into the air, which can be used to perform aerial combos. Though it’s Tamaki’s true mobility skill, its low cooldown and vertical reach make it a vital part of his survival and zoning power.
Ground Melee
Tamaki’s ground melee consists of a three-hit combo chain, the first hit, an opening strike that locks targets into the rest of the combo, the second hit, that of which deals the same amount of damage as the first, and finally a rapid triple burst acting as his Melee 3, with the final hit ending the chain. Tamaki’s ground melee is reliable for close-range trades and quick knockdown setups when paired with Wing Claw, Marlin Rapier tipper shots, or even Octopus Mirage to end the combo. It’s especially useful for confirming damage after a successful pull.
Air Melee
Tamaki’s air melee is a single strike that deals half of an enemy's downpower gauge in one hit. This is Tamaki’s strongest melee option for burst knockdown setups. It’s ideal to use after Octopus Whip and before launching with Wing Claw. Because of its high downpower, it should be used in the middle of combos in order for Tamaki’s punishing game to be consistent. It also has the quirk of giving you subtle upwards momentum, which can be used to stay airborne for longer if needed.

One of the most reliable paths for maintaining pressure and combo flexibility throughout the match. You always opt to max Alpha first, not just for damage but for consistency, as keeping it at Level 4 will leave you short on ammo and size if not cooldown-managed well, especially in extended fights. The alpha tip damage and pull size scale hard with level, and the extra ammo at Lv.4 and Lv.9 gives you breathing room for bad aim in extended fights. Beta comes next, since vanishing is your primary escape and punishment mechanic. Level 4 gives you faster reloads and wider hitboxes, but pushing to Level 9 ensures you can hit it even more consistently. Gamma is last—not because it’s weak, but because it’s safest to use once you’ve already secured control with Alpha and Beta. Once maxed, Gamma gives you zoning pressure to close out fights.
![]()
![]()
![]()
![]()
![]()
![]()
![]()
![]()
![]()
![]()
![]()
A path built around early survivability and reactive control. You start by leveling Beta to 4, giving you faster reloads and a wider hitbox for vanishing, which is critical for dodging early aggression and baiting wakeups. Alpha follows to support your mid-combo setups and give you access to Octopus Whip pulls in or out of the air. Maxing Beta next ensures you can rotate and vanish more often and punish overextensions. Gamma gets brought to Level 4 next to simply help with zoning, while Alpha reaches Level 9 to give you full combo flexibility and tipper potential. Gamma reaches Lvl. 9 last, rounding out your kit with sustained pressure.
![]()
![]()
![]()
![]()
![]()
![]()
![]()
![]()
![]()
![]()
![]()
One of the most stable and flexible paths for Tamaki across all match types. You start by evenly leveling all three skills to Level 4, giving you access to Alpha’s extra ammo and size, Beta’s faster reload and wider hitbox, and Gamma’s extended duration. Alpha is prioritized next because it’s your most versatile combo tool. Whether you’re ending chains with Tipper or setting up with Whip, the scaling on damage and ammo gives you consistent pressure. Beta follows to give you punish reliability, especially in late-game skirmishes where hiding can become critical. Gamma finishes last, rounding out your kit with sustained zoning from long range once the zone tightens and terrain control becomes important from up above.
![]()
![]()
![]()
![]()
![]()
![]()
![]()
![]()
![]()
![]()
![]()
Tamaki is able to cancel his Melee 2 or Melee 3, this is done by using Melee 1 with no direction input and wait for the crab claw to disappear (depending on your reflexes you might need to wait a milisecond after it disappears or else you'll be too early) and then hit Melee 2. To test if you're doing correctly, quickly press backwards movement input after Melee 2, if you did it right you will move away with no endlag, and sometimes might even miss the hit.
To expand this to Melee 3 just use Melee 3 after Melee 2 and use a directional input after to cancel it. If you plan to do another melee chain after a Melee 3 cancel, then the hitting the next melee should be done pretty much at the same time as you press the directional input to cancel Melee 3, otherwise on GP they might gain i-frames. Also make sure to cancel Melee 3 a bit late or else they can get i-frames that way too.
In simple terms: Melee 1 -> Wait a milisecond after the crab claw disappears -> Melee 2 -> Melee 3 -> Wait a milisecond -> Directional Input
The different ways you can combine and chain various skills for higher damage within 500 DP (Downpower). The downpower of Tamaki's abilities are as follows:
Alpha Skill: 100 DP (Normal Marlin), 250 DP (Marlin Tip), 250 DP (Octopus Grab)
Beta Skill: 500 DP
Gamma Skill: 100 DP (Per DMG Instance), 500 DP (Maximum Hits)
Special Action: 100 DP
Ground Melee: 100 DP (Melee 1, Melee 2), 200 DP (Melee 3), 400 DP (Chain Total)
Air Melee: 225 DP
The text of the combos below will be colored by how true they are, in this case, we will define as "True" combos that, without 3rd party or tuning interference, can only be escaped/interrupted by Overhaul and/or Mirio, as those are special cases.
White Text means that part of the combo is True on both GP and HP.
Green Text means that part of the combo is True if the target is on HP only or the hit guardbreaks them.
Blue Text means that part of the combo is True if the target is on GP only.
Red Text means that part of the combo is Untrue, and therefore the enemy can escape it.
The DMG of the following combos at max level and accounting for the character's strike role is classified under the following tags:
Basic DMG (100-149 DMG), Basic+ DMG (150-199)
Light DMG (200-249 DMG), Light+ DMG (250-299)
Medium DMG (300-349 DMG), Medium+ DMG (350-399)
High DMG (400-449 DMG), High+ DMG (450-499)
Heavy DMG (500-549 DMG), Heavy+ DMG (550-599)
Deadly DMG (600-649 DMG), Deadly+ DMG (650-699)
The weakest combo on the list that works if you're airborne.


A basic combo if you happen to catch somebody with your melees and don't have beta charges.

A known Tamaki combo that makes use of Beta's ability to cancel Tamaki's own melees.
A melee cancel combo.
The weakest of the melee cancel combos, but can be useful if you want to keep an enemy busy with a long combo string that isn't too hard to perform.

An alternative to the other airborne combo, replacing alpha by beta for higher damage, but uses a beta charge, which you might want to save.

A combo that works if the target is against a wall, otherwise the beta will likely miss.
The most effective combo for a Tamaki that doesn't want to overcomplicate with melee cancels.
The most damaging combo that isn't situational, making use of the melee cancel tech to squeeze some extra damage.

Tamaki's 2nd strongest combo, only held back by how niche and situational it is, as you either gotta hit the first melee on a target that's slightly off-the ground or on a downwards slope. It also takes some time to be executed which means that you will leave yourself vulnerable to enemy attacks for a while.

The strongest of Tamaki's combos, but that suffers of the same issues as the previous combo with how situational it is.


Strike Slots (Option 1): Present Mic > Strike Dabi > Strike Kendo > Strike Deku > Strike Endeavor
Strike Slots (Option 2): Strike Kendo > Strike Kirishima > Strike Hawks > Strike Shinso > Strike Denki
This is the only side of Tuning that needed two options, as the amount of Beta Attack Power+ tunings that are in the game should be taken advantage of if possible. But if not, the best Beta DMG tunings have been ordered for what else they offer.
Assault Slots: Assault Endeavor > Assault All Might > Assault Ochaco > Assault Kirishima > Assault Deku > Else
Rapid Slots: Rapid Twice > Rapid Mirio > Rapid Toga > Rapid OFA Deku > Else
Support Slots: Overhaul > Ibara > Kurogiri > Else
Technical Kaminari > Aizawa > Dabi > Toga > Else
| The list of recommended special tunes (not ordered): | ||
|---|---|---|
 |
Electrification Tamaki’s Pull in Alpha into a full Melee string frequently leads into Guard breaks. Electrification lets you follow up with Beta without fail. It is a good combo starter once they are on HP. |
|
 |
Acceleration His melee chains are fast and consistent, and Acceleration turns them into momentum tools. The movement speed helps reposition for tipper Alpha or Pull Alpha into Beta setups, while attack speed tightens his combo windows. |
|
 |
Willpower Willpower gives Tamaki a second chance to vanish or reposition. It’s especially valuable when you’re mid-combo while low health and get interrupted, and surviving longer lets you escape on wake up with Wing Claw, a quick move that could hopefully stall until a team heal comes. |
|
 |
Full Burn His PU is a combo extender. Full Burn gives you more time to keep piling on the combos, just with more damage; chain combos are common with this tuning, and beta becomes especially powerful during his PU. |
|
 |
Perception His melee confirms often lead into vanish or Alpha setups. Perception lets you track enemies post-hit, making it easier to follow up. It is common to track them with gamma, charging it up until they stop moving, thinking they’ve reached a safe distance, and releasing it. |
|
 |
Critical Permeation If his Guard gets broken mid-combo or during a bait, Critical Permeation gives him a brief invincibility window to reposition or escape, much like Willpower. It’s a strong defensive tuning for players who like to play reactively or bait pressure. |
|
 |
Wall Runner Wing Claw and Air Melee benefit from vertical control. Wall Runner gives Tamaki easy access to high ground, letting him set up Alpha pull angles from above or escape pressure when Super Jump tech is used. |
|
 |
Space Hop Space Hop makes Wing Claw launches more evasive and improves the consistency of air melee follow-ups. It’s also a great tool for contributing to the air stall nature of the character, and can straight up no diff certain characters when used in tandem with his alpha pulls. |
|
 |
Embrittlement Simple tuning. Embrittlement turns melee related combos into debuff starters, making follow-up Alpha or Mirage hits more lethal. At max levels this allows you to do more damage without the need to melee again, as the Embrittlement is still in effect (~15 seconds). |
|
 |
Crushing PU Charge Crushing PU Charge rewards his natural playstyle by accelerating PU gain after successful eliminations. This tuning is especially strong in mid-to-late game when Tamaki starts securing solo picks or third-party finishes. |
Here you can see the stuff you can do with 3 of each of Tamaki’s PUR skins (The Budget Build equivalent would be whatever Special Tuning Slots line up with the PUR.)
Good enough normal tuning slots to leave room for a deadly double red special tuning combo, I’d suggest Willpower and Crushing PU Charge to be offensive-focused.


Good enough normal tuning slots to leave room for a deadly double red special tuning combo, I’d suggest Willpower and Crushing PU Charge to be offensive-focused.


Using Willpower and Space Hop on this will ensure that you keep the enemy in the air, on you, to combo until death, and if the matchup goes bad, there’s that second chance. Normal tunes are evenly spread out as well.

This build is melee focused, ENTIRELY. Combinations like Iron Fist and Trance Blow work well with Acceleration, and it gives you the chance to be at a better position to kill your opponent first and swiftly before their teammates show up, if it is a 1v1. Once again, normal tunes are even, no more of one type.


Embrittlement could work if going the melee route, but if going for a more support role, Quirk Factor Release or Sisterly could work here, as when you are running away from enemies, breaking their guard or giving defense for yourself to run away, in combination with Revenge Support, survivability goes way up.

Solely movement focused. Wall Runner and Space Hop are recommended here. Good amount of HP and Strike normal tunings that have an effect this time.

Budget build you can equip Wall Runner and Space Hop on.
Budget build you can equip Revenge Support and Sisterly Disposition on.
Budget build you can equip Space Hop and Revenge Strike on.


Difficulty Score: 🟢Favorable🟢
Assault Deku’s Alpha fires a fast, mid-range barrage that staggers on hit, making it hard for Tamaki to approach or counter with his grab. Deku’s Beta, a downward shockwave kick, deals high true damage and is best used from above, perfect for punishing Tamaki’s grounded play. Even with vanish, Tamaki struggles to reset due to Deku’s relentless pressure and short alpha cooldowns, and if your aim is unreliable, Deku will prove to be a formidable opponent and punish. To win, Tamaki must bait him to get close from a safe distance, then punish with Alpha grab during recovery. Tamaki’s kit outpaces Deku’s in both speed and pressure, making this an easy enough matchup.

Difficulty Score: 🟡Even🟡
Strike Deku’s kit revolves around close-range burst and mobility, which directly counters Tamaki’s reactive style. His Alpha is a fast, short-range punch that has high damage. Deku’s Gamma lets him reposition vertically, making it hard for Tamaki to disengage once caught. Tamaki’s vanish can dodge one engagement, but Strike Deku’s short cooldowns and aggressive pacing make it difficult to reset neutral. Tamaki’s grab struggles to land unless Deku whiffs Beta or overcommits near cover. To win, Tamaki must bait Deku’s Beta and punish the recovery with Alpha grab, ideally from behind or after vanishing repositioning. However, Deku’s ability to maintain airtime and confirm damage makes this a consistently inconsistent battle.

Difficulty Score: 🟢Favorable🟢
OFA Deku’s kit revolves around aggressive melee rushdowns and high-speed mobility, but this plays directly into Tamaki’s reactive control style. Deku’s tendency to close the gap gives Tamaki frequent opportunities to punish with his Beta vanish, which not only evades incoming pressure but also sets up a devastating counter-combo. Tamaki thrives when opponents overextend, and Deku’s linear approach makes him vulnerable to Octopus Whip pulls and tip Alpha confirms. While Deku can overwhelm less disciplined players with his rapid movement and burst, his lack of ranged zoning and reliance on predictable melee chains leave him exposed to Tamaki’s spacing traps. Most OFA players struggle to manage their invincibility frames effectively, making them easy to punish on wake-up or after a failed engagement. Tamaki’s Gamma beam also pierces terrain, allowing him to pressure Deku even when he tries to reset behind cover. As long as Tamaki maintains smart angles and doesn’t get caught mid-cooldown, he can consistently shut down Deku’s momentum and control the pace of the fight.

Difficulty Score: 🟢Favorable🟢
Bakugo’s Alpha is inconsistent and his Gamma dash is easily baited. Tamaki can punish his forward momentum with vanish and pull, especially when Bakugo commits without backup. As long as Tamaki avoids tight trades and holds spacing, he can reliably shut down Bakugo’s pressure.

Difficulty Score: 🔴Unfavorable🔴
Rapid Bakugo’s erratic movement and aerial control make him difficult for Tamaki to track and punish consistently. While less experienced players may dash in with Gamma and eat a Beta counter, skilled Bakugos will hover at mid-range, peppering Tamaki with Alpha shots and only committing when his vanish is down. Tamaki struggles to control vertical space without tuning support, and his pull is unreliable against Bakugo’s unpredictable angles. Without Space Hop or tight cooldown management, Tamaki risks getting chipped down before he can set up a proper punish.

Difficulty Score: 🟡Even🟡
This matchup hinges on timing and awareness. If she lands her Gamma lift, Tamaki is forced into a dangerous wake-up situation where mistiming can cost the fight. Her Zero Gravity movement gives her an edge in mobility, but it leaves her briefly vulnerable during activation. With good Beta usage and smart spacing, Tamaki can keep the fight even; mistakes, though, are heavily punished.This matchup hinges on timing and awareness. If she lands her Gamma lift, Tamaki is forced into a dangerous wake-up situation where mistiming can cost the fight. Her Zero Gravity movement gives her an edge in mobility, but it leaves her briefly vulnerable during activation. With good Beta usage and smart spacing, Tamaki can keep the fight even; mistakes, though, are heavily punished.

Difficulty Score: 🟡Even🟡
While Assault Ochaco’s grounded Gamma and stationary Alpha make her more predictable than her Rapid variant, Tamaki still has to respect her burst potential. Her Alpha can zone him out if he mistimes his approach, and her Gamma can still catch him during cooldown gaps. Tamaki can punish her commitment windows with specifically alpha pulls, but if he misreads her movements, he risks getting comboed. The matchup is manageable with good spacing and cooldown discipline, but not free—both sides have clear punish windows. Good alpha aim will edge out the win here.

Difficulty Score: 🟢Favorable🟢
Iida’s melee-focused kit and low HP make him vulnerable to Tamaki’s Beta vanish and Octopus Whip pull. His linear engagement paths are easy to intercept with tracking, and Tamaki’s knockdown Beta can break his combo flow. While Iida’s speed allows for surprise entries, disciplined spacing and cooldown tracking let Tamaki punish his rushdowns consistently. As long as Tamaki doesn’t lose sight of him, he controls the matchup.aki doesn’t lose sight of him, he controls the matchup.

Difficulty Score: 🟡Even🟡
Todoroki’s grounded playstyle makes him susceptible to Tamaki’s Alpha and pull setups, especially from high ground. However, his freeze combos are dangerous at close range, and Tamaki’s super armor can be punished if mistimed. The matchup is balanced, Tamaki controls spacing, but one slip in timing lets Todoroki hit hard. Smart positioning and cooldown discipline are key

Difficulty Score: 🟢Favorable🟢
Technical Todoroki’s grounded, zoning-heavy kit lacks the burst or lockdown tools to threaten Tamaki up close. His Alpha and Beta are slow and spacing-dependent, giving Tamaki time to vanish through, pull him in, or even fall back and Gamma through his Beta(s). Without strong combo routes or reliable stuns (other than Gamma), Todoroki struggles to punish Tamaki’s armored entries, making this a matchup Tamaki can control with patience and pressure.

Difficulty Score: 🟢🟢Very Favorable🟢🟢
Tsuyu’s low damage output and reliance on close-range pokes make her an easy target for Tamaki’s Beta vanish and Octopus Whip. Her aerial movement doesn’t avoid a good Tamaki’s Alpha, and she’s highly punishable on wake-up. Without strong burst or combo tools, she struggles to contest Tamaki, making this one of his safest matchups with distance.

Difficulty Score: 🟡Even🟡
Kirishima’s Hardening lets him absorb Tamaki’s Alpha and Beta with reduced damage, making trades less favorable. However, Tamaki can still punish him when Hardening is down, especially with Octopus Whip to control spacing. Kirishima’s slow movement and predictable engage paths give Tamaki windows to vanish and reset. The matchup swings based on timing, as Tamaki wins neutral when Kirishima’s armor is off, but loses trades when it’s active. With smart cooldown tracking, Tamaki can keep the fight balanced.

Difficulty Score: 🔴Unfavorable🔴
Strike Kirishima’s Hardening state makes him a major threat to Tamaki. His ability to ignore knockback from Tamaki’s Alpha and power through vanish with burst damage gives him strong control in close-range trades. While Tamaki can punish when Hardening is down, Kirishima’s mobility and pressure make it difficult to find safe openings. Without a reliable way to force him out of his armored state, Tamaki is often forced to disengage or risk losing trades. This matchup favors Kirishima unless Tamaki can bait out and punish his cooldowns with good alphas to combo start.

Difficulty Score: 🟢Favorable🟢
Denki’s mid-range zoning is strong, but Tamaki outperforms him both up close and at long range. Beta vanish lets Tamaki ignore Denki’s Gamma stun and punish his combo attempts directly. Denki’s Alpha is easy to dodge or armor through, and his movement doesn’t threaten Tamaki’s spacing tools. As long as Tamaki doesn’t get caught mid-cooldown, he controls the match-up.

Difficulty Score: 🟢Favorable🟢
Technical Denki’s auto-lock Alpha can be disruptive at range, but can be punished with a Gamma cannon. Also, his aimed mode leaves him exposed to Tamaki’s pull and Alpha spam. His Gamma is his only mobility tool and has a slow startup, making it easy to punish with vanish. Without strong DPS or combo pressure, Denki struggles to contest Tamaki in close quarters, giving Tamaki control over the matchup.

Difficulty Score: 🟢🟢Very Favorable🟢🟢
Momo’s grounded movement and slow startup on most tools make her easy prey for Tamaki’s Alpha and Octopus Whip. Her shielded dash doesn’t stop Tamaki’s pull from the back, and she struggles to escape once pressured. As long as Tamaki avoids getting boxed in by her Gamma cannons, he can dominate the matchup with consistent close-range control.

Difficulty Score: 🔴Unfavorable🔴
Monoma’s copied quirks vary, but his core strengths—high mobility, air stalling, and evasive movement—make him a tough matchup for Tamaki. His unpredictable positioning makes Octopus Whip and Alpha confirms unreliable. While Tamaki wins up close, Monoma rarely commits unless he sees an opening, forcing Tamaki to chase and risk cooldown trades. Without a consistent way to pin him down, Tamaki struggles to control the fight.

Difficulty Score: 🟢Favorable🟢
Kendo’s melee-focused kit lacks burst mobility, making it easier for Tamaki to zone and punish her. Her shielded dash doesn’t stop Octopus Whip, and she’s vulnerable to Alpha pressure at mid-range. While her Gamma can trade with Tamaki’s vanish, she lacks the tools to force openings without overcommitting. As long as Tamaki maintains spacing and doesn’t let her close the gap unchecked, he controls the pace of the fight.

Difficulty Score: 🟡Even🟡
While Strike Kendo’s flinch-heavy Alpha and armored Beta make her a strong brawler, Tamaki’s Octopus Whip can pull her out of her Beta shield, bypassing her main defensive tool. This gives Tamaki a reliable punish option if he times it well. However, her pressure is still dangerous up close, and her mobility allows her to chase down cooldown gaps. The matchup is volatile—Tamaki has the tools to win, but missteps are death.

Difficulty Score: 🟡Even🟡
As a mirror match, this fight hinges on precision and timing. Both players have access to the same zoning tools, wake-up traps, and Alpha pressure. The key factors are recognizing wake-up patterns and baiting Alpha trades—whoever lands the better-timed strike controls the tempo. Octopus Whip can punish overextensions, but it’s equally punishable if mistimed. This matchup is a test of spacing discipline and reaction speed.

Difficulty Score: 🔴Unfavorable🔴
Mirio’s kit is built around evasiveness and burst punishes, which directly counter Tamaki’s zoning and armored options. His Alpha lets him phase through attacks, making Octopus Whip and Alpha trades unreliable, especially if Tamaki overcommits. While Tamaki can catch Mirio during cooldown gaps, Mirio’s mobility and invulnerability windows make it difficult to maintain pressure. This matchup demands precise timing and baiting, but the risk-reward favors Mirio.

Difficulty Score: 🔴Unfavorable🔴
Sheer Counter Mirio is a reactive powerhouse who punishes aggression with brutal efficiency. His Alpha counter punishes Tamaki’s Alpha pull by making it almost impossible to hit him while he’s doing it, making Tamaki’s usual pressure tools risky. His Beta grants him brief invulnerability and repositioning, allowing him to phase through Octopus Whip and stall to reset his already short cooldowns for Alpha. While Tamaki can win if he baits out the counter, the matchup heavily favors Mirio’s ability to turn Tamaki’s offense against him. Patience and feints are essential, but the margin for error is slim.

Difficulty Score: 🟡Even🟡
The mirror match is a test of spacing, cooldown discipline, and wake-up awareness. Both players rely on Octopus Whip to punish overextensions and Alpha to control combos. The one who better baits Alpha, times their wake-ups, and maintains pressure without overcommitting usually comes out on top. It’s a volatile but balanced matchup where precision decides the winner.

Difficulty Score: 🟡Even🟡
Nejire’s aerial mobility and long-range Alpha make her a tricky opponent, but Tamaki has answers. Her Alpha can interrupt Tamaki’s pressure if mistimed, but she’s vulnerable during her Gamma’s startup. Octopus Whip can catch her mid-air if she floats too long, so the matchup becomes a spacing battle; Tamaki wins if he controls neutral and punishes her landings, but mistimed aggression gives Nejire room to zone and reset.

Difficulty Score: 🟡Even🟡
Shinso’s Alpha and Beta both use Binding Cloth, giving him solid mid-range control and combo potential, but his brainwashing is tied to his Special Action, not his core skills. This means Tamaki doesn’t have to worry about getting stunned just for pressing a button, unless he’s baited into getting hit with Trance Blow. Octopus Whip can punish Shinso’s setups if timed well, and Tamaki’s Alpha can contest his cloth swings at range. However, if Shinso lands a clean hit or forces a panic response, he can create strong follow-ups. The matchup is balanced.

Difficulty Score: 🟡Even🟡
All Might’s explosive Alpha and leap-based Special Action give him strong burst potential, but Tamaki has the tools to keep him in check. Octopus Whip can punish his delayed mobility and large hitbox, making him vulnerable during approach. While All Might can armor through Tamaki’s pressure with his Gamma, his cooldowns leave openings that Tamaki can exploit with simple spacing. The matchup is balanced, Tamaki must respect All Might’s splash damage and punish his windows.

Difficulty Score: 🟡Even🟡
Gatling All Might is a relentless pressure character with rapid multi-hit Alpha and strong forward momentum. His Alpha can shred Tamaki’s attempts to zone, and his Beta allows him to chase down cooldown gaps with ease. Tamaki’s Octopus Whip acts as the only tool to interrupt Gatling’s flinch-heavy strings, and mistiming a punish often leads to eating full combos. While All Might’s large hitbox makes him vulnerable during recovery, the risk of trading into his pressure is high. Tamaki must play reactively and bait his long cooldowns.

Difficulty Score: 🔴Unfavorable🔴
Armored All Might can do pretty much everything you can do but better. He has more HP, way more mobility, an air grab into air melee combo that does pretty much as much damage as your alpha grab -> beta, does a lot of damage with his alpha and its DoT, and can also cancel your combos and stun you at any time by using 2 gamma drones (he doesn't need all 4) and follow-up with a melee combo or beta. To win this matchup against a competent Armored All Might you have to play it smart and make use of obstacles and buildings to squeeze-in damage without being damaged back.

Difficulty Score: 🟡Even🟡
Aizawa’s kit revolves around mid-range control and punishing overextensions with his Binding Cloth. His Alpha can interrupt Tamaki’s approach if mistimed, and his Beta allows him to reposition or combo off successful hits. However, Tamaki’s Octopus Whip can pull Aizawa out of his setups, and his Alpha trades well if spaced correctly. The matchup becomes a battle of cooldown timing and baiting, and Tamaki must avoid predictable entries, while Aizawa looks to capitalize on whiffed pressure, with the help of his Special Action.

Difficulty Score: 🔴Unfavorable🔴
Present Mic overwhelms Tamaki with sheer volume. His Alpha barrage fires faster than Tamaki can trade, and his Special Action boosts that fire rate even further. Tamaki’s Octopus Whip struggles to land cleanly unless Mic is caught mid-cooldown, and his slim profile makes him hard to clip. On top of that, Mic’s Gamma can’t be avoided in the combo and forces Tamaki to either dodge or take the hit, often with too much damage. Tamaki has no armored tools to brute-force through, so he must rely on baiting and punishing rare gaps. The tempo favors Mic

Difficulty Score: 🔴Unfavorable🔴
Cementoss controls space with massive, persistent hitboxes that punish Tamaki’s usual rhythm. His Alpha wall can block Octopus Whip outright or force it to whiff, and his Beta floor spike punishes grounded approaches and wake-ups. Cementoss thrives on locking down movement and forcing trades—something Tamaki can’t afford. While Cementoss is slow and punishable if baited, Tamaki’s lack of burst and reliance on linear tools make it hard to capitalize. The matchup demands extreme patience and creative spacing, but Cementoss dictates the pace.

Difficulty Score: 🟡Even🟡
Endeavor’s kit is built around oppressive flame control and punishing trades. His Alpha barrage can shred Tamaki’s approach attempts, and his Beta flame wall lingers long enough to catch wake-ups and zone escapes. Tamaki’s Octopus Whip struggles to land cleanly unless Endeavor is mid-cooldown, and his larger hitbox doesn’t offset the sheer damage output he brings. Mistiming a punish often means eating a full combo. Tamaki must bait cooldowns and play reactively, but Endeavor’s pressure and splash damage make this a tough matchup.

Difficulty Score: 🟢Favorable🟢
Inferno Fist Endeavor trades zoning for brutal close-range pressure. His Alpha is a fast, forward-moving flame punch that can blow through Tamaki’s spacing attempts, and his Beta grants him strong combo routes off successful hits. Tamaki’s Octopus Whip can punish overextensions, but Inferno Fist’s aggressive cooldown cycle makes it hard to find safe windows. Once Endeavor gets in, Tamaki has few tools to escape or reset. The matchup favors Endeavor’s rushdown—Tamaki must play reactive and maintain air superiority to gain the edge, as his airstalling combos drains Endeavor’s health, as most likely than not the enemy will want to wake up in the air after the combo ends, thanks to his Special Action that shoots him up to go even higher. When that happens, you can use that chance to escape, as the increased distance has made it harder for Endeavor to hit his shots.

Difficulty Score: 🟡Even🟡
Hawks’ aerial dominance has waned—his Alpha volley is slower and easier to punish, and his cooldowns leave him vulnerable if he overcommits. Tamaki can now contest his zoning with well-timed Octopus Whips, especially when Hawks floats or stalls mid-air. His slim hitbox still makes him tricky to catch, but Tamaki’s Alpha can clip him during landings or whiffed feathers. The matchup is no longer oppressive; it’s a spacing battle where Tamaki can win by punishing predictable flight paths. Hawks must play cleaner than before to keep control.

Difficulty Score: 🟡Even🟡
Slicing Wind Hawks trades volume for precision, using fewer but harder-hitting feathers with tighter angles. His Alpha volley is slower than Default, giving Tamaki more room to react and punish with Octopus Whip. His Beta offers strong combo extensions, but it’s telegraphed—Tamaki can sidestep or counter if he’s not mid-cooldown. Hawks still controls the air, but his commitment windows are longer, and his damage is more burst-dependent. Tamaki wins by catching landings and forcing grounded trades, while Hawks thrives on spacing and vertical resets. The matchup is balanced.

Difficulty Score (Small Form): 🟡Even🟡
Difficulty Score (Giant Form): 🔴Unfavorable🔴
In small form, Mt. Lady plays like a standard brawler with decent mobility and combo potential. Her Alpha is fast and can interrupt Tamaki’s startup if he’s too close, but it lacks range. Tamaki’s Octopus Whip can control neutral and punish her approach, especially since her hitbox is easier to catch than most.
Giant Mt. Lady shifts the matchup dramatically. Her Alpha and Beta cover massive areas, making it hard for Tamaki to safely zone or reposition. Octopus Whip struggles to reach her core hitbox cleanly, and Tamaki’s Alpha often trades unfavorably due to her splash damage and range. While her cooldowns are long and she’s vulnerable between moves, Tamaki has to commit hard to punish—and one mistake can cost him the round. The matchup favors Mt. Lady’s oppressive size and area control. Tamaki must stay mobile and strike during recovery gaps.

Difficulty Score: 🟢Favorable🟢
Shigaraki’s Alpha decay wave is slow but punishes careless zoning. His Beta has strong range and combo potential, but Tamaki can sidestep or punish if it whiffs. Octopus Whip catches him during startup, and his large hitbox makes trades favorable. Tamaki must avoid Gamma’s area denial and play mid-range; Just maintain air superiority, and victory is easy.

Difficulty Score: 🔴Unfavorable🔴
Catastrophe’s Alpha decay wave is massive and lingers, punishing Tamaki’s zoning and forcing repositioning. His Beta has huge range and combo potential, often catching Tamaki’s startup. Octopus Whip struggles to land cleanly unless Shigaraki is mid-recovery. Tamaki’s best openings come from sidestepping decay and punishing whiffs, but the matchup favors Shigaraki’s area control.

Difficulty Score: -
To Be Added...

Difficulty Score: 🟡Even🟡
Tamaki can contest AFO’s slow startup with Octopus Whip, especially if timed between his Gamma pulses. If caught, Beta offers a quick escape, while Alpha can punish his recovery. AFO’s wide hitboxes still threaten trades, but Tamaki has tools to reset and reposition.

Difficulty Score: 🟡Even🟡
Tamaki can Octopus Whip Alpha AFO out of Gamma super armor, denying his knockdown loop. His delayed Alpha and Beta are still threatening, but Tamaki can sidestep or punish if spaced well. The matchup is manageable with clean timing and reactive spacing

Difficulty Score: 🟢🟢Very Favorable🟢🟢
Tamaki’s Octopus Whip cleanly outranges Dabi’s Beta and clips him out of Gamma startup. Dabi’s lack of mobility makes him easy to punish on wake, and Tamaki can interrupt his Gamma follow-up before it lands. His revive barrier doesn’t protect him from Alpha knockdown, making cleanup simple.

Difficulty Score: 🟡Even🟡
Gamma’s flame burst beats Tamaki’s Alpha if mistimed, but Octopus Whip can still punish Dabi’s Beta startup or catch him post-Gamma. His movement is limited, making him vulnerable on wakeup, but his burst damage and lingering flames force Tamaki to play carefully around cooldowns and spacing.

Difficulty Score: 🟡Even🟡
Toga’s Alpha beam reaches faster and farther than Tamaki’s, forcing him to play reactive. Octopus Whip can still punish her Beta startup or catch her during slashing charge. Tamaki’s knockdowns help control her movement, but he must respect her range.

Difficulty Score: 🟡Even🟡
Her boomerang Alpha and wide Beta zone punish Tamaki’s zoning if mistimed. Octopus Whip can catch her mid-Gamma, but only with tight timing. Rolling her Beta shuts down most of her combo routes. The matchup favors whoever reads movement better.

Difficulty Score: 🟢Favorable🟢
Twice’s Gamma clone grab can catch Tamaki if he overextends, but Octopus Whip punishes his startup cleanly. Tamaki’s Alpha knockdown and Beta escape options make it easy to reset neutral. Twice’s predictable cooldown flow and limited range give Tamaki consistent punish windows

Difficulty Score: 🟢Favorable🟢
Tamaki can punish his Alpha startup and catch him post-Gamma with Octopus Whip. Compress Beta blocks Alpha cleanly, but doesn’t threaten Tamaki directly. Staying close forces awkward trades and cooldown burns, letting Tamaki control the pace.

Difficulty Score: 🔴Unfavorable🔴
Tamaki’s zoning gets disrupted by Kurogiri’s teleport Beta, which resets spacing and punishes overextension. His Alpha hits wide and fast, shredding Tamaki’s startup if mistimed. Octopus Whip can catch him post-teleport, but the matchup favors Kurogiri’s ability to break positioning and force cooldown trades. Can’t forget his ToD combo, too.

Difficulty Score: -
To Be Added...

Difficulty Score: 🟢Favorable🟢
Overhaul’s grounded playstyle and slow startup make him vulnerable to Tamaki’s zoning tools. Octopus Whip punishes his Alpha cleanly, and Tamaki’s Beta can reset spacing after trades. While Overhaul’s Gamma offers burst damage, it’s telegraphed and punishable if baited. His large hurtbox and limited mobility give Tamaki consistent knockdown opportunities and safe pressure.