Guide developed and supervised by: Shinin (PS)
Contributers: No1MirioGlazer (PS)
Last Update: January 22nd 2026
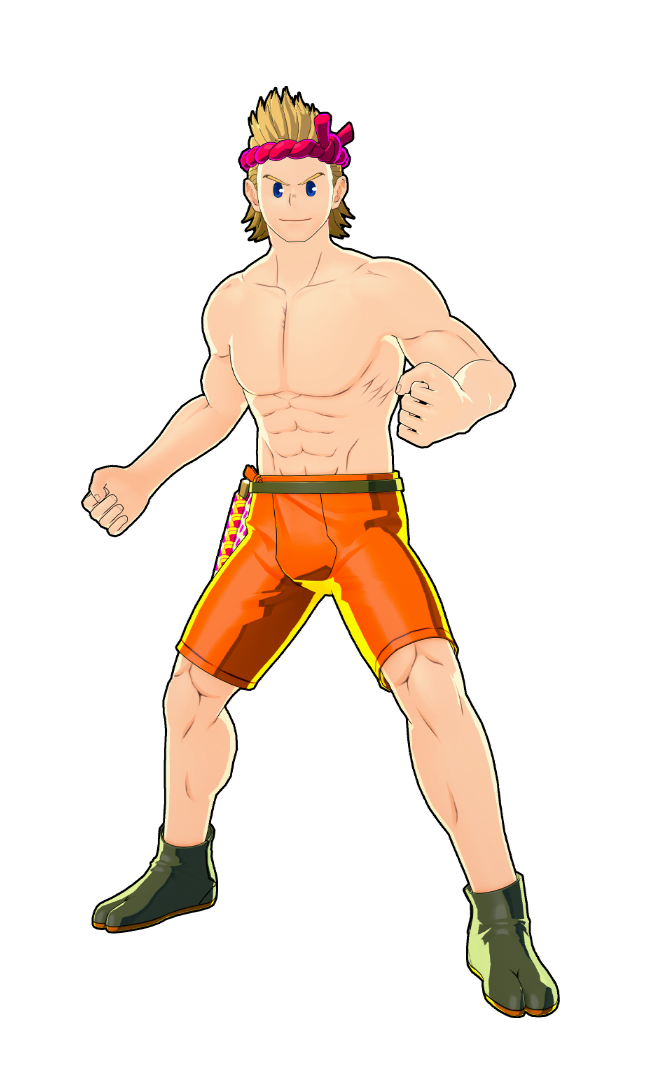
Mirio is an agile character that exemplifies the archetype of his role. He is a nimble, at times hard-to-hit close-range attacker that excels in hit-and-run tactics. At 225 HP, Mirio has the lowest base HP in the roster—but his kit compensates with high mobility, invulnerability, and permeation mechanics. He can use his skills in a variety of ways: supporting allies, chasing down enemies with his abilities, or ensuring your team stays in the game with his survivability. That being said, Mirio doesn’t come without his drawbacks. His skills are predictable; experienced players can make it difficult to connect attacks. Because his HP is so low, you’ll need to respect his vulnerable windows.
Best Map: UA Island


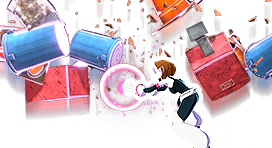
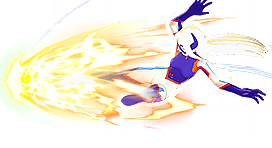
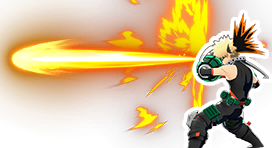
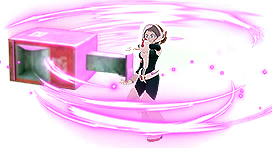
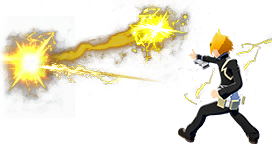
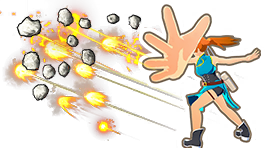
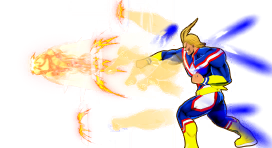
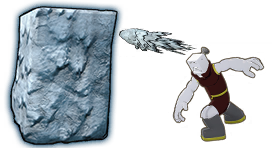
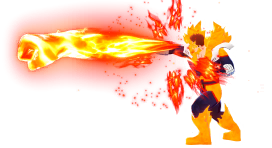
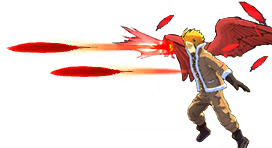
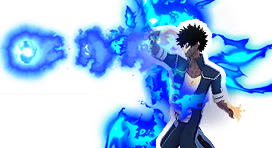
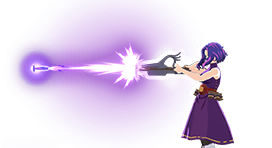
Alpha Skill - Invisible Eye Break/Phantom Threat
Mirio’s main skill. It has a short-distance, quick combo variant, as well as a charged variant that increases both its range and damage after a brief charging delay. This skill also gives him the permeation property during the charged variant attack.
DISCLAIMER: Mirio’s Alpha Combo is unable to be performed for certain people due to latency. This is usually caused by playing in a server that’s far outside of your area. For example, playing on JP servers as a US player. Due to this, before you attempt to play the character, you’ll need to test whether you're able to reliably perform the combo. Otherwise, you’ll never be able to fully lean into the character’s strengths.
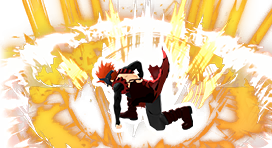
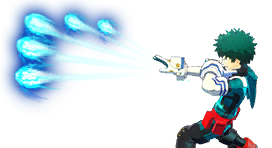
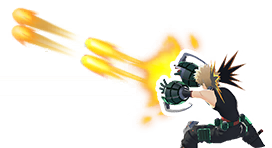
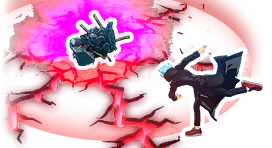
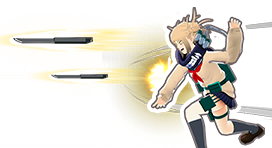
Invisible Eye Break (Combo Chain ver.)
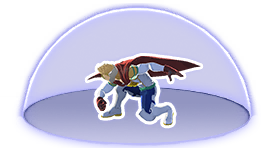
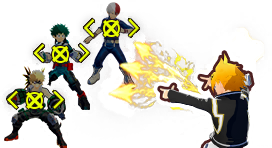
A quick, short-ranged attack that launches you in the direction you aim. The combo-chain variant has strong tracking, making it consistent at close range. The attack moves the enemy slightly in the direction they receive the initial hit. Pressing the skill again when Mirio turns around allows him to follow up with another quick attack that does not use up his remaining alpha. Triggering the input a final time when he turns around the second time will do yet another quick attack and trigger a small, final AOE attack where Mirio stands still and does his signature “POWERRRR” pose, which deals more damage than the other hits in his combo-chain. During this attack, Mirio is unable to move, leaving him vulnerable to attacks.
This attack can hit multiple enemies in its trajectory and—if an enemy is lined up properly—may cause them to take the rest of the hits in the combo. Any enemies attacked during this combo end up taking the final “POWERRRR” hit—regardless of distance or obstacles.
Invisible Eye Break does stun the enemy (3 seconds) while you do the combo-chain, allowing allies with lower down-power attacks (such as Assault Deku and Bakugo’s alpha, to name a few) to add on to the damage.
At levels 4 and 9, his “POWERRRR” hit gets a wider AOE attack and does NOT get increased damage. It stays at a flat 65. It does, however, get impacted by both tuning and Strike cards.
Mirio’s short-ranged alpha attacks do NOT get the benefits of damage area+, dash range+, or dash speed+ at levels 4 and 9—those are for his charged variant. His uncharged alpha also gains the benefit of speed cards—including during his chain—allowing him to become more unpredictable and, as a result, more difficult to dodge and hit.
Each hit does 125 down power, with his final “POWERRRR” attack having a down power of 500, guaranteeing a knockdown. You gain a 3rd alpha at level 7, further increasing his viability in a fight. Each alpha takes 3 seconds to come back at every level and has a penalty reload time of 12 seconds at max level (10 seconds at levels below 7).

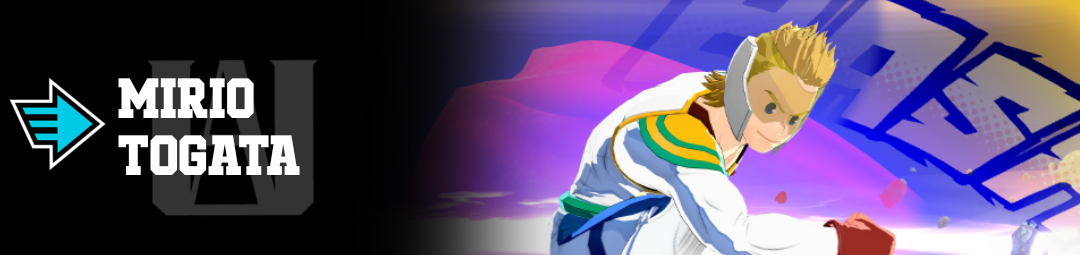
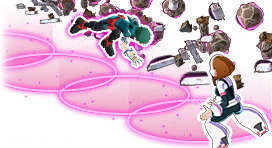
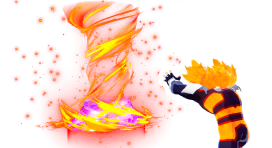
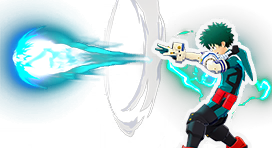
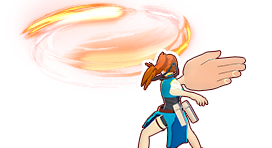
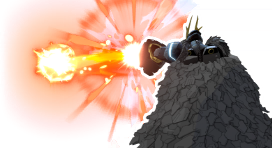
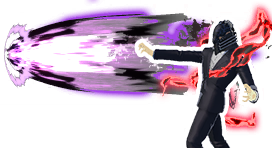
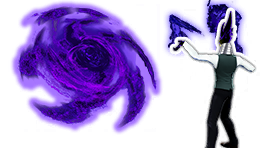
Phantom Threat (Charged ver.)
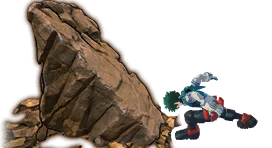
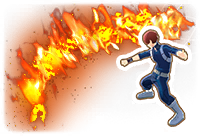
Phantom Threat is the charged variant of Mirio’s alpha. This attack begins with Mirio holding a pose for a period of time (around 0.8 seconds), during which Mirio is vulnerable to attacks. After he charges, he quickly travels in the aimed direction and gains permeation during the traveling distance of the dash. This allows him to not only phase through obstacles, it also allows him to completely ignore attacks—including skills such as AFO’s gamma pull. Any enemies in the trajectory of this attack take damage and are knocked back.
There are structures on every map that do not allow you to permeate through them, or you may stop permeating while you’re inside a structure, causing you to “rubber band” out of the structure from where you entered it. Most of them will be shown in the “Perm Spots” section.
Phantom Threat is the main method in which you will chase enemies, though there is a caveat—you’re unable to recover alpha ammo without touching the floor first. This is a major issue since Mirio’s alpha takes 3 seconds to recover at every level. There is, however, a technique that allows you to ignore this restriction that will be covered in the "Techs" section.
Phantom Threat gains additional benefits from Rapid cards. Using one allows for further momentum after the initial charged dash, in addition to providing smoother control toward the aimed direction. This can be used to further increase chasing ability and make yourself more unpredictable during more challenging matchups.
While Phantom Threat does less damage to your opponent than the Combo-Chained variant, it does allow for a quick attack that can hit multiple targets that are lined up.

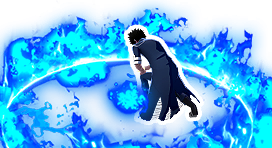
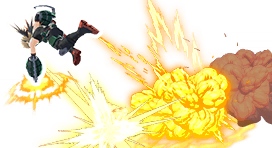
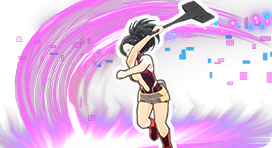
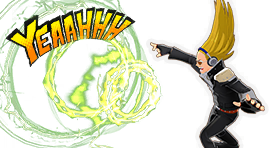
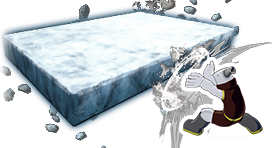
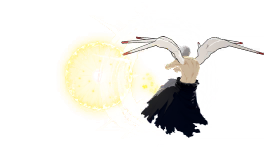
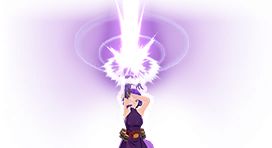
Beta Skill - Phantom Dive
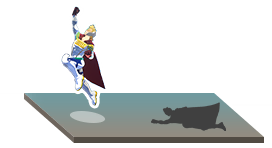
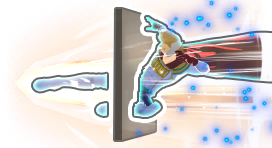
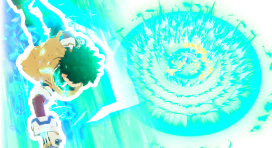
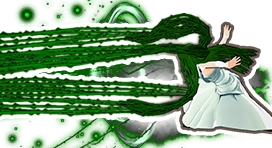
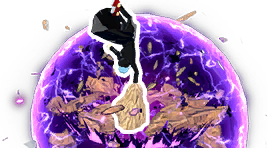
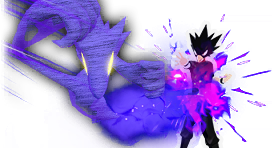
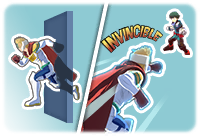
Mirio’s beta allows him to quickly dive down from the ground or air to permeate into the floor, allowing him to move around, while a twinkling sound effect can be heard emanating from his location. After activation, Mirio cannot be damaged or affected by skills. The skill can be canceled at any time by releasing the input (or when the gauge runs out), causing him to launch an uppercut from the ground, during which an AOE field is shown, indicating Mirio’s damage radius. After Mirio lands the uppercut, he is very vulnerable to being attacked. This is a high-risk, high-reward skill that can be dodged, either dealing massive damage to the enemy or causing your unfortunate downfall as you get pelted for your 225 HP’s worth.
During this skill’s use in the air, Mirio does not use its gauge and only begins to drain once he touches the ground. In addition, using the skill in the air and making movement inputs allows Mirio to slightly adjust where he will land, giving you some control over what platform or surface you’d like to enter.
While Mirio is underground, your screen turns blue and allows you to observe which obstacles or structures can be permeated through (blue) or which obstacles can’t (red). When inside a blue structure such as a building, Mirio can cancel his skill and travel up the structure, allowing for quick vertical travel. If Mirio travels off of a raised ledge, he is forced out of the structure to do his AOE attack, allowing you to hit enemies in the air who are within the AOE ring.
If used from the air, Mirio permeates through any permeable obstacles until he either reaches an impermeable object or the floor—whichever comes first. If used while standing on a platform, Mirio instead dives onto that surface without going through to a lower platform or floor.
There are some structures that show up as red; however, when against them and the skill is canceled, they still allow you to travel up that surface. For these structures, they tend to have a small film of permeable surface surrounding them. These are map-specific and will be documented in the “Perm Spots” section.
Phantom Dive also enables you to go up small red structures, allowing you to further increase your control over where you’d like to exit. Phantom Dive is quite forgiving with this, so experiment!
Using this feature enables you to use a technique called “Beta Skimming” which will be covered in the "Techs" section.
While Phantom Dive is a fantastic skill for launching surprise attacks, going through obstacles, or giving you vertical movement, it does have a few fatal flaws during gameplay. Using Plus Ultra exposes your location due to the particle effects shown on Mirio. Not only that, but you also become extremely vulnerable to attacks during your exit, allowing any number of enemies to attack you during your vulnerability window and potentially cause a knockdown.
Phantom Dive does NOT benefit from Rapid cards in terms of movement. It does allow you to enter (from floor level) and pop out of the ground faster. Acceleration also provides this same benefit. Phantom Dive also does NOT allow you to ignore poison damage.
Phantom Dive gets additional damage at every level, and a duration and area buff at levels 4 and 9. While this skill is fantastic for dealing wide-area damage to groups of people, the vulnerability window and the fact that it can be dodge-rolled leave a lot to be desired when considering whether to prioritize leveling this skill. Not to mention the fact that the reload speed only goes from 10 seconds to 9 seconds at level 4 and does not decrease at higher levels. If you like having a dependable beta, level it up to 4 after leveling Mirio’s alpha to 7 (preferably 9). The good news is this skill has a down power of 375, allowing you to combo it into Phantom Guard—the most common combo Mirio has.

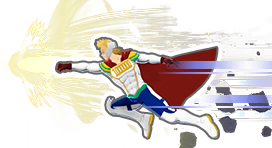
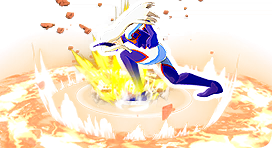
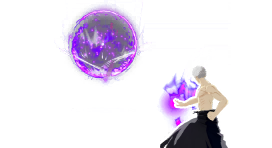
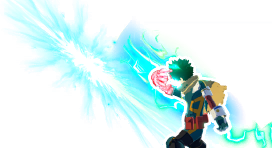
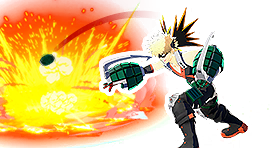
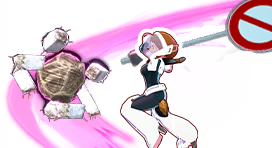
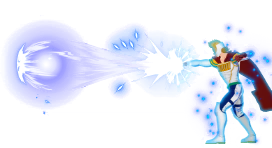
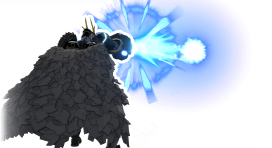
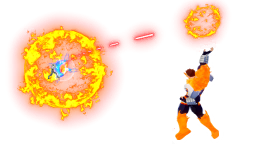
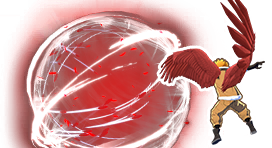
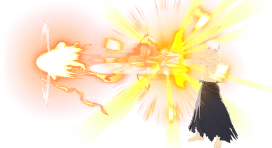
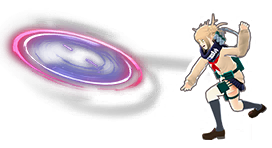
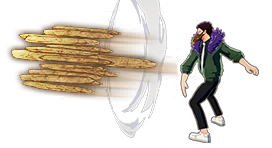
Gamma Skill - Phantom Guard
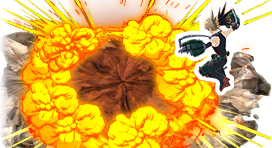
Mirio’s gamma, Phantom Guard, enables him to create a spherical bubble centered around himself with the cape draped over his back that prevents projectiles and certain AOE skills from going through the created barrier. If used in the air, this skill causes Mirio to rapidly drop down from whatever height he is at and form the barrier. Anyone within the radius of the created barrier takes damage and is knocked back or upward depending on where you are in relation to the sphere. Allies can shoot projectiles in and out of the sphere.
Certain projectiles, such as Strike Kirishima’s boulders, can be bounced in a random direction depending on the attack’s relation to the sphere. Any projectile that is bounced away from Mirio’s Phantom Guard takes the property of Mirio having launched it himself, preventing allies from catching any strays that may result from the bounced projectile. As a result, having any gamma damage sub-tuning or using any strike cards will increase the damage of that reflected attack.
Phantom Guard is a gauge-based skill that consumes 33% of the gauge upon its activation and continuously runs the meter down as you hold the skill to block attacks. The skill only begins recovery 5 seconds after its use, takes 10 seconds to reload, and once it reloads, recovers the full gauge (and has a penalty reload of 15 seconds). Using Phantom Guard once and allowing the cooldown to recover, then using the skill again, does not reset its current cooldown. This means you can use the skill for an attack, mix up your attacks with alpha or beta, use the skill again, and infinitely cycle the attacks in a way where you will never run out of Phantom Guard as an offensive option.
This means that Phantom Guard is one of the most versatile skills in Mirio’s kit. You can use the skill as either a defensive or offensive option. For example, you can defend a downed ally from attacks while your other ally comes in to pick them up with a revive skill, stall for your cooldowns to finish, or defend an ally while they use a revive card or open a big chest. One of my personal favorite uses of Phantom Guard is to catch enemies waking up from the downed state. Many times, an enemy will panic, jump for a movement skill, and instead be met with a shield right in their face.
Phantom Guard can also be used to lure enemies into initiating a melee combo. Since enemies can enter the bubble of the shield and attack, many enjoy waltzing into your bubble and launching an attack. However, because Mirio’s initial melee hit is so fast, you can actually turn the tables and begin attacking them instead.
Useless fun fact: Phantom Guard can actually be used a 4th time when you use 2 Rapid cards together. Since Rapid cards increase the speed of the skill’s activation, you end up with just enough gauge to achieve one final bonk before the skill goes on cooldown.
Phantom Guard has a down power of 500, can be used as the final attack of multiple combo strings, and receives an increase in the bubble’s radius and slower gauge depletion at levels 4 and 9.
One of the only issues that Phantom Guard has is that certain AOE skills can ignore the barrier entirely. Some of these skills include AFO’s gamma pull, Assault Endeavor’s beta, and Rapid/Assault Ochaco’s gamma. These skills can leave you vulnerable to serious damage, so I’d advise against using Phantom Guard as a defensive option against these enemies.
Skills that bypass Mirio’s shield:

Note
-
For Deku OFA's beta, Rapid Bakugo's gamma, and Assault Kirishima's gamma the descent from these attacks can bypass the shield not the damaging part of the move.
-
For Tech Shoto's beta it only sometimes bypass the shield as the interaction is bugged
-
For Mt. Lady's beta and gamma they only bypass the shield when she is big
-
Only the center of Young AFO's held beta bypasses the shield. The edges of it do not bypass the shield
Skills that bounce off Mirio’s shield:


Special Actions that bounce off Mirio’s shield:
Melees that bounce off Mirio’s shield:
Momo's Melee 3 and Lady Nagant's Melee 3.

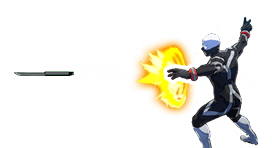
Special Action - Permeation
Mirio’s get-out-of-jail-free card. Not only does this skill enable you to ignore any attack or skill, but it also allows you to go through walls and permeable floors. Be careful though, the skill doesn’t allow you to ignore poison damage! The skill’s gauge lasts 5 seconds during its use.
While using aim mode, it allows Mirio to travel toward a nearby ally by using 25% of the gauge, ignoring both permeable and non-permeable surfaces as he quickly zooms to an ally. Careful though! If your ally is too close to a building, you’ll permeate through that building too!
If an ally gets KO’d, you’ll have about 5 seconds where you can use your special action to teleport to their body. This is great for quickly popping in, grabbing whatever you can, and then using Beta to safely get away. Just be careful—if you’re not quick, you might get punished.
This is a fantastic skill you should learn to rely on during both fights and collecting loot. Unfortunately, you are unable to use the skill at the start of the game and must wait for it to recharge for approximately 1 minute and 10 seconds. After the skill gauge is fully used, it takes 1 second per 1% of the gauge to recover and can begin recharging while in the air. This means that 25% of the gauge takes 25 seconds to fully recover. While you can permeate to an ally regardless of how much gauge you currently have, you can only activate the skill to permeate through attacks when the gauge is at 100%.
My personal recommendation is to use Mirio’s Special Action skill sparingly! Timing attacks and predicting when an enemy might use their most damaging skill is crucial for making the most out of this skill. Another great use for this skill is to immediately use it after beta to decrease its vulnerability window, or after a charged alpha in order to enter a room without having to waste your beta or alpha.

Basic Attacks
Ground Melee
Mirio’s first melee hit is a very quick step-in left punch that has a small lunge distance. It does 35 damage and has a DP of 200. Mirio’s second melee hit is a right uppercut that does 35 damage and has a DP of 25. Mirio’s third melee hit is an overhand left punch that deals 60 damage and has a down power of 25.
Unfortunately, Mirio’s second melee can fail to land due to its shorter range than his first melee hit. Oftentimes, this leads to awkward situations where your entire combo may fail and, in the worst case, lead to you getting combo’d instead.

Air Melee
Mirio’s air melee is a right-handed punch that does 70 damage and has a down power of 250.


Leveling Path
Ideal Leveling Path
Since you get your 3rd alpha at 7, aim for that at the start. After reaching level 7, save 2 upgrade cards until you enter a fight. Since Mirio has great movement, he can gather loot quickly, potentially saving you levels by opening red chests for Rapid cards.
After you get his alpha to 9, upgrade beta to level 4 to improve consistency in landing beta against enemies. Since the skill can be dodged and does not provide any cooldown reduction past 4, you’ll level up gamma to 9 next, as it gives a wider AOE and increased duration, improving the consistency of punishing wake-ups and combos. After you level gamma to 9, finish upgrading beta to 9.


Non-Beta Path
For those who find beta unreliable in today's meta.
Well-Rounded Path
This leveling path is for those who prefer well-rounded levels early on. While your ability to chase may be impacted until later on, this leveling path will allow for better escapes near the start of the game, and mathematically is the best route for damage.

Techs
By using a charged alpha from the ground, you can recover that expended alpha in the air. Doing this with every charged alpha to move will allow you to quickly traverse at a steady pace toward the escaping enemy, while allowing you to reserve your ammo for finishing the enemy off once you reach them. Quite fittingly, I call this tech the “bunny-hop” method.

Another Phantom Threat movement tech is the ability to slightly increase your horizontal travel distance by making an Air Melee input just as you finish charging up. This works on both the ground and in the air. However, any additional Air Melee inputs will reduce your travel distance. Be wary if you’re using this to chase someone. The Melee input makes noise, and you don’t want to let them know you're approaching.

Looking straight downward when you activate the skill allows you to enter the ground without moving. Making any movement input afterward enables you to do normal travel. This is a great technique when you want to stay still in tight spaces or during the final circle. This is commonly called the “Phantom Trap” tech.

Looking straight upward when you activate the skill allows you to enter the ground without moving as well. Making any movement afterward enables you to do normal travel. However, looking upwards allows you to permeate up certain structures. This is called the “Elevator” tech. As of current patch: The “Elevator” tech only works on devices performing at 30fps and below, such as Switch devices or poorly performing PCs.

"Beta Skimming" allows you to alter the reach and height of the Beta hitbox and provides Mirio with extra height. Its performed by cancelling Phantom Dive just after you reach the top of the red platform.

Another tech you may find useful near the end zone is the ability to slow yourself down after having already used Beta. This tech is done by making a small input in the opposite direction that you’re traveling from.

Mirio has a tech that allows him to increase the distance of his melee lunge. The “lunge tech” is done by either running/starting to run, jumping, and immediately canceling the jump by doing a melee hit.

Combos
The different ways you can combine and chain various skills for higher damage within 500 DP (Downpower). The downpower of Mirio Togata's abilities are as follows:
Alpha Skill: 125 DP per hit (uncharged ver.), 500 DP (“POWERRRR” hit), 250 DP (charged ver.)
Beta Skill: 375 DP
Gamma Skill: 500 DP
Ground Melee: 200 DP (Melee 1), 25 DP (Melee 2), 25 DP (Melee 3), 300 DP (Whole Chain)
Air Melee: 250 DP
The text of the combos below will be colored by how true they are, in this case, we will define as "True" combos that, without 3rd party or tuning interference, can only be escaped/interrupted by Overhaul and/or Mirio, as those are special cases.
White Text means that part of the combo is True on both GP and HP.
Green Text means that part of the combo is True if the target is on HP only or the hit Guardbreaks.
Blue Text means that part of the combo is True if the target is on GP only.
Red Text means that part of the combo is Untrue, and therefore the enemy can escape it.
The DMG of the following combos at max level and accounting for the character's Strike role is classified under the following tags:
Basic DMG (100-149 DMG), Basic+ DMG (150-199)
Light DMG (200-249 DMG), Light+ DMG (250-299)
Medium DMG (300-349 DMG), Medium+ DMG (350-399)
High DMG (400-449 DMG), High+ DMG (450-499)
Heavy DMG (500-549 DMG), Heavy+ DMG (550-599)
Deadly DMG (600-649 DMG), Deadly+ DMG (650-699)
Melee 1 🡪 Melee 2 🡪 Melee 3 (130 DMG)
Basic combo string. (For reference)


Melee 1 🡪 Melee 2 🡪 Gamma (180 DMG)
Improved melee string with an added gamma at the end.


Air Melee 🡪 Melee 1 -> Melee 2 -> Melee 3 (200 DMG)
Ideal basic combo string.

Air Melee 🡪 Melee 1 🡪 Melee 2 🡪 Gamma (250 DMG)
Ideal standard melee string with an added gamma at the end.


Charged Alpha 🡪 Gamma (250 DMG)
Fun combo that allows you to use a charged alpha into gamma. Works best landing the end of the charged alpha to ensure a clean connection. From up close, you can aim the charged from the sky to the ground in front of the enemy to ensure they get hit.

Phantom Threat is an attack that has 250 down power and allows you to land 2 charged alpha in a row when the enemy does not have shields. This can mainly be done through the method of knocking an enemy off a higher platform and attacking them as they fall.

Charged Alpha → Melee 1 → Gamma (285 DMG)
Using a charged alpha from jump height at a 45-degree angle from an enemy will allow you to land a charged alpha, interrupt their knockback with the first hit of a melee string, and finish the attack with a gamma.

Melee 1 → Melee 2 → Melee 3 → Alpha → Gamma (285 DMG)
Using Mirio’s full combo chain and animation cancelling the end melee animation with an alpha allows for Mirio to follow up with a Gamma at the end.

Melee 1 🡪 Melee 2 🡪 Melee 3 🡪 Alpha 🡪 Alpha (290 DMG)
Basic combo string with 2 alpha attacks mixed in. There’s a window between the final melee attack and alpha. Use alpha as quick as possible to cancel the end lag from melee.

Disclaimer: The combo below is not “True” and may fail. However, since the combo itself deals significant damage, I felt it was a disservice not to provide you with the knowledge that it's possible if the enemy fails to dodge-roll.
Melee 1 🡪 Melee 2 🡪 Melee 3 🡪 Alpha 🡪 Beta (345 DMG)
Doing the regular melee chain and cancelling the final animation into an alpha and finishing it off with beta allows you to do a powerful combo.


Charged Alpha 🡪 Melee 1 🡪 Beta (345 DMG)
Using a charged alpha from jump height at a 45-degree angle from an enemy will allow you to land a charged alpha, interrupt their knockback with the first hit of a melee string, and finish the attack with a beta.

Changes with Acceleration
New Combo
Beta 🡪 Charged Alpha
Using Beta near the center of an enemy allows you to land a Charged Alpha soon after you leave the ground!

Combo Changes
- Melee 1 🡪 Melee 2 🡪 Melee 3 🡪 Alpha 🡪 Gamma (Now works on GP) (285 DMG)
- Charged Alpha 🡪 Melee 1 🡪 Gamma (Now works on GP) (285 DMG)
- Melee 1 🡪 Melee 2 🡪 Melee 3 🡪 Alpha 🡪 Alpha (Now works on HP) (290 DMG)
<

Perm Spots

Recommended Normal & Special Tunes
Normal Tunes
Strike Slots: Dabi 🡪 Lady Nagant 🡪 Bakugo 🡪 Present Mic 🡪 Endeavor 🡪 Izuku 🡪 Kendo 🡪 Kirishima 🡪 Shinso 🡪 Hawks 🡪 Denki 🡪 Tamaki 🡪 Todoroki 🡪 Shigaraki
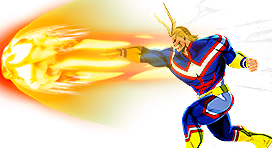
Assault Slots: Endeavor 🡪 Overhaul 🡪 All Might 🡪 Shigaraki 🡪 Kirishima 🡪 Else
Rapid Slots: Bakugo 🡪 Izuku (OFA) 🡪 All Might 🡪 Toga 🡪 Twice 🡪 Else
Support Slots: Overhaul 🡪 Nejire 🡪 Ibara 🡪 Kurogiri 🡪 Momo 🡪 Else
Technical Slots: Denki 🡪 Shigaraki 🡪 All For One 🡪 Aizawa 🡪 Todoroki 🡪 Armored All Might 🡪 Dabi 🡪 Nejire 🡪 Toga 🡪 Monoma
Special Tunes
| The list of recommended special tunes (not ordered): |
|
|
 |
Wall Runner
Mirio’s primary weakness is CD management. Since his Alpha takes 3 seconds to come back at all levels and has a penalty reload time of 12 seconds at max level. Using Wall-Runner, Mirio can begin his Alpha’s cooldown by wall-running instead of waiting to land on the floor. This also provides the additional benefit of being able to wall-jump off surfaces to increase your momentum toward where you'd like to go as you fall, saving resources during a fight. Not only that, but it also increases your ability to dodge attacks and makes you harder to predict. Mixing wall-jumps during a fight makes you harder to track and target than simply using your alpha and beta for movement. There are two techs available for wall-running. One allows you to jump much higher than normal. The second allows you to move forward much farther than normal. For the first tech, use your movement input for a dash against the surface of a wall. After you complete the dash animation, wall-jump off the surface as you release the movement input. This tech allows you to vertically travel much faster than normal wall-running. For the second tech, it is similar to the first: use your dash input against a wall, but this time, before you complete the dash animation jump off the wall as you release your movement input. This tech is best used against small structures or near the tops of buildings and other surfaces. The only downside to these techs is that as soon as you make an input for movement, you fall much faster than normal. However, with enough practice, you won’t even notice this. |
 |
Ability Manifest
This tuning works great with prep-work. Since Mirio is fantastic at collecting loot, you can reliably find yourself with a good collection of ability cards. At max level, Ability Manifest increases the duration of all ability cards by 60% (55% at level 10). This allows you to extend the duration of key buffs for a variety of ways you can play Mirio. Assault cards can be used for long fights, freeing you from your squishy HP confines; green cards can be used for reviving in the storm; Rapid cards can add a variety of different effects to your Alpha; and technical cards allow you to spam skills without needing to worry about cooldown management. Strike cards as always are great for free damage. |
 |
Perception
Since Mirio can launch attacks through walls, this tuning is a solid option. Landing a melee attack instead of finishing an Alpha combo allows Mirio to see enemies through walls for 15 seconds (14 seconds at level 10). |
 |
Revenge Support
Since Mirio’s HP pool is small at 225, having a tuning option that helps him to tank a few more hits is a welcome addition. At level 11, this tuning recovers 98 HP. |
 |
Acceleration
One of, if not the best tuning option for Mirio. This tuning, upon activation with a melee hit (not on a downed body), increases the speed of most of Mirio’s actions for 10 seconds. These actions include Mirio’s chained Alpha combo, Mirio’s post charged Alpha’s movement, Mirio’s Beta dive speed (From the floor), Mirio’s Beta exit speed, Mirio’s Gamma activation speed, Mirio’s melee attack speed, Mirio’s running speed, Mirio’s post-down crawl speed, and Mirio’s climb speed. At level 10, the CD to reactivate the tuning is 40 seconds. At level 11, the CD to reactivate the tuning is 20 seconds. For this reason, it is highly recommended to put acceleration on a right-side hero slot. Acceleration also provides a tech that enables you to literally fly across the map with 3-4 charged Alpha. Using 2 rapid-role cards with Acceleration allows Mirio to glide through the air and at whatever direction you use your input on. Mirio also acquires a few positive combo changes that are only available with this tuning activated and are covered in the "Acceleration" portion of the "Combos" section. Landing melee with Mirio CAN be tricky. Here are some methods that can be used to best land a melee attack on an enemy: Land down onto an enemy while they’re busy healing, using beta and landing the attack near the center allows you to land a melee attack, +using the chained alpha combo twice allows you to often land a melee hit, and slightly charging up an alpha allows you to use the chained combo variant, but enables you to get up close after one alpha, allowing you to guarantee a melee hit. (You lose your auto aim, so you need to guide the shot like a charged alpha.) I recommend looking downward after landing the alpha in order to guarantee a melee hit with the tracking, since the enemy can sometimes end up behind you. |
 |
Quirk Factor Release
Since one of Mirio’s biggest issues is CD management, having a tuning that helps you to take care of that by simply guard breaking an enemy is huge! This tuning lasts for 10 seconds at all levels and cuts the CD of all Mirio’s skills in half! At level 10 it comes back in 20 seconds (15 at level 11). |
 |
Revenge Technical
While not as great as Quirk Factor Release, you can still get good value out of this tuning. Since Mirio has lower HP, you mainly want to either continue the fight carefully or run away shortly after getting your guard broken. |
 |
Willpower
The best survival tuning available for Mirio. Since Mirio can get combo’d quite easily or find himself in the most ridiculous circumstances, having yet another get-out-of-jail-free card puts him in one of the best conditions to be even more annoying to deal with. |
 |
Kota Finder
Mirio's “bunny-hop” tech allows him to quickly traverse the map, giving you a good shot at getting Kota as the game starts! If you're going for Kota and see an enemy, however, be careful—don’t fight unless you know your allies are nearby and heading your way. Let the enemy have Kota if your allies are slow and far, or if the enemy’s kit counters yours. The last thing you want is to force your allies to chase down your revival token and search for civs instead of grabbing loot. |
 |
Speedy Civilian Rescue
A very convenient tuning! While you don't want to spend the early game grabbing civilians instead of levels (you need that Alpha at level 7), you can grab plenty of civilians near the start of the game, putting your allies in a great spot when it comes to team fights. Mirio is able to quickly separate from a fight, drink team recovery items, and return to the fight either with his Special Action or a charged Alpha. And if your teammates die, don’t worry — you’ll have plenty of cards to revive them with. |
 |
Divine Protection
Since Mirio is quick, he can head to chest locations as they spawn and wait for the chest to land before quickly grabbing the loot! Not only can you find yourself with a level 7 Alpha right at the start of the game (if you get lucky with the competition), but you’ll also be better able to grab important resources for allies that may make all the difference in whether you’ll win! |
Recommended Builds and Costumes
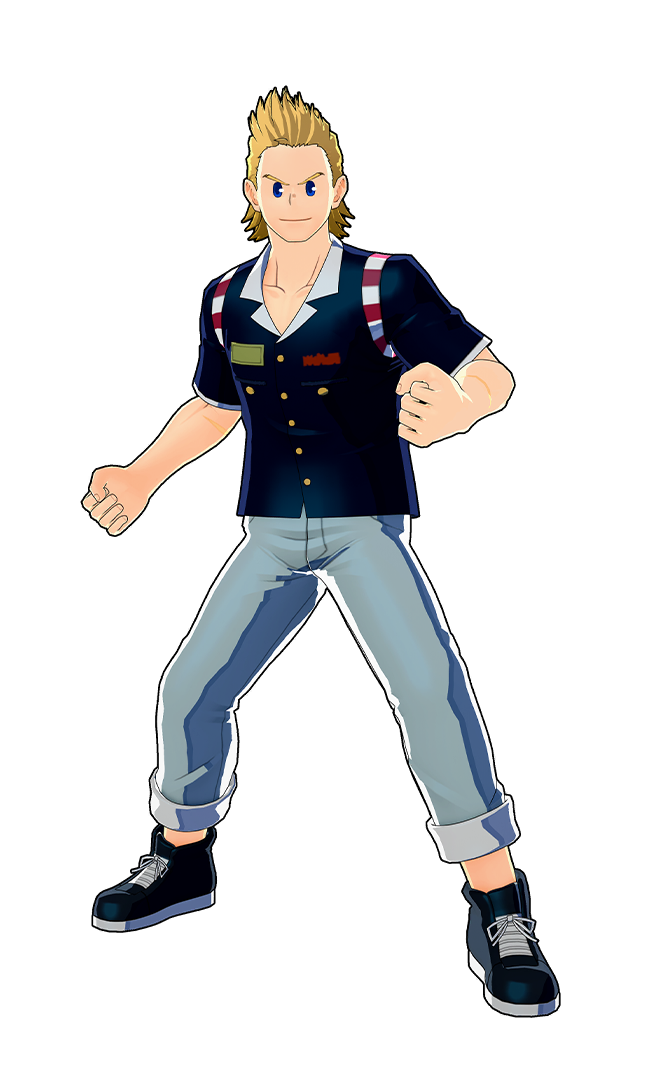
Casual Wear
Mirio’s casual wear is a solid choice for running a support setup. You can make a few options here depending on what you’re looking for. You can use High-Speed Replenishment and Speedy Civilian Rescue. This allows you to not only quickly gather revival cards from instantly saving civilians, but also drink GP recovery items (including team GP recovery items) 25% faster than normal. OR you can run Foundation of Peace and Speedy Civilian Rescue. After 2 minutes (at level 10), any civilian you rescue will level up the skill in the immediate order of Alpha 🡪 Beta 🡪 Gamma.
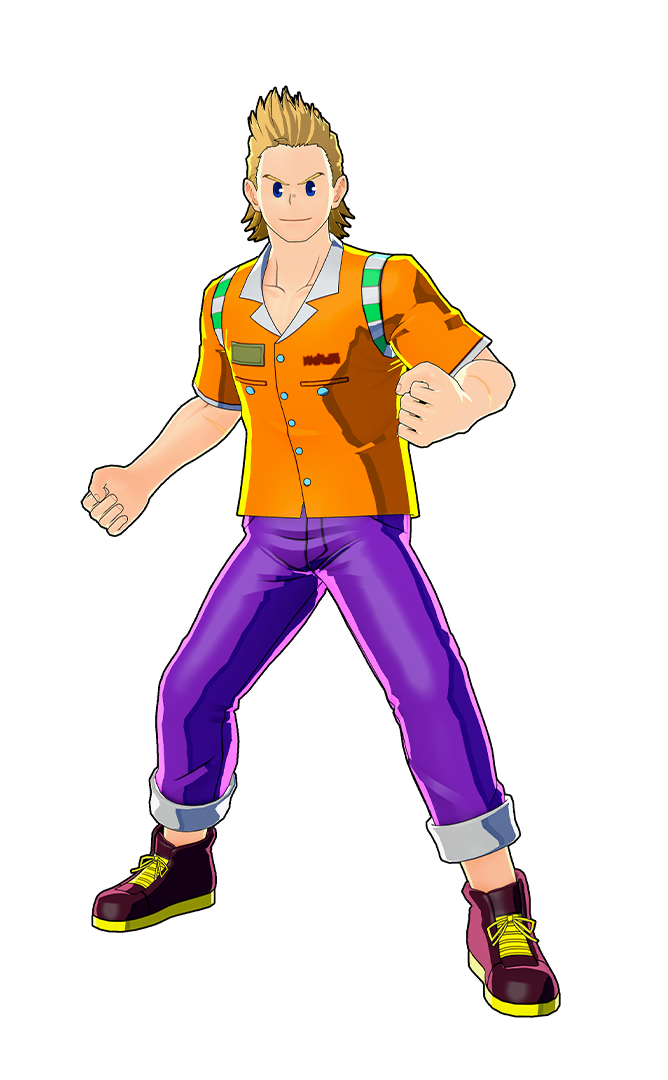
Casual Wear (Dangerous)
This skin allows Mirio to run both Wall-Runner and Divine Protection together. You can quickly grab the big chests all game and ensure you have a good supply of not only revive cards, but also a little extra movement. I wouldn’t recommend using Acceleration here, since the cooldown at level 10 is 40 seconds instead of the 20 seconds you get at level 11. You could alternatively use perception on the blue slot instead of Wall-Runner, or Revenge Support instead of Divine Protection – It's ultimately about preference.
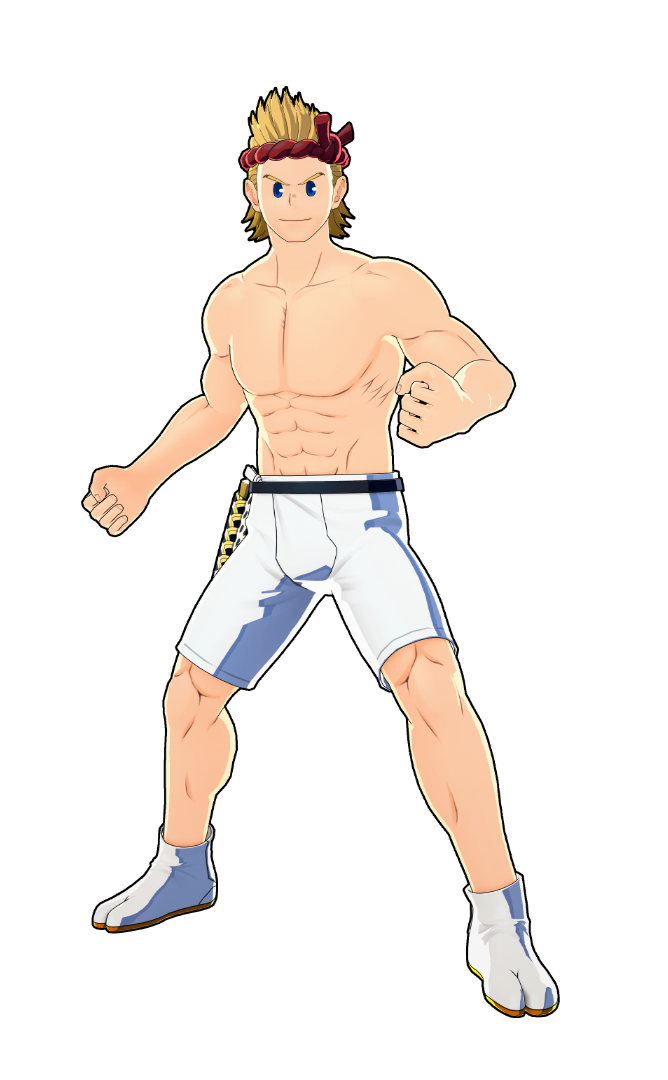
Festival Outfit
One of Mirio’s best outfits. You can run a few different tuning layouts. You can run Will-Power or Ability Manifest on the left side, and you can run either Wall-Runner, Perception, or Acceleration on the right side. Not only that, but the outfit also has many red slots, allowing you to kick up your damage quite a bit. If you like being annoying and avoiding insta-deaths, I recommend running Will-Power and Acceleration. If you’re good at card management and find yourself using them throughout the game, I recommend running Ability Manifest and Acceleration.
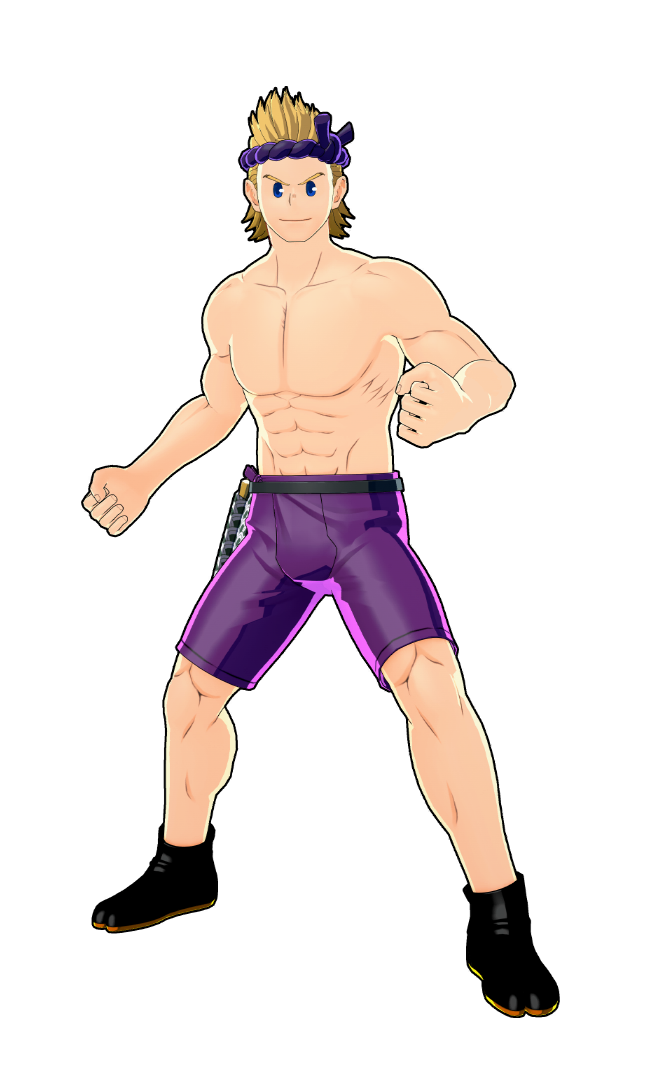
Festival Outfit (Villain Style)
Yet another one of Mirio’s best outfits. This outfit can run either Quirk Factor Release on the left side or Speedy Civilian Rescue, and on the right side it can run Wall-Runner, Perception, or Acceleration. I recommend pairing Quirk Factor Release and Acceleration. Not only can you expect your cooldowns to come back quickly while you’re getting in guardbreaks, but you’ll also find yourself avoiding attacks and quickly pushing in on your own.
Festival Outfit (Heat)
The best outfit Mirio has for running Kota Finder. You can not only run Wall-Runner, Perception, or Acceleration (not recommended) on the left side, but you can also run Kota Finder, Will-Power, or Ability Manifest on the right side. I personally recommend running Wall-Runner and Kota Finder. Not only can you expect a solid chance at getting Kota right away, but you’ll also have more movement options throughout the game.
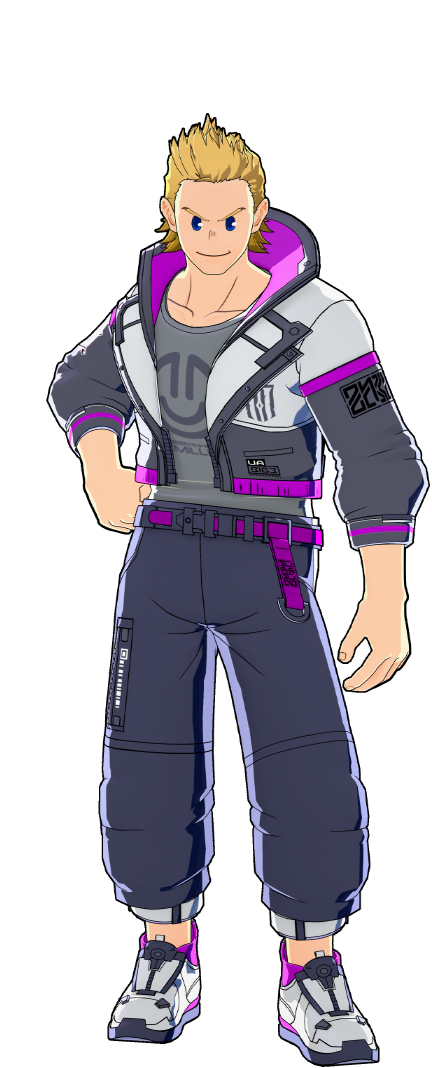
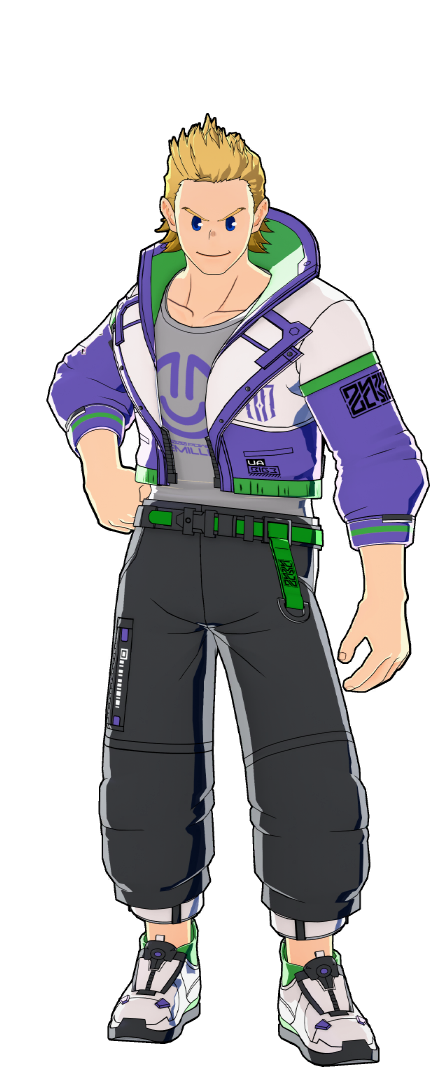
Cyber Hero Costume (Villain Style)
Double Rapid can run Acceleration and Perception. Perfect for chasing people down.
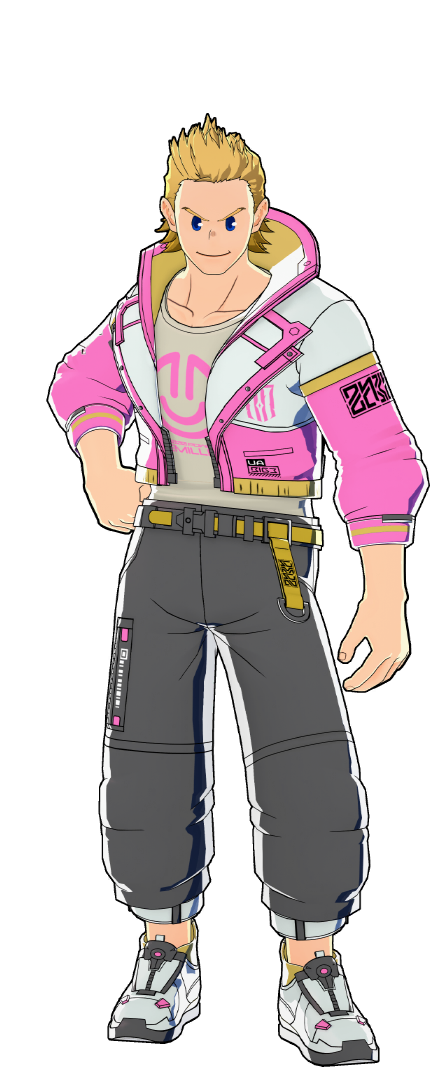
Cyber Hero Costume (Fancy)
Can run something like High-Speed Replenishment and Quirk Factor Release/Embrittlement. The choice between Quirk Factor Release and Embrittlement is dependant on if you prefer to land melees or not.
Cyber Hero Costume (Dangerous)
This fit has the Rapid slot which can run Acceleration, Perception and Muscle Form. The Tech slot can run High-Speed Replenishment or Fixer with Support Nejire's regular tuning to get him to 250 HP again.
Best Overlay Outfit For Hiding In Bushes
Hero Costume (Combat)
Put two bush pictures here
Is it ugly? Yes. Does it give you a much better chance of not being seen in bushes and trees? Also yes!
While it’s a bit extra—and definitely not required—if you don’t mind trading style for performance, I recommend running this outfit as an overlay.

DISCLAIMER
My goal in making the match-up section as I have is not to force you, the reader, to read everything at once, but rather to use it as a reference sheet against opponents you may struggle to face. This match-up section does not take into account the average player, but instead those who understand their character and lean into their strengths. That being said, I did include bad habits that most characters tend to have, which you may be able to exploit.
To keep the match-up section as concise as possible, I opted not to include T.U.N.I.N.G. in my considerations for match-ups. This is both to preserve the information below beyond future balance changes and to ensure that the information does not imply that you have every costume and T.U.N.I.N.G. material to follow the suggested combat routes.
That being said, my information does change depending on whether you have certain T.U.N.I.N.G. For example, using Acceleration makes you the best chase character in the game during its activation, and, should the situation allow, you can chase anyone I may have otherwise stated to not until later on in the match. That being said, I leave those choices to you, the player, who, with experience, will grow to understand how to best proceed.
Izuku Midoriya (Default) 
Difficulty Score: 🟡Even🟡
While Deku can punish predictable Alpha attempts and will dodge obvious Beta uses, you can keep the matchup manageable by controlling where the fight happens. Avoid open areas. Play around cover, and vary your air movement slightly so you’re harder to hit.
Treat Beta as either (1) a combo confirm, or (2) an emergency escape—avoid using it to begin an engagement. If you’re forced into open space, your priority is timing dodges and breaking line-of-sight as soon as possible.
Because Deku generally prefers mid-range combat to avoid close range attacks, you can use Gamma to take time to recover your cooldowns. Deku is unable to close the distance fast enough to punish, and while his melee is relatively good, you can counter his melee by utilizing melee on him instead just as he reaches your shield.
If the Deku has strong aim, ensure you’re near permeable cover and attack through walls if he chooses to chase.
While Deku’s Gamma is difficult to land, good players are able to land them consistently and use them to deal devastating amounts of damage. If you can guess their usage and permeate past its grab, Deku will be stuck in the animation long enough for you to land a chain-alpha combo. Deku’s Gamma takes a considerable amount of time to recover, so make sure you keep a general sense of how many uses he may have to dictate whether to use your Special Action.
Due to the long CD of his Gamma and Beta, you are more than able to chase them down if they get low. Keep the pressure and use the bunny hop method to chase. Once Deku feels he is safe and healing, come in from up high and land a chain alpha combo to confirm the down. If he is healing behind permeable cover, use a charged alpha to land an attack through the wall.
Izuku Midoriya (Full Bullet) 
Difficulty Score: 🟢Favorable🟢
Full Bullet Deku is a vertically inclined character with highly damaging Alpha attacks. He focuses on mid-to-close range combat and can punish the vulnerability windows of your Alpha and Beta if you aren’t careful.
Stay near permeable cover so you can break line-of-sight and threaten him through walls if he commits to chasing you down.
If Deku uses his Beta, its obvious animation gives you enough time to either use Beta to deal devastating damage that can be combo’d, or use your Special Action to perm through the damage and land a melee combo to conserve your skill ammo.
If Deku uses his Gamma to gain the aerial advantage while nearby, use your charged Alpha in his path to prevent him from gaining height. His Gamma has a noticeable startup before the vertical movement, and catching it stops him from gaining the angle he wants to use for Alpha.
Be careful with Gamma wake-up punishes. Since Deku can choose not to wake up early, using your Gamma can backfire: he can Gamma through the shield and chain into a devastating combo, or hit you with Beta if he’s close enough. That being said, Deku often uses Beta on wake-up when an enemy is nearby—if he does, punish him using the methods mentioned earlier.
Deku is weak at escaping. His Gamma (his main escape tool) is better for vertical travel than horizontal, and because its momentum and height make him easy to track, use bunny hop to stay in chase. If he tries to heal behind a doorway blocked by his Gamma or in a blocked angle, you can either use your Special Action to permeate through it, or use a charged Alpha to attack him through walls (or through his Gamma structures).
Izuku Midoriya OFA 
Difficulty Score: 🔴🔴Very Unfavorable🔴🔴
One of Mirio’s worst matchups. OFA Deku is considered overpowered for a reason—he excels in everything: armored moves, damage, movement, arguably the best melee in the game, and short cooldowns to boot.
There’s very little you can do against a good OFA Deku. His grounded Alpha inflicts knockback that can deny you the spacing you want for chain Alpha usage. Your Charged Alpha can be punished by his grounded Alpha, and he can also attack with aerial Alpha, making him harder to hit with your Charged Alpha. He has built-in “Space Hop”-style jumps within his kit that can counter your Beta, and his Gamma provides a double dash that can be used to dodge attacks mid-air.
If that wasn’t enough, his Overdrive buff makes him even more oppressive. Overdrive can let him auto-connect his Gamma, so even if you think you’re safe in the air, you can get knocked down from behind. His Overdrive Beta allows massive damage with precise control over where he lands, and the shockwave is large enough to catch you even when you think you’re spaced correctly. And if he decides to attack you with a regular Beta instead of his “Overdrive” variant, he can choose to say “Nah, actually…” and use his “Overdrive” Beta instead without consuming additional Beta ammo.
That said, you do have options—mostly by punishing bad habits. Many OFA Dekus get cocky and stop respecting their opponent’s skills.
Many times, an OFA Deku will commit to constantly doing wake-ups after they get knocked down by an attack. If you are nearby, ensure you attempt to land either a Gamma attack or a chained Alpha combo in order to punish their wake-ups.
When an OFA Deku is attacked, they will often commit to starting up their Gamma for a speed buff or Special Action for a jump buff before they either continue the fight or run away. Both of these skills take time to fully activate, giving you a precious window of opportunity to land either an uncharged Alpha combo or a fully charged Alpha. If he’s far, use Charged Alpha. If he’s nearby, use your uncharged Alpha combo instead.
If you’re having trouble reaching Deku due to his Alpha, wait for an ally to engage with him. Then use your Special Action to rapidly close distance and create a window of vulnerability with a chained Alpha combo, giving your ally time to land their attacks.
If Deku has his “Overdrive” buff active and uses his “Overdrive” Beta, wait until he’s about to land, use permeation to avoid the attack, and use either an uncharged Alpha or Gamma to punish him.
OFA Deku also excels at disengaging—his kit gives him multiple ways to create distance. If you notice he’s backing off while low, commit to finishing him. Keep Beta ready as an emergency escape tool if things go south. Approach from above and drop Gamma directly over him to secure the down, or drop in with a quick chain Alpha before he notices. If you hear him healing behind a wall, use Charged Alpha to confirm the finish. It’s strongly recommended to remove an OFA Deku if you suspect he’s low.
Katsuki Bakugo (Default) 
Difficulty Score: 🟡Even🟡
Bakugo is a mid-range attacker who can keep distance with his Special Action, while dealing consistent damage with his Alpha and Beta. If you’re within close range, he can deal powerful damage with his Gamma, which has a wide explosion radius. If you’re farther away, he can pressure you with his AOE Beta, which also has multiple uses.
Bakugo can continuously punish your Charged Alpha and Beta attempts with his Alpha after dodging them, or— if he’s nearby, punish you with his Gamma’s explosion radius.
Avoid using Beta for anything other than escaping if you notice Bakugo leaning into his character’s strengths. At higher levels, Bakugo can spam his skills relentlessly while avoiding your attacks. And while you can hide behind cover, it won’t always be as effective since his Alpha shots can pass through certain obstacles and walls.
Your goal in this matchup is to get close and either force him to burn his Special Action or bait a Gamma. His Gamma can be dodged, avoiding the rotational portion of the attack; however, the explosion itself can’t be dodged. If you notice Bakugo cutting the skill short on purpose to catch you with the explosion, use permeation to avoid it and follow up with either a melee string or a chained Alpha combo.
If you notice Bakugo canceling his invincibility frames, punish with Gamma or a chained Alpha combo. Often, Bakugo will use his Special Action to create distance after getting knocked down, and in doing so, drop his invulnerability frames—watch for that window.
If Bakugo is maintaining distance well with his Special Action and has particularly strong aim—making it difficult to land an attack without getting punished, retreat with Beta and look to ambush him later during a third party.
Bakugo’s escape options are tied to his Special Action and Gamma, allowing you to chase quite easily since neither provide drastic distance. If you chase to finish him off, keep Beta ready as an emergency escape option—his Gamma hits extremely hard, and you don’t want to be on the receiving end if your engage fails..
Katsugi Bakugo (Machine Gun) 
Difficulty Score: 🔴🔴Very Unfavorable🔴🔴
Bakugo is what you’d get if you somehow put an extended magazine into a fighter plane: constant pressure from above, extreme mobility, and the ability to deliver massive damage throughout a fight.
His Alpha fires a fragmented, multi-bullet burst and can knock him in the opposite direction. It recovers quickly and makes him excellent at both maintaining distance and closing it. This alone makes him exhausting to fight, resource-wise—especially when you only have three Alpha shots to close distance and confirm a hit.
On top of that, while his Beta doesn’t deal huge damage on its own, it has a wide radius and keeps him mobile and airborne while he uses it. If you start to close in, he can use Beta to maintain pressure and stay out of reach.
His Beta also briefly stuns on hit, which can give him enough time to land Gamma—a wide-range explosive attack that deals massive damage on the ground and bounces him far back into the air. It punishes you for getting close and helps create distance immediately after.
As if that weren’t enough, his Special Action launches him in whatever direction he’s looking, letting him disengage or re-engage at will.
There isn’t much you can do against a strong Bakugo who fully leans into his strengths, but a good start is to watch for his attempts to tag you with Beta. Most Bakugo, once in range, will Beta and then immediately Gamma if they think it connected. If you time your Beta as he’s falling after Gamma, you can often guarantee a punish. Even if your Beta doesn’t land, you may still have a small window to confirm a Chained Alpha combo.
Also, while Bakugo can stall in the air and pressure you from above, you’re harder to hit while airborne yourself. Your general plan is to stay close to cover and play deceptively: land Charged Alphas from behind cover as he approaches, use Beta as either (1) an escape tool or (2) a punish for his Gamma, and use permeation to avoid repeated Beta → Gamma pressure while your Beta is on cooldown. Then punish with a Chained Alpha combo when he does.
Bakugo is extremely good at escaping, but his path is usually obvious. If you chase to finish him, take high cover, watch for his flashy animations, and use Bunny Hop tech to secure a knockdown. If he’s healing and watching for you, approach with Beta to close the gap, then finish with a Chained Alpha combo.
Ochaco Uraraka (Default) 
Difficulty Score: 🟡Even🟡
Ochaco is a character that excels in using her skills to create combos. She usually prefers to keep distance and rain cars on you until one lands, causing a stun that chains into her Gamma. From there, she can extend the combo with Alpha or additional Beta throws, then re-activate her Gamma so the debris deals the final, devastating blow.
While fighting her, your main concern is her Gamma. Fortunately, the startup takes a moment and gives you time to either dodge it completely or permeate through it. Dodging is unreliable since the window is small, and latency can make it connect even if you dodge correctly—so I recommend permeating through it whenever possible. If you don’t have permeation available, use Beta to break line-of-sight behind an obstacle to avoid getting combo’d with her Beta → Alpha follow-up.
Her thrown Beta is easy to avoid from range and can be dodged up close. Your main strategy is to get in quickly with Charged Alpha to start chain Alpha combos from the air, or if she’s grounded, use Charged Alpha to avoid getting clipped by the spinning attack. If she tries to use thrown Beta to interrupt your approach, use Permeation to create the window you need for a chain Alpha combo. The timing of her thrown Beta gives you time to land an attack before she can throw the next one.
If you get knocked down, avoid using skills immediately. Extend your recovery window as much as possible to buy time for your skills to recover, and to avoid early wake-up punishes like her Gamma or Beta spin.
If you get her low and she begins to run, often it’s better to let her go. With Special Action active, she can create enough distance to recover before you catch up. Unless she gets cocky and doesn’t choose to disengage far enough to heal safely, avoid hard-chasing until the zone closes enough to limit her escape distance.
If she chases you, go through walls, use Beta to change heights, and make your path hard to track. If you’re indoors, be careful—her Beta ring can clip through walls. Be ready to use Permeation or Beta to avoid it.
Ochaco Uraraka (Zero Satellites) 
Difficulty Score: 🟢🟢Very Favorable🟢🟢
Zero Satellites Ochaco is a predictable but hard-hitting mid-range character. Her main playstyle is using Alpha from above to deal damage at a safe distance, using Beta as a movement tool, and using Gamma to start combos that lead to massive damage.
The recommended approach to fighting Ochaco is to be patient. If she’s attacking from the air. Let her use her Alpha charges and then quickly close distance with a Charged Alpha after she exhausts her resources.
You could also dodge one of her Alpha attacks, use a Charged Alpha to close distance during the attack tempo, and use your Special Action to avoid her next Alpha or Beta attack. If she uses her Alpha, use your Chained Alpha combo to punish her.
If she uses her Charged Alpha while you are on the ground, use Beta to punish the attempt and combo into it with Air Melee 🡪 Gamma or Gamma depending on what’s possible for you at the time.
If she uses her Beta to attack, either use a charged Alpha if she’s far enough away or use Gamma to stagger her when she runs into it. If she gets staggered, use your Chained Alpha combo to punish her. You can time Gamma to deal damage and achieve a knockdown, but Chained Alpha gives better damage—choose based on cooldowns.
Avoid using Beta unless you need it—she can punish it with Alpha. Save it as an escape option if she lands a charged Gamma and you need to disengage or to punish a Charged Alpha attack.
If you knock down Ochaco—don’t attempt to punish wake-ups. Her Charged Gamma is deadly and leads to some serious damage.
Ochaco is quite weak at escaping. Her movement is tied to her Beta and makes it obvious where she is heading. She also tends to build a Gamma platform to recover, especially in end phase. Use this to your advantage and use a charged Alpha attack from below to land an attack through her platform.
Tenya Iida 
Difficulty Score: 🟡Even🟡
Iida is a fast, close-range attacker who can become difficult to track if you aren’t paying attention. His kit revolves around quick engages/disengages and chaining quick strikes.
Fighting Iida as Mirio could prove challenging. While he is straight-forward in the air and is quite predictable, on the ground you may find yourself confused as he uses the Wall-run techs to attack you from odd angles. Using your Charged Alpha will be quite unreliable during this match-up, since the charging duration can allow time for him to react and make it difficult for you to land.
With his Gamma active, your Beta will prove easy to dodge and punish.
Your main goal while facing him is to dodge-roll his Alpha and Beta and punish his 2nd Beta with your Chained-Alpha combo. If he finds you in the air, use your Special Action to avoid the attacks and use Gamma to quickly descend, or punish the attempt by using your Chained Alpha combo.
When his Gamma comes close to stalling, Iida players tend to use their skills to get themselves high into the air, leading to most of their stall-window being done while they drop. To counter this, use a charged Alpha if he stalls in the air near you to catch him as he falls.
If Iida gets low and starts to run, consider how long Gamma has been active. If it’s been active for a while, you can chase and catch him off guard when the stall hits. If he just activated Gamma to disengage, only chase if the zone has shrunk enough to make the chase realistic. If you do chase, rely on sound—Gamma is loud and can reveal his position through walls.
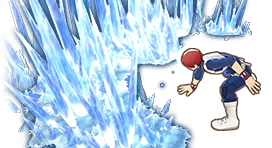
Shoto Todoroki (Default) 
Difficulty Score: 🔴🔴Very Unfavorable🔴🔴
Strike Shoto is a mid-range damage dealer with high burst options at both close and mid-range. His main focus is dealing damage from afar to aerial targets and dealing high burst damage with his Gamma and Beta for anyone grounded.
When fighting Strike Shoto, your main game plan is to pressure him with Charged Alpha, preferably through walls and obstacles to hide your intent, since he can punish predictable approaches with Beta and his Beta can go through your Gamma if he’s close enough. In addition, you’ll want to avoid using your Chained Alpha combo. Because his Gamma allows ice to quickly form in front of him, touching it at any point during your attack will freeze you, and he’ll punish you shortly after with his Beta.
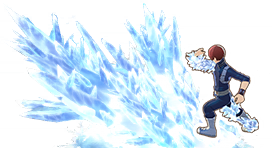
If you need time to recover your cooldowns, do so either behind cover or from a higher platform to avoid being frozen by his Gamma. If you’re at mid-range, you can use your Gamma to recover cooldowns before returning to the fight. His Gamma can’t go through yours, so you’ll be safe from being frozen. If he uses his Charged Gamma to move toward you, cancel Gamma and use Beta or your Special Action as he leaps out of Gamma to use Beta on you.
Strike Shoto’s escape potential is high because his Gamma provides quick horizontal movement with a relatively low cooldown. You may have difficulty keeping up if you pursue. If you try to stop his escape with a Chained Alpha combo, his ice trail can Freeze you, giving him more distance.
Use the bunny hop method to chase. If the map allows it, chase from higher ground. Because his Gamma leaves a lingering trail, his escape path is usually obvious. Strike Shoto players often place Beta at a building entrance or along a wall to protect themselves while they recover. This practically screams, “I AM RIGHT HERE.” If he’s healing in the open and protected by Beta, drop from above and use a Chained Alpha combo to finish him. If he’s healing in a building, rely on the sound of his drinking animation to locate him, then attack with a Charged Alpha. If you miss, use Beta or your Special Action to leave the building and re-engage from a different angle. Avoid staying in the room with him when possible, since he can heavily punish you with Gamma or Beta in tight spaces.
Shoto Todoroki (Ice Fang Wind Flame) 
Difficulty Score: 🟢🟢Very Favorable🟢🟢
Tech Shoto is a master at securing areas and clearing occupied buildings. With multiple defensive skills, he can use his kit to ensure an area is protected. That said, Mirio can easily counter his kit in various ways, making this matchup favorable for Mirio.
When fighting a Tech Shoto outdoors, their main form of attack will be their Alpha. Since it’s quite large and has good range, you’ll need to be careful if you’re getting focused by his attacks. While it doesn’t do much damage, it can make it difficult to approach because it knocks you down in 2 hits.
If you do get knocked down during your fight, take advantage of your invincibility frames. Tech Shoto players love to punish early wake-ups with their Beta and explode it with their Alpha to deal severe damage at a massive radius.
However, if you do manage to get into Charged Alpha distance, ensure you’re careful about sudden Beta attacks. Your best time to deal damage is when they explode their Beta. Your Charged Alpha allows you to completely permeate through the damage, while also allowing you to use Shoto’s Beta as cover for your attack.
If your cooldowns are low and you need time for them to come back, use Gamma at any range. Your shield completely negates every part of Tech Shoto’s kit. His Alpha bounces off and has a high chance of hitting him back because of its massive hitbox. His Beta fails to form when it hits your shield, and his Gamma is erased on contact. Even Tech Shoto’s Special Action can be reflected by Mirio’s Gamma. The only thing to avoid is his Beta explosion, which completely ignores Mirio’s Gamma. The bright side is that you can easily dodge-roll the explosion after canceling your Gamma.
If you find your Charged Alpha attacks missing because of his dodge-rolls, use your Chained Alpha combo after your Charged Alpha to avoid the explosion from his Beta, or use your Gamma if he’s close enough to ensure a hit that’s hard to avoid. If you find Shoto using his Alpha and playing smart, back off. His Alpha lets him form ice on the ground in front of him, and you risk being punished by being frozen on contact.
If you're fighting Tech Shoto indoors, use your Charged Alpha toward the general direction of his newly formed Beta or the sound of movement. If he chooses to explode his Beta after you land an attack, use your Beta or Special Action briefly to avoid it. If you use your Beta, leave the building instead of attempting to land an attack unless he uses his Beta while you're nearby. His Beta animation prevents him from dodge-rolling, giving you an easy punish.
If he uses his Gamma to protect himself in the room, you can use Charged Alpha to attack through it and use Beta or your Special Action to exit the building before re-engaging. It’s important to note that his Gamma doesn’t disappear if it’s already within the radius of your Gamma and can damage you. Only use your Gamma if you see it heading your way; otherwise, you’ll risk taking damage instead of mitigating it.
You won’t have much trouble chasing down Tech Shoto, since he lacks movement skills. If he goes indoors, apply the same principles I mentioned earlier to take him down.
Tsuyu Asui 
Difficulty Score: 🟡Even🟡
Tsuyu is a close-range attacker who loves to chase and attack when you least suspect it. Her kit can make it challenging to use your Charged Alpha due to her mobility, and she has a great Melee that allows her to close the distance from the air.
When fighting Tsuyu, she likes to quickly close the distance with her Alpha and deal more damage with her Airial Beta into her Ground Beta. Using Charged Alpha can be unreliable, since she can change direction quickly with her Alpha or Melee, and your uncharged Alpha can be countered with her Beta. Fortunately, you can use your Special Action to quickly dodge an incoming Airial Beta and punish it during its end-lag with your Chained Alpha combo. Unfortunately, if she touches the ground during the end-lag, she can cancel it and perform a ground Beta. So if Tsuyu is closer to the ground during her Airial Beta, keep permeation active until she uses her Ground Beta, then punish her with either a Chained Alpha combo or a more potent combo that starts with Melee and uses one or more of your other skills. If Tsuyu gets low and attempts to run away, go for the chase. Her revival skill at a short cool-down makes her a high-priority target. Unfortunately, not only is she quick, but she also has an invisibility skill that makes it difficult to track her. Use the Bunny-hop tech to chase, but if you have difficulty tracking her due to her invisibility, attempt to chase without it until you can gauge her destination. Fortunately, even with invisibility active, you’ll be able to see her shadow. Look for that if you don’t see her. Attempt to approach her from above in order to land a Chained Alpha combo to quickly finish her off before she gets another chance to disengage.
If you are being chased by Tsuyu while low, rely on escape routes that involve entering and exiting buildings. Tsuyu players have earned the title of being the character that WILL obsessively chase you if you are low—and for good reason. They WILL absolutely chase you relentlessly. Confuse them by using charged Alpha when exiting buildings, and use your Special Action to head to an ally if they are not fighting.
Eijiro Kirishima (Default) 
Difficulty Score: 🟢🟢Very Favorable🟢🟢
Kirishima is what one would consider the archetype of an Assault character. He’s a close-range brawler with a significant HP pool and built-in damage reduction by way of his Special Action, which makes it difficult for Mirio to deal significant damage while it's active. While he is very “tanky, his attacks are quite honest—they are easy to predict and counter with your own attacks.
When fighting Kirishima, their primary sources of damage come from Beta and Gamma. Beta can be easily avoided by dodge-rolling. You can also avoid it by using your Special action, Gamma or Beta. If you use your Beta to avoid the attack from the Ground, you’ll be able to punish it by immediately canceling the Beta due to Kirishima’s Beta end-lag. If you dodge-roll the attack or use your Special Action to avoid it, you can also use your Gamma to punish the attack.
Avoid using your Chained Alpha combo entirely when fighting Kirishima. All of his moves are armored, and he has flinch resistance from his Special Action. As a result, your Chained Alpha combo is often cut short because these armored moves disrupt your Alpha’s predetermined distance. Not only that, he can use your attack to his advantage, punishing you with Gamma if he suspects you’ll use an uncharged Alpha.
You can punish his Gamma with your Charged Alpha or Beta if you notice him about to use it in a group fight. That said, I would avoid using Beta if he has his Special Action active, since he has flinch resistance and can punish your Beta with his own Beta.
If you get knocked down by one of his attacks, don’t wake up early. Use your invincibility frames. Kirishima can use his Gamma to punish wake-ups, leaving you in a bad spot if you get hit.
Ultimately, a battle with Kirishima is straightforward. Avoid his attacks, whittle him down, and escape if you get low. Kirishima’s only movement tool is his Alpha, and it doesn’t provide him with any significant movement, allowing you to quickly chase and finish him.
Be wary, though. His healing isn’t interrupted by your Alpha or Beta if he’s healing with his Special Action. Only your Gamma can prevent Kirishima from healing, since it guarantees a knockdown. If a Charged Alpha through a wall doesn’t finish him, quickly follow up with your Gamma to prevent him from recovering.
Eijiro Kirishima (Red Drive) 
Difficulty Score: 🔴🔴Very Unfavorable🔴🔴
Strike Kirishima has everything in his kit. A good HP pool, damage reduction, armored moves, shields, spammable skills, an AOE attack, and a movement “tech” that makes it hard to chase effectively. His main playstyle revolves around using his movement “tech” to keep moving during battle, allowing him to engage and disengage at will, use Gamma to punish approaches and deal damage to aerial targets, and block attacks with Beta while also using it to punish being near him, all while benefiting from damage reduction from his Special Action.
Fighting Strike Kirishima is challenging. His Special Action prevents flinching, so avoid using your Chained Alpha combo, as it's unreliable, and he can counter you when you're close. His Alpha move is especially good at punishing close-range engagements, allowing him to deal significant damage with extensive combos.
He can also punish your Beta with his Beta shield by aiming it in the direction of your Beta exit and immediately canceling the Beta into a slam that deals massive damage. Completely avoid using it during an engagement with him.
If Strike Kirishima is good at aiming, he can also punish your approach from the air by utilizing his Gamma, which instantly knocks you down.
Your main approach should be to use Charged Alpha whenever he has his shield active or if he’s using it in the air during his tech, since it's your only reliable source of damage without retaliation. There’s not much else you can do against a good Strike Kirishima player since he can punish charged Alpha attacks with his Gamma.
If you see he is low and using his movement tech to get away, use your bunny hop tech to chase him. It’ll be easy to see him since his bright red shield outlines him in the air. If he’s healing with his Special Action active, use your Gamma to knock him out of his heal before it gets completed.
Momo Yaoyorozu 
Difficulty Score: 🔴🔴Very Unfavorable🔴🔴
Momo is a formidable opponent to challenge as Mirio. Her kit centers on defensive plays, such as locking down areas with her skills and aiming Gamma attacks that can completely turn the tide of a battle.
When fighting Momo, you’ll want to avoid using your Beta entirely. If she feels she is in danger of being hit by it, she can either place a cannon down to deal devastating damage or use her Alpha to punish you as you leave the ground.
Your main approach should be to use your Charged Alpha, since Momo can punish a dodged uncharged Alpha with her Alpha. A Charged Alpha gives you enough distance to avoid being hit and to escape before getting punished. If she is using her Beta against another enemy or an ally, use your Charged Alpha to deal damage through her shield.
If Momo has cannons placed directly on the floor to make a defensive play against attacks, avoid her. Those cannons are powerful and capable of instantly downing you. Respect. The. Cannons.
If Momo is indoors, use Charged Alpha through the walls and quickly use your Beta to get away. This’ll only work once, since Momo will then use her Gamma repeatedly to protect herself from your attacks. While I don’t recommend it, you can use your Gamma after entering the building and potentially reflect her cannon shots, turning her Gamma against her.
While Momo’s escape potential is weak, her Gamma protects her completely from close-range enemy attacks that would knock her down. Normally, Momo players heal indoors, using Gamma to cover her immediate area, giving her time to recover.
Her Gamma lasts long enough for her to use small heals without trouble. However, she can’t use a large GP/HP heal to recover reliably, since her cannon’s duration won’t last long enough. Use this to your advantage by waiting until her Gamma ends, then immediately use a Charged Alpha through the wall if she’s indoors, or a Chained Alpha combo from the sky if she’s hiding behind her Beta.
Fumikage Tokoyami 
Difficulty Score: 🟢Favorable🟢
Tokoyami is a character who stuns and chips opponents whilst not allowing them to fight back. He excels in fights where his shield takes attacks for him and his team and allows for openings with black ankh or alpha and beta.
Your charged alpha goes straight through his shield which can be useful for one time hits as the opponent will most likely learn and adapt but it can really help ur team as it can stop the tokoyamis shield.
Tokoyami doesnt hurt a lot so the most dmg he will do to you for a punish is about 100-150 which is small compared to others.
To fight him you want to using charged alphas your tap one gets blocked but you can still use it if he doesn’t have shield up or is trying to glide and heal.
Picking a fight inside can be an alright idea as he can struggle with your pressure but one stunlock and his team can eat you.
Denki Kaminari (Default) 
Difficulty Score: 🟢Favorable🟢
Strike Denki is one of those characters who can delete your GP and HP if you’re not careful. He’s a mid-range damage dealer who can stun with his skills. If you get stunned, you’re more likely to be downed.
Fighting Strike Denki is straightforward: Use Charged Alpha to approach from the air and avoid using Beta for attacks. Use your Special Action to dodge his Gamma charge, then attack with your Chained Alpha combo or Charged Alpha combo to counter him.
If Strike Denki has his Special Action active or many Alpha mines surrounding him, avoid using your Chained Alpha combo. Doing so will stun you and likely down you.
If you see Denki landing his Alpha attacks, retreat and re-engage later via a 3rd party or a surprise attack. His Alpha attacks are powerful and can down you if you're not careful.
If Denki uses his Beta directly in front of you, punish him with a Charged Alpha. He stays in one spot, and his Beta has end lag, giving you enough time to punish him. If he tries to hit you with his Beta through a wall, use your Gamma to block the damage entirely.
Chasing Strike Denki down will be easy. While his Gamma has 2 charges, it’s relatively slow and is the only movement option he has. You can chase him down without the bunny hop tech and use a Chained Alpha combo to down him.
Denki Kaminari (Lightning) 
Difficulty Score: 🔴🔴Very Unfavorable🔴🔴
Tech Denki is a character resembling a traditional sniper. With long-range attacks that let him stay in the fight regardless of distance and a clever kit that helps keep him safe while countering chasers, he can be quite a tough opponent for Mirio to deal with.
When approaching Denki, you’ll want to do so either through and around cover or when he’s not paying attention to you. His Beta mines will likely surround him. If so, you’ll need to use your Charged Alpha to attack him. Using your Gamma from up high will only result in the mines making contact and stunning you, and using Beta to destroy the mines will leave you open to a counterattack if he dodges.
If you manage to get up close to him, avoid using Beta unless it's for escape and use Charged Alpha for attacking. Denki’s shotgun Alpha allows him to stun you, guaranteeing massive damage if you decide to attack him with either.
If you notice that Denki is spamming his Alpha and Beta, use your Gamma to reflect his Alpha attacks and destroy his Beta mines.
Your Chained Alpha combo is your best bet for dealing damage—but avoid using it if he uses his Beta to place mines around you or has his Special Action active. You’ll be stunned and punished as a result. If you notice Denki is playing smart and utilizing his kit to counter your attacks, run. And if you do choose to run, ensure you do so by either utilizing Beta and getting behind cover, or quickly using Alpha to do the same thing. If you have an ally nearby, use your Special Action to permeate toward their direction. It’s the safest path of escape. Tech Denki can and will use his auto-tracking Alpha from a massive distance if you choose to use your Charged Alpha in the air to get away.
If you have been marked by his Beta, completely avoid using Beta as a confusion tool. His Beta places a red outline around you and shows your exact location through the floor. If you permeate to an ally and aren’t hidden behind cover or within a building, run further away behind obstacles until the marking has been removed. Tech Denki or his allies will likely chase you until you're downed.
Chasing Tech Denki can prove difficult; his Gamma allows him an easy method of escape, and when healing, Tech Denki players like to place mines down as added protection. To make matters worse, if you are marked by his Beta, your exact location is shown to him, preventing the ability to sneak attack him. If you can, use your Charged Alpha combo in order to destroy the mines and attack him either through walls or in the open. If Tech Denki avoids your attack and you notice him about to use Gamma to get away, use either a Chained Alpha combo or Gamma to punish him.
Neito Monoma 
Difficulty Score: 🔴🔴Very Unfavorable🔴🔴
Monoma is challenging to place in match-ups. He can mix and match his quirks, which can make it hard to follow what he has planned. Unfortunately, his base kit alone makes it hard to keep up as a Mirio player and completely counters him.
His Alpha has a very long range and radius of attack. Not only can he steal your Alpha quite easily and use it against you as part of his own kit, but he can also refresh its Cooldown twice by re-activating his Special Action. Essentially, he has double the amount of Alphas compared to Mirio by default.
His Beta can be triggered twice at all levels and activates very quickly. Not only can he use it as a form of movement, but he can also land the attack twice in a row as a punishment for either missing an Alpha or for bad Beta usage.
His Gamma alone essentially shuts Mirio’s attacks down. It’s a shield that lasts 9-18 seconds at max level and can be used right as Mirio is about to attack. Worst of all, it can be spammed by using his Special Action. So even if you attack him multiple times, he can still come out of it without taking damage.
His Beta allows him to stall longer than you can in the air, so even if you finally have a window to land a proper attack, he’s more than capable of stalling until either his Special Action or his Gamma recovers before continuing the confrontation.
Even if you DO manage to chase one down, they can have their Gamma active as they recover, meaning you’d need to attack them more than once to deal damage and knock them down.
Not only that, but his Gamma also makes your Chained Alpha combo unreliable because it interrupts it.
And that’s just with his BASE kit. Monoma can steal your quirks or those that counter you, use them against you multiple times, and then retreat before allowing you time to counter him.
That being said, while this match-up section is meant for facing top-tier players, most Monoma aren’t well-versed in cycling stolen quirks with their own. Most opt to use powerful stolen quirks instead of their own kit and spam them from the sky, allowing you to punish them as they finally touch the ground.
Your best method of fighting Monoma is to 3rd-party him or land a surprise attack when he doesn’t expect it. If he has copied a quirk with obvious end-lag or leaves himself open to punishes while using it, take advantage of it and deal as much damage as possible.
Itsuka Kendo (Default) 
Difficulty Score: 🟢Favorable🟢
Kendo is a defensive, close-range attacker who can deal massive damage if you’re not careful. She likes to take advantage of opponents who close the distance to land attacks and push in her own in between dodges and blocks.
When 3rd partying Kendo with her shield out, take advantage of it if she’s not paying attention to you and use a Charged Alpha attack to deal damage through her shield.
When fighting Kendo, your main approach is to use Charged Alpha from a distance. Not only will this help you to avoid getting damaged as much with her Alpha while charging your Alpha, you’ll end up close enough to her that she will be tempted to use her Gamma to retaliate. When this happens, use your Special Action to avoid the attack and either use your Chained Alpha combo, or use a combo that begins with Melee. If you avoid her Gamma from up close by dodge-rolling, use your Gamma to punish the attempt and use the knock down to provide yourself with more distance. Don’t try to punish wake-ups with Kendo. While you have a good chance of catching her Gamma with your own Gamma, if you end up using Gamma and she doesn't wake-up, she can retaliate with a powerful combo or Gamma.
If she uses her Beta while in front of you, be careful, she could be baiting you to attack with either your Charged Alpha or Beta so she can retaliate with either her Alpha or Gamma. If she does, use the method mentioned above.
Chasing Kendo should prove to be an issue. While she does have a good run speed, she has no form of movement. If you manage an opportunity to sneak attack her, use your Chained Alpha combo to take her out. If you believe that she knows you’ll approach, use Charged Alpha. If she dodges the attack and tries to counter you with Melee or Gamma, punish her Melee/Gamma attempt by using your Special Action, and either use your Chained Alpha combo or a Combo that begins with your Melee to finish her off.
Itsuka Kendo (Twin Palm Strike) 
Difficulty Score: 🔴🔴Very Unfavorable🔴🔴
Strike Kendo is a close-range character who loves forcing fights and winning trades. Her Alpha is a constant flinch threat that shuts down predictable attacks and makes it risky to “do anything” in her face, while her Beta gives her the confidence to tank and challenge your attacks instead of respecting them. She wants to close the distance, keep you locked in place with repeated pressure from her Alpha, and punish any obvious attacks.
When approaching a Kendo that uses her Alpha, you’ll need to do so with Charged Alpha behind cover or obstacles. A good Kendo will make it difficult to approach without getting constantly knocked down.
There’s not much you can do against a good Kendo. Her Beta not only prevents you from dealing meaningful damage but also allows her to retaliate with massive damage. When her Beta is active, avoid using your Chained Alpha combo, as her shield will cause you to flinch.
Your best approach to dealing damage is to use Charged Alpha against her when she doesn’t expect it. If you notice she has an itchy trigger finger and is about to release her Beta for counter damage, use your Charged Alpha, wait for her to begin her counter, activate your Beta, and once she’s stuck in the end-lag of her skill, hit her with her Beta and follow with Alpha or Air Melee if able.
If you notice Kendo using her Gamma to move around, use your Charged Alpha or Beta to punish it if possible. You don’t get many chances to damage Kendo without retaliation, so take advantage of them.
If Kendo is playing smart and doesn’t fall prey to bad habits, retreat and re-engage by 3rd partying or sneak attacking her later on.
Chasing Kendo shouldn’t be too much of an issue. While she does have her Gamma, its cooldown is long and makes her location obvious. Chase her down and either use your Chained Alpha combo or Charged Alpha from the sky or through a wall to take her down. If you choose to go very high during your chase and she’s outdoors, you can also drop down with your Gamma to ensure a quick attack.
Ibara Shiozaki 
Difficulty Score: 🔴🔴Very Unfavorable🔴🔴
Ibara is a low-mobility character with long-, mid-, and close-range options. Not only does she pose a severe threat in team battles due to her 2 Special Action revive charges, but she can also deal severe damage if you're not careful. A good Ibara can dodge and punish your attacks, and may have one or more allies more than willing to get downed for her defense due to her revives.
When fighting Ibara, you’ll need to be observant and patient. If an Ibara is present during a team fight, keep tabs on where she is. Otherwise, she may sneak up and use her Gamma on you to deal high HP damage, which is your natural enemy as a low HP character. If she has her Gamma at level 9, she can instantly down you. Consider it illegal to use your Beta around her. Not only does her Alpha deal significant damage, but she can also use her Gamma after you leave Beta, downing you instantly.
When fighting her directly, avoid using your Chained Alpha combo, since she can use her Gamma with armor to immediately catch your attempt and potentially down you.
That being said, you do stand a good chance of taking her out, though it must be done perfectly. When she uses her Alpha or Beta, she leaves herself open with massive end-lag on her attacks. Take advantage of this by using your Chained Alpha combo if you’re nearby, or a Charged Alpha, to punish her attempts.
Your best approach is to 3rd-party her. While you want to be careful about getting up close to her, you’ll be able to deal damage between her attack attempts. A good Ibara keeps herself at the backline of a fight to deal damage with her Alpha attacks and catches wake-ups with her Beta or Gamma. If you notice her during a fight, she’s a high-value target. If she tries to escape or is indoors, use Charged Alpha through walls to take her down. That being said, if you are trying to finish an Ibara that’s low and you have Plus Ultra available, feel free to attempt using your Beta to launch a surprise attack. If Ibara dodges and manages to use her Gamma on you, use your Plus Ultra to escape the attack, use your Special action to avoid her next attack, and punish the next end-lag Beta or Alpha to finish her off with a Chained Alpha combo/Melee/Gamma. Due to her instant-down potential and her ability to keep her allies in a fight, she is marked as a Very Unfavorable match-up.
Mirio Togata (Default) 
Difficulty Score: 🟡Even🟡
Do I even need to explain him at this point?
In a mirror match-up, winning ultimately comes down to who can gain the advantage in cooldowns and evasion.
Many Mirio players prefer engaging each other with Charged/Uncharged Alpha until they’re down to 1 Alpha. This prompts them to use their Beta to launch an attack while they recover their expended charges. Since Mirio can’t deal enough damage to pose an immediate threat, most opt to fight for a while before escaping.
One of the most beneficial things you can do to gain an advantage during this fight is to dodge-roll the Beta when they use it against you. After they’re stuck in the end-lag of their Beta, you can either punish their Beta with your Chained Alpha combo or Gamma.
Many Mirio players may also choose to use their Gamma after missing their Beta to attempt their luck. If you notice this, use your own Beta while they’re stuck in their animation to land a devastating Beta 🡪 Air Melee 🡪 Gamma combo.
If you notice a Mirio starting up a Charged Alpha from a closer range, counter that by using your Chained Alpha combo during their start-up.
After guard-breaking a Mirio, they’ll usually choose to retreat to recover. It can be very difficult to chase down a Mirio player who uses buildings and cover to escape. Use your bunny-hop method to chase and get the cooldown advantage. Stick to going over buildings to keep track of him and use your hearing to locate him nearby. Mirio’s Charged Alpha has a distinct noise that will communicate his location. After you approach him, either use a Chained Alpha combo if he is outside, or a Charged Alpha through the wall where the drinking sounds originate from. If he uses Beta to escape, either chase from a higher angle with your Charged Alpha to see where he comes out of, or use your own Beta to chase the sound of his Beta.
If Mirio escapes using their Special Action to head toward their teammate, don’t attempt to chase. Not only will you be outnumbered, but you’ll also need to take time to locate him, and by that time, they’ll likely be recovered.
Mirio Togata (Sheer Counter) 
Difficulty Score: 🔴🔴Very Unfavorable🔴🔴
Tech Mirio is the ultimate “No u” character. Capable of countering many skills and attacks that the roster has, he can turn your offense into your own downfall. Not only is he difficult to attack due to his Alpha and Gamma, but he also shares the same Special Action as the original Mirio, making him even more difficult to pin down.
Tech Mirio is ironically one of the worst match-ups for Rapid Mirio. Not only can Tech Mirio counter all of your skills, but Rapid Mirio is also very predictable and can allow him plenty of opportunities to counter your attacks.
When fighting Tech Mirio, you’ll want to avoid using Beta unless to escape, as it’s the most predictable attack in your kit and can allow him to deal easy damage if you use it against him, or he can deal damage with his Alpha to punish the usage near him.
More often than not, your Chained Alpha combo will miss as he uses his Alpha, which grants him permeation. Your best chance at dealing damage is waiting for his Alpha to run out, forcing him to use his Beta/Gamma as a window of opportunity to punish him.
If he uses his Beta, wait until the travel distance runs out, and use either a Charged Alpha in anticipation of his exit, or use a Chained Alpha combo if he’s nearby.
If he uses his Gamma, wait until its counter window expires and land a Chained Alpha combo during its end-lag.
While Rapid Mirio stands a good chance of chasing Tech Mirio, he can utilize his Special Action to quickly travel to an ally. If this happens, allow him to escape and attempt to surprise him later, when the zone gives him little room to escape. If you notice he doesn’t travel very far, use your Charged Alpha to quickly travel to his location and keep the fight going. If your skill charges are running low, use your Special Action to travel to your ally and don’t attempt to re-engage unless you find the option favorable.
Tamaki Amajiki 
Difficulty Score: 🟢Favorable🟢
Tamaki is a mid-range character who excels at repositioning during fights and maintaining constant pressure. He plays best from mid-range—pulling people out of their fights to deal damage, disappearing with his Beta to slip away, and shooting through walls if you try to escape or to support his allies.
When fighting Tamaki, you’ll want to avoid using your Beta. As with every character with a pull/grab skill, he can punish you on exit with massive damage.
When approaching Tamaki, you’ll want to do so from the air and shift side-to-side to make yourself harder to hit. Getting close is your main priority. A good Tamaki tries to keep you at his preferred distance, allowing him to deal greater damage with his Alpha on contact.
Your main form of attack should be your Chained Alpha combo. If he uses his Special Action to create distance, use your Charged Alpha in the air to not only prevent yourself from becoming an easy target but also keep a clear view of where he’s heading.
If you’re fighting him on the ground and he uses his Beta, dodge-roll into the attack to completely avoid it and follow up with a Chained Alpha combo to punish him. When fighting him in the air and he uses his Beta to attack you, use your Special Action to avoid the attack and follow up with a Chained Alpha combo shortly after.
Tamaki’s Cannon takes a moment to fire and signals his intent with a red radius that extends to where he’s aiming. If you find yourself in that red path, use your Gamma or Beta to avoid getting hit by the attack.
If you catch Tamaki using his Gamma to attack someone else, use multiple Charged Alpha attacks while he’s stuck in his Gamma animation to punish him. If you need him to cancel the skill immediately, use your Gamma to knock him out of Gamma.
When chasing Tamaki, avoid letting him hit you with his Beta. Using his invisibility lets him run faster and makes him harder to track. If he uses his Special Action and Beta to get away, chase him immediately with your bunny-hop tech. Since his Beta takes a while to come back, you’ll only need to worry about his Special Action giving him vertical movement. Hit him through the wall with Charged Alpha if he’s indoors or a Chained Alpha combo if he’s outside.
Nejire Hado (Default) 
Difficulty Score: 🟡Even🟡
Nejire is a mid-to-long-range character who excels at dealing damage from above. Her Alpha, Beta, and Gamma are great for dealing damage from above, and her Special Action makes her a master at managing distance against Mirio.
While fighting Nejire, Mirio isn’t too difficult, but he does face hurdles when attempting to close the distance. Nejire can not only attack you from a distance as you approach; she can also continue to separate herself from you with her Special Action as you use your Charged Alpha to approach.
Your best approach is to wait until she lands and uses her attacks, then use the time her cooldowns take to come back to attack her with your Chained Alpha combo. If she’s dodging your attacks, wait until she uses her Special Action to move away, use the fact that she’s stuck in the air to your advantage, and attack her with your Charged Alpha or Chained Alpha combo. If you get low, use your Beta to separate yourself from the fight and re-engage later on.
3rd partying a Nejire is usually quite easy since they tend to stay in the air or on top of a building, allowing you to come up and quickly attack before retreating.
Chasing a fleeing Nejire is quite easy. You do what you usually do and use the bunny hop tech to chase, then attack them as they take time to recover their cooldowns. Hit her through the wall with Charged Alpha if she is indoors or a Chained Alpha combo if she’s outside.
Nejire Hado (Fairy) 
Difficulty Score: 🔴Unfavorable🔴
She excels at keeping her team up and forcing you off them.
She’s a real struggle to hit if she’s in the air unless you have good aim
Her beta and alpha can do big damage to you and knock you down fast which can leave you in bad spots being forced to disengage
Two of your moves can efficiently cancel her beta your gamma can stop the explosion or hit her whilst she’s floating and both alphas can, recommended tap alpha as it has tracking.
She also keeps her team alive which makes it so you lose the efforts of using your resources forcing a retreat with no reward and used heals.
To fight her stick indoors or use alpha when she’s in the sky to keep her busy or you can punish gamma
Hitoshi Shinso
Difficulty Score: 🔴🔴Very Unfavorable🔴🔴
Shinso is a character who excels at everything he does. Not only does he have a mid-range Alpha attack that holds you in a grab twice, but his Beta can be used for movement and as a fairly sizable radius attack that travels downward, catches anyone in its path. If that weren’t enough, he can use his Gamma to punish wake-ups and slow all your actions. His Special Action allows him to steal your items and leave you standing still, giving him a free follow-up to perform combos.
Avoid using your Beta unless to punish his attacks; it allows him to land free attacks since he can use his Beta to completely avoid the attack—be careful.
When fighting Shinso, you’ll want to be unpredictable in your approach. Attack from behind cover, avoid standing on the ground for too long, and avoid using Charged Alpha predictably.
Shinso’s main weakness comes from his Alpha and Beta after he commits to using them. If he uses his Alpha on someone, use your Charged Alpha to punish him as he stays still for that duration. If he tries to use his Beta from the air to land on you, use your Special Action to permeate through the attack and punish him with either your Chained Alpha combo or a combo beginning with your Melee.
An important tip to remember. While affected by Shinso’s Gamma, you're unable to see your allies, making it incredibly difficult to permeate to their location with your Special Action. If you find yourself without your Beta and needing to escape, rely on your mini-map. While you’re unable to see your allies in the game, you can still see their location on the map. Quickly look in their direction and attempt to use your Special Action in that direction.
Chasing Shinso can be annoying. While he does have a long Beta cooldown, his Beta allows him to travel much faster than one would expect, leaving you unsure of his immediate location. Use your bunny hop tech to pursue and take him down either with a Charged Alpha through a wall if he’s, or a Chained Alpha combo from outside if you manage to drop down onto him without him noticing.
All Might (Default) 
Difficulty Score: 🟢Favorable🟢
All Might is a durable mid-to-close-range Assault character who enjoys poking with his Alpha and, whenever possible, uses his Beta to punish attackers while avoiding hard-hitting attacks with his Gamma. Your main difficulty in this match-up will be his Alpha.
Fighting All Might is straightforward. Avoid being on the ground with your Charged Alpha to prevent his Alpha’s splash damage from making contact with you. Dodge-roll to the side to avoid All Might’s Beta on the ground, and use your Special Action if in the air, then follow up with a Chained Alpha combo to punish. If he is using his Gamma, use a Charged Alpha to knock him out of his tornado.
If you get hit by his double-beta combo, be careful. Don’t wake up. Use your invincibility frames to locate your ally and use your Special Action to teleport to their location. If you don’t have an ally nearby, use your Beta to create distance and escape the fight.
If you get All-Might low, he’ll use his Gamma to create distance before activating his Special Action, which takes time to activate before he actually jumps. Use this to your advantage and try a Chained Alpha combo to knock him down. If he uses his Beta to escape, use Charged Alpha from the ground to recover your Alpha, then down him with a Chained Alpha combo when you get close. As always, if he’s indoors, use Charged Alpha in the direction you hear his drinking animation.
All Might (Gatling) 
Difficulty Score: 🔴🔴Very Unfavorable🔴🔴
Rapid All Might has few flaws as a character. 300 HP, all of his attacks are armored, so he can deal continuous damage without interruption, very low cooldowns that encourage being spammed, and massive damage that can easily take you down if you’re not careful.
Fighting All-Might is exhausting. Not only can he stay in the air longer than you can, he can also deal damage to you with his Alpha faster than you can punish him for staying in place with your Charged Alpha. Your main approach will be attacking him with your team or 3rd-partying him.
Avoid using your Charged Alpha or Beta when near him; he can grab you while you're charging up or exiting the ground.
If he’s using his Alpha and attacking someone else, punish him by using your Charged Alpha while he is distracted and slowed. If you are getting hit with his Alpha, use your Beta or Special Action to avoid the damage and reposition to an area where you’re more protected.
Don’t attempt wake-ups; he can Gamma you and deal devastating damage as a result.
If you see him using his Gamma on someone else, use your Charged Alpha where he will land to punish him. If he chooses to use his Alpha directly in front of you or is in a position to do so, use your Gamma directly in front of him to reflect the damage back. You will require good positioning for this, as it can backfire and he may end up inside the shield to deal damage to you.
If you get All Might low and he doesn’t have Beta available, he’ll use his Special Action to create distance before activating his Beta returns. His Special Action takes time to activate before he actually jumps. Use this to your advantage and try a Chained Alpha combo to knock him down. If he uses his Beta to escape, let him run. All-Might is capable of cycling his skills to travel across the map whenever he wants. If the zone is small and he isn’t capable of running away very far, use Charged Alpha from the ground to recover your Alpha as you pursue, then down him with a Chained Alpha combo when you get close. As always, if he’s indoors, use Charged Alpha in the direction you hear his drinking animation.
Armored All Might 
Difficulty Score: 🔴🔴Very Unfavorable🔴🔴
Armored All Might is, as of this writing, one of the most overpowered characters in the game. He has oppressive fire that can freeze or deal burn damage, high movement, a huge HP pool, can stall in the air for long periods of time, and a punishing Melee that can be used consistently to deal quick damage.
Fighting All Might is not recommended. He can deal massive damage if you're not careful and can make easy escapes when your cooldowns are low, while retaliating if you decide to chase.
When fighting All Might, make sure you're hard to hit by moving through obstacles such as walls or map structures. Avoid being out in the open unless it's in the air, and if he has his Gamma active, prepare to use your Special Action to avoid getting hit by its auto-tracking, which could result in a follow-up combo.
Do not use your Beta near him. He can stun you when you exit the floor and deal massive follow-up damage through his combos.
Your main approach to damaging him will be your Chained Alpha combo. If you don’t connect, use your Special Action or Beta to get away before getting attacked. Another option is to use your Gamma to potentially knock him back before he can land an attack while you're dodging your Alpha. If you notice he has his drones out, avoid using your Chained Alpha combo and rely on Charged Alpha from behind cover or in odd places to prevent him from punishing you as you charge it up. His drones can be used to disrupt your combo and retaliate with his Alpha or Beta.
If he runs, you’ll want to avoid chasing until the zone shrinks down to a manageable size. He has the advantage in escape due to his kit’s movement potential.
Shota Aizawa 
Difficulty Score: 🔴🔴Very Unfavorable🔴🔴
Aizawa is a character who can counter every other character in the game. His Special Action disables enemy skills, forcing opponents to rely on melee attacks or dodge rolls while he decides who to target with his powerful skills. His main tactic is disrupting enemy attacks and positioning, giving his teammates a strategic edge.
Fighting Aizawa is challenging. He can deal high damage and counter skills with his Special Action.
Skills affected by Aizawa’s Special Action include: Alpha, Beta, Gamma.
If Mirio is underground, Aizawa’s Special Action will not pull Mirio out of the ground. However, activating Beta while going underground allows Aizawa to prevent its use by activating his Special Action.
Overall, avoid using Beta unless for escaping, as Aizawa can exploit the vulnerability window after you exit for a free grab and significant damage.
You can still use your own Special Action freely, even if Aizawa is using his. It can help you stall his Special Action, giving you time to recover your skills, or, on permeable platforms or near permeable walls, to permeate through walls or floors to avoid being trapped.
During this encounter, use your Chained Alpha combo and Gamma. Save your Special Action for short bursts to dodge critical hits, recover it quickly, or stall Aizawa’s Special Action.
Aizawa’s skills allow him to continuously send a barrage of attacks. His Alpha keeps him on offense, bouncing along the ground and making it hard to hit. If he uses this skill to continuously move around, dodge an attack, and utilize your Chained Alpha combo to deal damage during this window you have before he lets out his next attack.
If Aizawa uses Gamma to stall for cooldowns, strike through his cloth with your Charged Alpha.
Fighting a skilled Aizawa is tough. Your best bet is to use cover, attack through walls with Charged Alpha, punish his Special Action up close with your own, and use Beta to escape.
If he chases you, make it hard for him by passing through walls with Alpha, moving unpredictably with Beta, and quickly relocating to allies with your Special Action.
When your health is low, tracking his position becomes easier. His bouncing makes noise, and his movements along walls and floors give away his location. Use the bunny hop tech and follow along buildings to avoid his Special Action or grabs.
Once close, use your Chained Alpha or Charged Alpha from walls to attack him. If he dodges or you miss, use your Special Action to run through the wall. The last thing you want after chasing and missing is for Aizawa to use his Special Action and prevent the use of your Beta, which would allow him a chance to use his Alpha on you.
Present Mic 
Difficulty Score: 🔴🔴Very Unfavorable🔴🔴
Mic is one of the top characters for dealing damage. With his Special Action and Alpha, he can swiftly change the course of any fight. He often positions himself on rooftops to take advantage of the height, attacking from above. If enemies come close, he can instead deliver a punch that will make you regret getting close in the first place. If that wasn’t enough, his Beta silence mutes all sound, leaving you unaware of your surroundings.
Mic will make it hard for you to get close. Spamming his Alpha, he can deal significant damage to you, and with his Beta→Gamma combo, you end up taking critical damage and lose the ability to hear what’s going on around you—something you rely on to both understand the situation and attack through walls.
Use your Charged Alpha to get close, use your Special Action to avoid either his Beta or Gamma (if he’s focusing you. If he’s fighting someone else, use your Chained Alpha combo.) and once he’s in the end-lag of either skill, use your Chained Alpha combo to deal damage. Immediately after you finish your attack, run away. Don’t attempt to punish a wake-up on Mic. He can easily down you if you’re not careful. Approach this fight with hit-and-run tactics. If your allies are fighting alongside you, punish his attacks and create distance. Your main priority during a team fight is to keep him pressured and prevent him from dealing damage to your allies.
If your ally gets downed by a team with Mic and you’re far away, don’t use your Special Action to teleport to their items. Mic can and will deal significant damage before you can escape, and potentially down you.
Chasing Mic isn’t difficult. With little in terms of movement, you can easily catch up to him. The only issue is getting countered. If you suspect that Mic knows you’re chasing him, make sure you can attack either through a wall or use your Special Action upon dropping down until you can land a Melee attack on him. This allows you to completely avoid being hit by his Beta or Gamma while you drop down, ensuring you land an attack. If he avoids the attack, use Beta to avoid getting punished. Use Charged Alpha through walls or obstacles to finish Mic off while staying safe. If after a period of time you fail to finish Mic, cancel the pursuit and return to your allies. Your main goal during a chase is a surprise attack, and without that advantage, you could easily get knocked down with Mic’s damage potential.
Cementoss 
Difficulty Score: 🟢🟢Very Favorable🟢🟢
Cementoss is a unique character capable of sealing off a room or creating his own to lock down. His abilities provide a height advantage and enable him to traverse the map using his constructs. He not only makes it difficult for enemies to reach him but also supports allies by disrupting enemy combos with his Alpha or Gamma throws. His Special Action is especially notable, as it allows him to revive allies. Since Cementoss can revive allies, create cover to stall fights, and alter the battlefield to make it advantageous for himself, he should be regarded as a high-value opponent. Although he can create cover and block attacks with his walls, your kit counters this by allowing you to attack through his walls and engage from the air, where he is weakest.
When fighting Cementoss, he often builds up with his Alpha. If you notice he is staying in place during this moment, come in from below and hit him through his platform at an upward angle. This not only ensures an attack through his platform and helps start the fight without his attention on you, but it also gives you air superiority and a platform to stand on for a few moments, allowing you to recover your expended Alpha as Cementoss falls, giving you an advantage in your next confrontation. If Cementoss is on GP and didn’t get knocked down, he’ll likely commit to a wake-up, aiming it at either a wall or his own platform to prevent himself from using up his Alpha charges to regain air superiority. If you hit Cementoss and he still has GP, be wary of an Alpha or Gamma attack. More than likely, he’ll do so. If he does, use your Special Action to avoid the attack and use your Charged Alpha if it creates a pillar in front of you to attempt landing an attack through his pillar.
If Cementoss builds up from the floor, you can either use a Charged Alpha from the sky to land the attack, or time his Alpha and use your Chained Alpha combo upon the 3rd pillar to deal more damage.
Don’t attempt to use Beta to attack him through his Alpha or other constructs; unfortunately, it doesn’t work.
Ultimately, to fight Cementoss, you’ll want to use your Charged Alpha to attack through his constructs. This’ll not only protect you during your Charged Alpha attack but also give you the ability to put constant pressure on him during a team fight.
If you see Cementoss running away, you won’t have any issue chasing him. His constructs make it obvious where he is. Follow him and either land an attack through the constructs/building. There is nothing he can do to stop your attacks. Be warned, though, if you miss, ensure you use your Beta, otherwise you can be caught by attacks that bounce you until you’re downed.
Endeavor (Default) 
Difficulty Score: 🔴🔴Very Unfavorable🔴🔴
Strike Endeavor is a mid-range character focused on punishing wake-ups and close combat. He can use walls to ensure hits across entire rooms, and his Gamma ability allows him to clear entire buildings. Typically, he plays by dealing damage from elevated positions or cover, gradually whittling down opponents with his Alpha or Beta when ready, and controlling escapes or advances with his long-range Beta attacks. His Special Action also provides maneuverability in combat, allowing him to reposition or use it as a chasing tool.
When fighting Endeavor, you’ll want to avoid attacking from the open. If you use your Charged Alpha, Endeavor can use his Beta to punish you for it. If you use your Chained Alpha combo, he can use his Beta faster than your Chained Alpha combo can connect, punishing its use. Additionally, his Beta can be used within rooms or alongside walls to land attacks from odd angles, making it difficult to actually attack a good Endeavor.
Even if you do manage to land an attack, his skills allow him to move to reposition in a favorable area or gain distance to attack you with his Alpha or Beta.
If Endeavor is out of Beta, you're more than capable of landing multiple attacks and punishing wake-ups. Wait for that opportunity to land attacks.
If you find yourself in a position where you know the enemy Endeavor is playing into their strengths, ensure you 3rd party them when possible. Put them in an unfavorable position, deal damage when they don’t expect it, and either retreat shortly after or confirm the down before escaping the fight.
If Endeavor attempts to attack you with their Gamma, use either Beta or your Special Action to avoid the attack. If you’re safe from immediate attacks or you need to protect your allies, use Gamma to completely block the attack.
When chasing Endeavor, your main issue will be their Beta. While they do have some movement, Endeavor’s Special Action is slow, and your bunny hop tech allows you to easily gain distance on him. If the enemy suspects you’re chasing them, they’ll likely throw their Beta alongside walls or directly at you to punish you. Because of this, you’ll want to chase behind cover and from high in the air to prevent them from suspecting your approach. If they are indoors, you’ll want to use your Charged Alpha to attack through the wall. If you miss, use Beta immediately after to avoid their attack, or use your Gamma if you’re far enough away as a result of the Charged Alpha. This’ll result in reflecting Endeavor’s Beta and, more than likely, dealing damage to him with his own skill.
Endeavor (Inferno Fist) 
Difficulty Score: 🟢Favorable🟢
Assault Endeavor is an AOE centered character that looks to attack groups of enemies with his skills for maximum pay-off. While he does have high HP and damage potential if he catches you with his Gamma, his cooldowns take a long time to come back, leaving him vulnerable with his Alpha as the only reliable method of dealing damage.
When fighting Endeavor, avoid touching the floor while his Beta is off cooldown, as it can deal severe damage if he chains it with Alpha attacks. This often forces you to step away from the fight to heal. Additionally, Beta can be used while you're using your Gamma to bypass the shield—be cautious when using it to recover cooldowns or protect an ally if he’s nearby.
Your other concern is his Gamma. While dangerous, especially at low HP, you can use your own Gamma to reflect it, preventing damage altogether.
Gain the high ground and attack from above. If you see the red ring forming on the floor, use your Beta or a Special Action to completely avoid it.
Both Endeavor’s Beta and Gamma leave him stuck in the air for a brief period of time, giving you opportunities to land your Chained Alpha Combo or Charged Alpha attack.
Endeavor’s Special Action is slow, and your bunny hop tech lets you easily gain distance on him. When chasing, be wary when you reach him. Most of the time, Endeavor takes time to use their Beta to protect themselves as they recover. You should use your Charged Alpha, since your Chained Alpha combo will be canceled if you touch the walls of his attack, allowing him to punish your attempt. If you think you can get away with it—as in, having plenty of GP and HP and with your allies nearby—use your Beta to surprise-attack him while he is healing. While he can dodge it, his Gamma takes time to use and provides plenty of time for you to use your Special Action to avoid any follow-ups.
Hawks (Default) 
Difficulty Score: 🟢Favorable🟢
Rapid Hawks is a highly mobile aerial character who stays above the fight, continuously chipping away at opponents who struggle to reach him. He spends most of the battle airborne, taking quick angles over buildings, firing while in motion, and withdrawing before you can punish him. His Beta ability lets him deal damage and reposition, setting up additional attacks.
There are two major things to consider when fighting Hawks. His Gamma and Beta. While his Alpha doesn’t pose much of a threat, his Gamma lets enemies see your location through walls. If they have teammates who excel at chasing or dealing damage, this puts you at a disadvantage in both running away and engaging.
Fighting Hawks is straightforward. Not only does he lack damage, but his Beta can be easily avoided by your Beta, Gamma, and Special Action.
His Gamma can be reflected with your own.
You’ll be more than able to use either your Chained Alpha combo or Charged Alpha to deal damage, and while he can make it difficult to land attacks by using his Special Action to reposition, he doesn’t pose too much of a threat. If you find them accurately landing shots and playing into their strengths, use your Special Action to reposition to your allies and make it difficult for them to apply constant pressure on you specifically.
While Hawks has his Beta active and using it to land attacks, you can completely avoid him by using your Alpha to go into the air, using your Beta to move away from his attacks, or dodge-rolling them entirely. Optionally, you can time your Gamma to deal damage to Hawks and knock him out of his Beta flight entirely.
When chasing Hawks, if he uses his Beta’s flight to escape—let him escape. Not only does his flight allow him to travel wherever he likes, but he can also use his Special Action to further move and escape.
If the zone is small, approach him while he is low and quickly use your Chained Alpha combo when you get close enough. Both his Beta and his Special Action flight take a moment to activate before he’s able to escape. As long as you close that distance, you’ll be able to get him down. If he is in a building, use your Charged Alpha to attack him through the wall, and if that fails, continue attacking with your Chained Alpha combo or Gamma.
Hawks (Slicing Wind) 
Difficulty Score: 🔴🔴Very Unfavorable🔴🔴
Strike Hawks is a mid-range fighter with strong mobility who can keep you busy with Alpha attacks at mid-range while he waits for a clean opening to deal massive damage with his Beta or Gamma. If you chase him carelessly, he’s good at turning that chase into free damage, then pulling away before you can punish him. At higher levels, his skills gain unique properties that can make it more difficult to punish bad habits. His Special Action also adds to his mobility, making him hard to chase.
When fighting Strike Hawks, you’ll want to use your Charged Alpha to attack him, since he can use his Alpha as a wall to block your Chained Alpha attempt.
Since Hawks can also use his Special Action to reposition himself at an advantageous distance to continuously deal damage to you, you’ll want to use surprise attack tactics to deal damage.
One skill that hard counters Hawks and keeps you safe during its use is your Gamma. Using it gives you time to recover your cooldowns during a confrontation and encourages him to get closer, allowing you to counter with your Beta or Chained Alpha combo once he draws near.
Another potential punishment is to use a Charged Alpha on an avoided Gamma attack to deal damage to him while he’s stuck in the animation.
That being said, other than surprise attacks or punishment for approaching you, there’s little counterplay you can perform. You’ll find it difficult to approach with your Alpha due to his Alpha and Special Action, and his Beta and Gamma will make close-range confrontations difficult as well. Your best approach is to apply pressure with your allies or catch him off guard with a surprise attack. Other than that, there’s not much that can be done.
Mt Lady 
Difficulty Score (Small Form): 🔴Unfavorable🔴
Difficulty Score (Big Form): 🔴🔴Very Unfavorable🔴🔴
Mt. Lady is a close-to-mid range character who wants to close the space and deal damage. As she approaches you, she looks to whittle you down with Alpha before using her Beta and Gamma to deal damage up close. She is also capable of completely changing the tide of battle with her Special Action. Allowing her to deal damage to every enemy caught in her massive radius or caught in the way of her kick.
In small form: You're generally at a disadvantage. Her playstyle is very grounded, allowing her plenty of chances to avoid most of your attacks while pushing in her own attacks with her Alpha.
You’ll ultimately want to avoid using your Chained Alpha combo unless she’s in the air, since she can use her Beta in order to counter your attempt with her armored damage.
Use your Charged Alpha through walls or obstacles to keep her guessing your location and make it difficult to punish your attempts.
Chasing her isn’t an issue. Since she doesn’t have much movement, you can easily catch up and attack her while she’s either in the air with a Chained Alpha combo or through a wall while she’s busy healing.
In big form: You're very disadvantaged. Not only does your Beta not deal damage,but your Gamma can be ignored by her Beta and Gamma. Avoid staying close, use Beta or Charged Alpha in the air to avoid her attacks, and don’t bother attempting to damage her since the trade wouldn’t be beneficial. You’ll want to stall or allow other players to deal damage to her while you stall.
Tomura Shigaraki (Default) 
Difficulty Score: 🟢🟢Very Favorable🟢🟢
Strike Shigaraki is an AOE-heavy damage dealer who makes it dangerous to stand still or fight in tight areas. He can both defend a whole building by utilizing his Beta, or turn your own surroundings against you if he places it at a different floor from you. His Special Action makes it dangerous to get close with lower HP, and his attacks guarantee you'll be downed if you touch the floor near him.
When fighting him, your main priority is to avoid touching the floor. Pretend it’s lava and use your Chained Alpha combo or Charged Alpha to deal damage. Most of the time, Strike Shigaraki will either be attacking from far away with his Alpha or holed up indoors. This gives you an advantage in confrontations and lets you set the pace of the fight.
If he’s outdoors, you can use either your Chained Alpha combo or Charged Alpha to attack him. Your main priority, however, is avoiding his Gamma, since it can deal true HP damage—and as a low-HP character, you’re likely to be taken down if your HP bar is around half. That being said, it’s not too much of a concern if your HP bar is full, and it doesn’t spell your demise unless he has allies that jump in to deal more damage.
It's worth noting that if you are getting attacked by Strike Shigaraki’s Alpha or Beta, you can use your Gamma to completely block any of their attacks. While you don’t negate their Alpha that were already on the floor, any incoming Alpha are blocked. This, however, isn’t the case with Shigaraki’s Beta, as long as you hold your Beta, any ticks of the damage done, regardless of whether the floor is visually covered with his decay, are completely ignored.
If he’s indoors, use your Charged Alpha to attack him through walls, use your Chained Alpha combo to continue your assault (if there are no other enemies indoors), and if he attempts a wake-up, use your Gamma. If you run out of ammo and need time to recover them, use your Beta to escape the attack, wait out your Cooldowns, and re-engage.
If you notice Strike Shigaraki during the near end-phase of the game, it should be your priority to knock him down and remove him from the fight. His Beta is very strong in the end phase and will make it difficult for you to touch the floor or recover if he’s nearby.
Tomura Shigaraki (Catastrophe) 
Difficulty Score: 🔴🔴Very Unfavorable🔴🔴
Assault Shigaraki is a character who specializes in combos. Although he's less effective in team battles, he can deal significant damage by comboing individual opponents. In group fights, he focuses on stunning enemies with his Beta or damaging grounded targets with his Alpha. His Gamma ability offers a way to move, albeit more restricted than others, aiding him in chaining combos and keeping enemies stunned.
When fighting Assault Shigraraki, you’ll need to be mindful of his Beta and Gamma. His attacks can deal massive damage and don’t necessarily have to hit the ground to knock you down. Since these are his combo starter options, use your Beta or Special Action to avoid these attacks when he is nearby.
As a result, you’ll need to focus on using Charged Alpha through walls or obstacles to avoid getting combo’d. Play evasively and attack during his Beta attempts if he’s not focused on you. His Beta takes time to throw and keeps him suspended in place while he uses it, giving you an opportunity to use your Chained Alpha combo safely, where you’d normally be careful.
If you need time to recover your cooldowns or find yourself getting attacked by his Alpha or Beta, you’ll be able to completely avoid his skills by using your Gamma. His Alpha spread is prevented, and if you get hit by the actual bullet, it stands a good chance of hitting him back, since the Alpha spread would likely attack him.
If you decide to chase, be very careful of retaliation. Use Charged Alpha to hit him through walls, and if that misses, use your Beta or Special Action to get out of the room before trying again. If he’s hiding outdoors, use the Chained Alpha combo or drop down from a high point by using Gamma if you feel he is very low.
Tomura Shigaraki (Thousand-Hand Break) 
Difficulty Score: 🔴🔴Very Unfavorable🔴🔴
The tankiest character to have been released. Not only can Tech Shigaraki deal massive damage with his Alpha and Beta, but he can also use his Gamma to repeatedly trigger revenge tunings. While he has high HP, short cooldowns, and an AOE tied to his movement, his skills still leave openings you can take advantage of. Be wary, though. Unless you can deal enough damage to him through combos, you’ll be fighting a losing battle, since he can recover and re-engage.
Don’t use your Chained Alpha combo on him. His Alpha has priority and stuns you, leaving you vulnerable to being chained and allowing him to continue attacking you through his “tech,” which guarantees massive damage. The hitbox also lingers behind him, so even if you use it from behind while he uses his Alpha, you’ll still get hit.
When fighting him, you’ll want to deal damage through your Charged Alpha. While he does have massive damage and the ability to regenerate, you can find openings in each of his skills.
For his Alpha, it keeps him in place and allows you to use your Charged Alpha if he either misses or is aiming at someone else. If he attacks you, dodge-roll sideways away from the attack. While the red marker can lie, it's your best bet to dodge it without using your Beta, Gamma, or your Special Action.
If he’s close and attacks someone else with his Alpha, you can use your Beta to punish him and deal significant damage with your Beta→Gamma combo. Since he has massive healing potential, large combos like this are key to defeating Tech Shigaraki.
His Beta, while quick, can be predicted and avoided by either using your Special Action or Beta. If you use your Special Action, be mindful to wait until AFTER his second AOE attack completes before releasing it. Otherwise, you’ll avoid the initial attack and get hit with the second.
If you use your Beta, you can wait a moment after the second AOE to punish him with your Beta → Gamma combo.
If he uses it on someone else and you are nearby, you can use your Charged Alpha attack a small distance from the ground to guarantee an attack during the bounce-up motion of his skill, leaving him in the air. Timing is key here, since he can use his Special Action to move out of harm's way, so you’ll only have half a second to time his weakness and get your angle right.
If he doesn’t have his aura of decay, he will attempt to use it either before the fight starts or during the fight. This is because it recovers his GP, allowing his revenge tunings to infinitely trigger during the fight, which recovers his HP and makes hits less effective. While I did state that this portion of the guide wouldn’t take tuning into account, the build is so prevalent that it would be a disservice not to include it.
Your best approach if he doesn’t have his Gamma active is to prevent him from using it at all costs. He takes a moment to activate it, so before that happens, apply pressure with your Chained Alpha combo or Charged Alpha combo to keep him from activating that skill. It’s the difference between a short fight and one that lasts for ages.
If he chooses to run, use your bunny hop tech to chase and follow the massive AOE explosion from his Beta. Keep in mind that its cooldown is very short and he may be healing during his escape, so don’t chase unless your allies are with you or the zone is small enough to apply repeated pressure.
Use your Charged Alpha attack from walls or the Chained Alpha combo if you approach from above. Be wary, though, that just because he’s low doesn’t mean he won’t be recovering, so be prepared for another long confrontation that includes using your Special Action or Beta to avoid his attacks and punish them.
Also use your gamma defensively against him especially in team fights, this is because Shigiraki cannot attack you if you shield up. This makes his alpha and beta stagger and allow for you or your team to punish him.
All For One (Default) 
Difficulty Score: 🟡Even🟡
Tech All For One is a versatile mid-range character focused on turning his defensive indoor plays into advantageous confrontations. He can disrupt opponents by pulling them into his area, inflicting significant damage on wake-ups or escape attempts. Additionally, he can acquire a set of quirks from other characters, enabling him to completely change his playstyle.
Aiming for an accurate difficulty score is—difficult. Since he can use any quirk when he takes them, it’s possible you could be fighting an easy or difficult match-up. That being said, AFO’s base kit can be quite challenging to fight against.
When fighting AFO, you’ll want to be careful about being near him near walls, as his Beta will allow for free damage if he can hear your general area. That being said, you’ll often be able to deal free damage to him whenever he attempts to pull people into his area with his Gamma. Even if you fail to hit the target, if you time the Charged Alpha, you’ll be able to completely ignore the AOE pull either way, so there’s no harm in attempting it.
If you find yourself unable to get the timing down, or are in mid-air, you can use your Beta or Special Action to completely avoid the pull of his Beta. His Alpha can also be reflected if you notice him spamming it in your direction, and his Beta can also be stopped if you time your Gamma, allowing you to get a free Chained Alpha combo due to it causing a flinch.
Normally, AFO players stick to indoor plays since that’s where they’re most protected and allows them to make their best plays. Though this also means that their allies are alongside them—helping deal damage to whatever enemies they pull in. If you want to capitalize on the free damage, time your Charged Alpha and line it up between the pulls. This allows you to not only damage AFO but also any unsuspecting enemies that get dragged into the attack. Of course, you’ll need to escape using your Beta or Special Action shortly after to prevent getting attacked.
When fighting AFO’s base kit, the only thing you’ll actually need to be concerned with is his Beta, since it flinches, deals heavy damage, and goes through walls. Be wary of your exits and ensure that he isn’t reacting to the sound of your Charged Alpha. You’ll also want to avoid using your Chained Alpha combo, since he can use his Beta and punish your attempt.
All For One -Youth age- 
Difficulty Score: 🔴🔴Very Unfavorable🔴🔴
Assault All For One is a character who likes to stay in the air and disrupt fights by using his Beta and Gamma. Not only does he make it hard to approach him, but if you do reach him, his built-in damage reduction on Gamma makes it difficult to deal any significant damage.
YAFO has the advantage in both durability and air time. His Beta enables him to knock you back whenever you attempt to get close, and even if he isn’t focusing you, its built-in defense and super armor prevent meaningful damage from your Charged Alpha.
You should also completely avoid using your Chained Alpha combo, since his active movement causes it to fail, leading to wasted charges.
In addition, his Special Action completely prevents the use of your own Special Action, so be careful about staying in one spot for too long.
What you’ll want to do is either attack him with your Charged Alpha while he is distracted, or aim for the moment after he uses his Beta to attack him. If he uses his Beta’s final attack, use your Gamma to prevent the damage completely, and aim for the moment when he uses his Gamma to deal more damage with your Charged Alpha, since that attack keeps him in place for a moment and doesn’t give him increased defense. It’s the perfect opportunity to deal meaningful damage.
Since he is a big target during fights due to his slow movement, you’ll want to chase after he uses his Special Action’s flight to finish him off. While his initial boost of speed is quick, he’s very slow afterwards, making him an easy target to chase. Once you catch up, use your Chained Alpha combo while he thinks he is safe and down him. Of course, if he’s indoors, use your Charged Alpha to attack him through the wall.
Dabi (Default) 
Difficulty Score: 🟢Favorable🟢
Tech Dabi is a defensive mid-range character who’s strongest when you’re impatient. He aims to punish your approach or escape by deploying his Beta at entrances or inside buildings. If a fight occurs outside, he can use Gamma to buy time to flee, as it blocks projectiles, pulling the fight to his preferred location or looping around a path while inflicting damage with Beta.
Dabi typically keep their plays defensive, using their Gamma to attack through walls or placing Beta to punish wake-ups and pursuits. If you want to fight one, be wary and keep Beta or your Special Action ready to avoid his attacks.
Your main style of fighting will be to attack through walls or obstacles, keeping his Gamma’s radius in mind. Being within the radius isn’t the worst, but being right on the edge will deal significantly more damage. If you notice Dabi about to use his Gamma, use your Charged Alpha to deal free damage during its startup. Many Dabi opt to use their Gamma immediately after a wake-up, so keep that in mind if you see one about to use it. You can either use your Gamma to punish the wake-up or use your Beta to stay close, avoiding the fire damage and allowing you to punish him with a Beta combo. Do keep in mind that even if you’re not close enough to trigger the Beta traps, using your Beta to remove the traps may still trigger them, possibly dealing damage to yourself in the process, so avoid using Beta if you’re surrounded by the traps. Instead, use your Charged Alpha to clear them. You could also use your Gamma to clear them, though this has the same issue with the Beta.
Ultimately, your goal is to whittle him down through walls and obstacles while preventing yourself from getting struck by his Gamma and Beta.
Dabi (Crazy Torch) 
Difficulty Score: 🟢🟢Very Favorable🟢🟢
Dabi is a mid- to close-range damage dealer who specializes in dealing significant damage to a single target with his Beta or in causing wide-area explosive damage when Gamma’s duration ends. Although he prefers to engage whenever possible, his skills expose him to counterattacks and retaliation, which may result in him taking more damage than he inflicts.
When fighting Dabi, be prepared to use your Beta, Gamma, or Special Action to avoid his Beta. You’ll need to avoid using your Chained Alpha combo, since with his Gamma active, it’ll deal damage to you and prevent the chain from finishing.
That being said, his attacks are predictable and very avoidable. Using your Beta will allow for an easy combo attack, although if he has his Gamma active, be prepared to take some damage if you’re in close proximity to him.
When he has someone else hugged with his Beta, you’re more than able to punish him by using your Charged Alpha to deal damage to both him and the other enemy.
If he begins to stretch out his arms, be prepared to either use your Charged Alpha to attack from a safe distance and avoid the flames, or use your Beta if he is on the ground to punish him with a Beta combo. If neither option is available and you just want to avoid the damage or protect your allies from the fire, you could use your Gamma to completely block the attack.
If Dabi is hitting you with Alpha from a distance, go up on a building or a structure to avoid the damage.
Himiko Toga (Default) 
Difficulty Score: 🟡Even🟡
Tech Toga is a mid-range character who loves pelting you with attacks from a distance or chaining her Beta attacks to extend skill duration. Her Special Action can make it difficult to keep up with her, as she can transform into a character that counters you. That said, her transformation also reveals her exact location to you through walls and on the map, allowing you to easily land attacks through walls or obstacles.
When fighting Toga, you’ll want to avoid using Beta to deal damage, since she can use her Alpha or Gamma to deal damage. She can use her skills to refresh her cooldowns and give herself invincibility frames, so your goal in this fight is to quickly deal damage with your Chained Alpha combo and apply continuous pressure to prevent her from making use of them. If she uses her Gamma in an attempt to chain it and deal continuous damage, use your Gamma to block the attack. If she transforms, be wary and prepare to use a different approach. Ultimately, you’ll need to apply continuous pressure and hope she doesn’t transform into something that can counter you.
If she transforms into you, make use of it, since you can see her through walls, giving you easy access to free damage if the situation calls for it.
It’s impractical to avoid her Gamma with your Special Action since she has 2. Using one will just allow her to stall the Special Action and wait for you to deactivate it before trying to take your blood again. If you do use your Special Action to avoid the first one, be prepared to use an obstacle or Beta to avoid the second one.
If she runs away, she can easily use your own skills to gain distance. Luckily, she shows you exactly where she is. Only chase if the zone is closed enough that she can’t gain distance, and use your Chained Alpha combo when she is within range, or use your Charged Alpha if she’s indoors.
Another tip: if she transforms into your ally during a fight and you need aid in distinguishing them, use aim mode to see on whom the teleport function appears on.
Himiko Toga (Sting Dance) 
Difficulty Score: 🔴🔴Very Unfavorable🔴🔴
Rapid Toga is a mid-range character who excels at pulling you into unfavorable positions with her Gamma while constantly cycling through skills and cooldowns with her Special Action. She can not only flinch you with her Beta but also deal group-wide damage with her Alpha. She favors long fights, as her constant skill cycling and cooldown refreshes give her an edge in battles.
When fighting Toga, you’ll need to be wary of her Beta, since she can use it with her Gamma to take advantage of the flinch, combo it into her Gamma, and steal your blood. Throughout this fight, you will be massively disadvantaged in the battle of cooldowns, and she can easily change herself while you’re downed to continuously refresh them.
Using your Chained Combo is unreliable, since she can use her Beta to avoid it and punish you for using it. If you were to use your Charged Alpha, she can use her Gamma to punish you for it as well. Even attempting to hide behind obstacles won’t work most of the time, since her wide Alpha hitbox can catch you behind trees or other obstructions. This is ultimately a losing battle that will force you to rely on rapid role cards and your Chained Alpha combo in order to attempt a quick knockdown. The only decent way to combat her mechanics is to guess her Beta usage and use your own Beta in order to counter her with a Beta combo.
For this matchup, you’ll need to attack her with 3rd parties or hope that whatever she transforms into is easy to counter and deal damage to.
If she runs away, she can easily use your own skills to gain distance. Luckily, she shows you exactly where she is. Only chase if the zone is closed enough that she can’t gain distance, and use your Chained Alpha combo when she is within range, or use your Charged Alpha if she’s indoors.
Another tip: if she transforms into your ally during a fight and you need aid in distinguishing them, use aim mode to see on whom the teleport function appears.
Twice 
Difficulty Score: 🟢🟢Very Favorable🟢🟢
Twice is a team-play character who grows stronger as the game progresses. While he isn’t good at combos, he can create copies of downed enemies with strong aim. He prefers fighting at mid-range in battles with his Alpha and creating clones with his Beta to deal additional damage. That being said, his skills are all very easy to punish, and while he may be a Rapid in role, he isn’t very fast.
When fighting Twice, take note of his clones. Since they have very good aim, be wary of any that use projectiles such as Deku, Bakugo, All Might, etc. Depending on whether he has clones that can deal constant damage from range, it will change how you’ll be engaging in the fight.
If he has many clones capable of dealing damage from a distance, be careful and avoid engagement. Even if your attacks land, you’ll still be punished by his clones and may end up downed quicker than you think. If you are forced to engage, attack using your Charged Alpha through walls or Beta to quickly deal damage and defeat his clones.
If you notice that he has no clones, you’ll be more than able to take him out. Twice by himself is not much of a threat. If he uses his Gamma to attack, you’ll be stunned for a brief period, which is usually followed up with his Beta, which creates a clone. This is the most dangerous attack he will have, since he can use his clone to whittle you down. Fortunately, the clone is defeated in one blow. Use any attack to defeat the clone and close distance to Twice.
You can use either your Chained Alpha combo if he’s on the ground or a Charged Alpha attack if he decides to use his Gamma to gain height. Since he is much slower than a traditional rapid, you should be more than able to hit him as he uses his Gamma with your Charged Alpha to both close distance and deal damage if he’s close enough.
Other than his Gamma, the only other attack you’ll need to be concerned about is his Alpha. While it is a solid ranged option, it lacks in close confrontation and can be countered by using your Gamma, allowing you to stall until your cooldowns return if necessary.
Chasing Twice shouldn’t be an issue at all. Despite being a rapid, he lacks in movement compared to your own and shouldn’t be capable of going far.
Mr. Compress 
Difficulty Score: 🟢Favorable🟢
Compress is a mid- to long-range character who excels at spamming attacks from afar or above. He can stay safe while engaging, deal significant damage, and reflect enemy attacks back at the sender. Compress is a master at maintaining favorable distance in a fight thanks to his Gamma, and he can be hard to keep up with if he uses his skills to escape.
Fighting Compress is relatively simple. You’ll often want to approach from above. This makes his offensive option much weaker since it won’t benefit from the secondary splash damage of his Alpha. In addition, it’ll also give you a chance to start combos with Melee.
If you’re fighting Compress without the element of surprise, use your Chained Alpha combo to deal damage. If you use your Charged Alpha attack, he’ll be capable of punishing your startup with attacks.
Keep constant pressure and don’t allow him distance to recover his spacing. He wants to stay mid-range to deal damage with his Alpha, keeping close prevents him from making meaningful use of his Alpha, providing you with an advantage if you keep close.
If you find yourself getting stunned and damaged by his attacks, don’t worry—his Alpha stuns you in place while you have GP. Once you get guard broken, you’ll be able to immediately react with Beta to escape, preventing yourself from getting knocked down. That being said, avoid using your Beta to initiate attacks. Compress will be able to make full use of your vulnerability window to deal devastating damage.
If Compress is using his Gamma to deal damage from above, stay calm and use your Beta to avoid the attacks, or use your Charged Alpha in the air to prevent becoming a target. If you see him in close proximity as you land, close distance and engage once more.
While Compress can cause damage with his Gamma, it's fairly obvious when he uses it and allows you time to use your Special Action to prevent taking that damage.
If you notice Compress attempting an escape, use your Charged Alpha and hope that the attack manages to hit him through his Gamma attempt. If he gets knocked down, great! However, if he manages to stay alive beyond that, it's likely better to let him escape.
His Gamma melee tech allows him to drastically increase the distance of his Gamma, enabling him to gain much more distance than normal. By the time you manage to catch up, not only will he be capable of using it again, but he’d have recovered from his damage.
If the zone has closed enough, however, you should be capable of chasing and downing him without too much issue. The best method is to approach from above, since he lacks the ability to retaliate reliably. However, if he’s indoors, use your Charged Alpha, and if he’s not yet downed or you missed, use your Chained Alpha combo to down him. You’ll want to be cautious, however, since indoors his Alpha attacks will be much more impactful. If he avoids your attacks, use Beta to quickly escape and re-engage after your cooldowns are recovered.
Overhaul (Default) 
Difficulty Score: 🔴🔴Very Unfavorable🔴🔴
Overhaul is a grounded, mid-range, low-movement character who can tank a lot of damage from enemies with his high HP and Special Action. He excels in grounded group fights, where he can deal damage with his Gamma, and he can use his Mid-range Alpha against airborne enemies. Overhaul’s most powerful ability is the Special Action that heals him, enabling him to stall in the poison or recover from a fight to gain an advantage in battle.
While fighting Overhaul may not seem a difficult task, the sheer amount of damage you’ll need to deal before taking him down will make it a challenge you’re better off not taking on. Not only that, but his grounded playstyle also gives him many opportunities to completely dodge your attacks. Unless you have allies alongside you, avoid confronting him since it’ll likely be a fruitless endeavor.
When fighting Overhaul, you’ll want to use either your Chained Alpha combo or Charged Alpha to deal damage. Since Overhaul can use his Special Action to negate your Chained Alpha combo attempt, you’ll want to use your Charged Alpha combo more often.
When fighting Overhaul, you’ll want to do so from a little more than jump height. This is the case since his Gamma has a tall height that can attack you from a deceptive height. And since he can chain his Gamma twice, you’ll end up nearly guard broken from one combo, leaving you in bad standing for a prolonged fight. That being said, if you catch him using it from a distance, use either your: Beta, Gamma, or Special Action to avoid the attack entirely.
If you do use your Gamma, use it sparingly. Overhaul’s Beta can ignore your Gamma completely, so be careful in that regard.
Fighting Overhaul is a lengthy process that takes a long time to finally knock him down. That being said, he’s bad at escaping and won’t be difficult to chase. If he’s indoors, however, keep in mind that you’ll need to engage briefly before escaping, since you’ll want to avoid touching the ground and allowing him to deal massive damage with his Gamma.
Overhaul (Blighted Precipice) 
Coming Soon...
Kurogiri 
Difficulty Score: 🔴Unfavorable🔴
Kurogiri is a long-range character with a lot of utility built into his kit. Not only can he pull downed enemies to his location, he can also pull downed allies to his location regardless of distance. While it's rare to find a good Kurogiri, those who master the character are experts at keeping their distance and attacking when it's favorable. His Beta not only allows him an easy escape if fights turn challenging, but he can also use it to deal devastating damage that could potentially down you if you're not careful. Because Kurogiri can steal your downed enemies and revive them from a safe location, it's highly encouraged to take them down when you encounter one, preventing your fights from turning fruitless as he rescues his allies.
When fighting Kurogiri, you’ll want to do so with the element of surprise. Typically, they hide their main body during confrontations or use their attacks from a distance to gain the advantage in battle. That being said, they’re very weak up-close and, when caught in a fight, will use their portals to escape.
When you get close enough to engage, use your Chained Alpha combo to attack. Once they are attacked, they should attempt to escape shortly after.
Keep this in mind, since they’ll likely create another portal after traveling to close that portal up. You’ll only have a few moments to react to continue the engagement. You can use one of 2 options. Option 1: Use your Charged Alpha attack through the portal to both potentially deal damage and avoid the automatic knock down when traveling through the portal. If you’re fast enough, you’ll be able to follow up with a Chained Alpha Combo as they create their next portal, allowing you to apply more pressure. Kurogiri only has 3 portals, and they take quite a while to return, allowing you to eventually exhaust his options and knock him down.
Option 2: Use your Beta if the portal is on the ground and travel through the portal immediately after. When Kurogiri is out of Beta, they’ll use their Gamma to stall in the air until their Beta returns. Normally, this allows the pursuer to fall down as they stay in the air. Using your Beta allows you to exit the ground from the air, potentially deal damage to Kurogiri as they air stall, and continue your engagement if they didn’t get knocked down with your Charged Alpha.
If Kurogiri manages to escape through their portal without you being able to go through it yourself, let Kurogiri escape. Their ability to create distance is much greater than your ability to catch up.
If the zone is close enough, however, look to the sky and watch where his portals appear. He’ll be within that area, allowing you to chase him down and re-engage.
Lady Nagant 
Difficulty Score: 🔴🔴Very Unfavorable🔴🔴
Lady Nagant is Mirio’s worst matchup. Not only does she excel at dealing damage from both close range and long range, but she also has movement that makes her difficult to track. She can quite literally one-shot Mirio with her sniping ability. If you try to chase her down, you’ll have to do so while getting shot from a distance as well.
Number 1 rule for engaging or fighting around Nagant. DO NOT USE YOUR BETA UNLESS TO ESCAPE!!! Nagant can easily down you or deal devastating damage in one attack. Don’t give her an easy way to do so.
Most of the time, Nagant will stay in the air, using her Beta to stun opponents and follow up with her snipe ability. Since this is the case, ensure that you have your Beta available to use in the air, where you’re in position to be hit by the attack.
Surprisingly, Nagant has air superiority since she can use her Gamma to avoid you entirely, along with the ability to double jump, allowing her to outmaneuver you in the air as well. Lastly, her Air Melee allows her to rapidly descend to the ground, adding more evasion to her kit.
Since this is the case, you’ll be looking to take advantage of when she actually drops down to the ground. If you manage to surprise-attack, ensure that you use your Chained Alpha combo, since your Charged Alpha attack gives her more time to retaliate or avoid the attack. Once you successfully knock her down, use your Chained Alpha combo to punish wake-ups. Since Nagant has no ability to gain distance other than her Beta, she’ll more likely use it to avoid your approach. Her Beta takes a moment to start, which gives you time to punish her attempt to use it.
Another possibility is that Nagant, believing you to be fodder since you’re so low HP, may use her Air Melee to follow that up with her snipe, insta-killing you. Using your Alpha is preferable in this case because it allows you to avoid that attack. If Nagant doesn’t wake up, she can go through your shield and attack you with her Air Melee, which will lead to a snipe and deal devastating damage to you.
If you see her Beta rings targeting you, use either your Beta or your Gamma to block the attack. If you use your Gamma to block the attack, keep it held for a moment. Many times, Nagant will simply use it again, so keeping your shield up prevents the next attempt.