


Festival Jinbei (Combat)
This is the best costume you’ll get for Critical Permeation, combined with Revenge Support you trade slightly more optimal alpha tuning for more survivability.

Last Update:
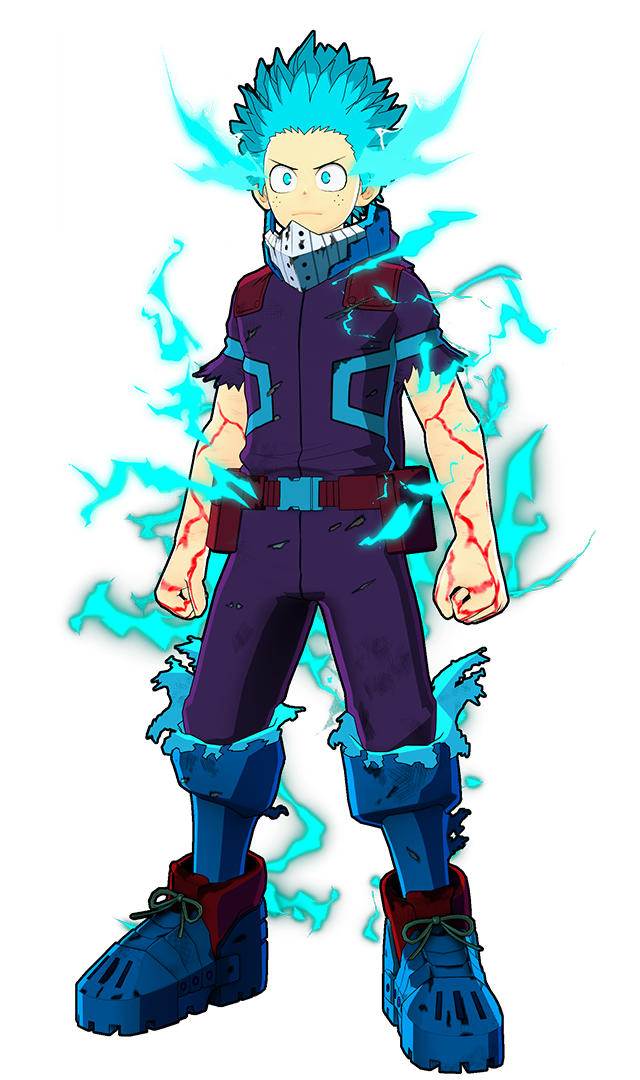
Assault Deku is an extremely versatile character, for both his flexible mobility, and potent ranged damage! His straight-forward kit, combined with the fact that he’s the tutorial character, makes him accessible for a wide variety of players! He’s a great character to learn the game with due to his low barrier of entry, helping you learn to sharpen your aim and positioning. His main weaknesses are that he’s susceptible to being overwhelmed if many enemies are fighting him at once, as he specializes in fighting one person at a time. Secondly he struggles a bit in the early game, requiring a lot of level cards to keep up with the rest of the cast.
Due to his access to solid ranged damage, Deku doesn’t struggle/thrive on any given map. He’s pretty solid no matter which map you’re playing! UA island is particularly note-worthy due to its abundance of tall buildings to reposition yourself with.


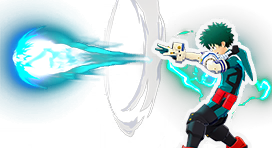
This move is your bread and butter, it's a very simple projectile that fires one fast and moderately powerful pellet. This skill basically never knocks down, requiring 10 shots (which exceeds how many shots you have) to knock your foes to the ground, making it very easy to use in tandem with your allies' attacks. This skill has the ability to be aimed in with, which is useful for lining up shots on opponents further away. Do note that your movement speed is decreased when aiming in and it may be best not to use it in close to mid range encounters! It is recommended when using this skill to constantly be jumping and sprinting around as you fire to make yourself more unpredictable with your movement and harder to take out.
Assault Deku's alpha has the unique property of being able to fire the entire magazine when he's crouching for a more powerful blast of air force! While this skill does use all ammo in Deku's alpha, its power is not affected by how many shots you had before firing, meaning you can use this skill with one shot remaining and still benefit from the additional damage. Alongside its increase in power, this attack also receives additional range, allowing you to hit enemies normally out of your reach. Compared to its non-crouching version, this skill has additional defensive utility, sending foes flying back a bit when they have GP, and will knock them down completely if they only have HP. This knockdown aspect of the move may be worth considering if you find yourself in a pinch, and could give you the space you need to make a getaway. If you plan on using up all of Deku's alpha ammo, it may be worth considering using the final shot crouched for the added firepower, but remember this skill cannot be used in the air, and has a small recovery period which could cause you trouble! The additional range and knockback on this move is also helpful for a powerful, long distance shot for your teammates during a fight to relieve pressure, and or to interrupt an ongoing battle between enemies from a safe distance.
Given how Deku’s alpha is so reliant on aim, we offer the following advice to those who may struggle to hit their shots. Slow is steady, steady is fast. Gradually, you'll gain more confidence in your abilities! Aim is a very difficult skill to acquire, it takes time, so try not to get too frustrated if you aren't getting immediate results.
This skill sees Deku perform a kick sending him in whatever direction the camera is facing. This move is very versatile for his kit, as it functions not only as an attack with armor (making him resistant to stuns), but a great mobility tool to conserve ammo on your gamma. The armor on this attack allows you to brute-force your way through problematic characters that are causing you issues up close if you’re in a tight spot, this could prove to be more useful against melee oriented opponents. Be careful about doing this though, as while the armor will usually help, it may also cause you to take a lot of damage. Beta should be your primary source of traversal mobility, such as spots where you don’t have people coming after you. Preserving your gamma whenever possible is ideal due to its immense value as a combo tool and superior mobility option mid-combat. This attack has some very finicky tracking, which will sometimes help, but you may sometimes track onto something or somewhere you didn’t want to.

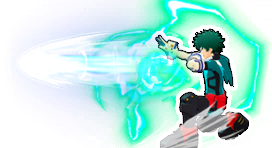
For this skill, Deku manifests a whip shaped form of energy to serve a variety of functions. This is not only an excellent mobility tool, but also a very threatening combo tool. This skill has quite a lengthy cooldown, especially at low levels, but upon further leveling up has astounding reach for grappling yourself around the map, and to reel in enemies. To pull yourself towards your desired location, you first need to jump and then use the skill. This move takes longer to reach the target/destination the farther you are away from it. Using this move for its utility as a grab can prove to be difficult, try to look for opportunities where your enemies are stuck in place performing an attack, or are just generally stationary. Upon reaching level 9, this skill gains a second charge, providing insane gains to your combo game and mobility. Make sure to ration them carefully however, as the aforementioned reload time may put you in a tight spot.
Much like Deku in the main series, this move often requires you to be selfless to perform! This skill is usable only on a downed teammate. Upon activation, you will lose the ability to use your other skills to pick them up and gain armor similar to that of your beta. Once your teammate is picked up, you have two options, you can either run away with your teammate, or put them down. Putting them down will instantly revive your ally from the downed state, which can be a huge game changer for any given fight. When using this skill, there are usually two main questions you should ask yourself before attempting a revival…
Usually not, as during the time it takes to get to your destination, there’s a high likelihood you’ll receive either a large amount of damage, or be knocked onto the ground and thus dropping your teammate without reviving them. The most useful scenario to actively carry your teammate around is in situations where they were downed due to the Poison Mist, and may not have enough healing items to make it back on their own. In this scenario, you can capitalize off of the movement speed increase Deku receives upon activation of this skill!
Can I revive my teammate without going down myself?
This will be different in every game, and every fight, but consider your surroundings, what enemies are in your surrounding area, and whether or not your additional teammate (if alive) can assist you.
It’s not guaranteed to work, but if your downed teammate only has one enemy on them, you can try to use your crouching alpha on them to knock them back, potentially buying you enough time for a revive!
This attack has Deku perform a total combo of 4 punches, during any one of these punches you can choose to stop the chain early, opening the door to combos.
This move has Deku perform a singular upward punch and if connected, can be followed up by several attacks, such as Blackwhip. This move can be performed after grappling to a surface after using your gamma, providing additional momentum. This momentum boost can also be done by rolling off of a high surface like a building and using your air melee. This move comes out fast enough that you might be able to use it while you’re being combo’d to break out as a last ditch effort.


This is the go-to level path for Deku, since alpha is your most reliable form of damage, it is crucial to have it maxed out as soon as possible. Getting gamma leveled afterwards is also key for its ability to get you out of sticky situations faster than beta can, with the added upside of having a second gamma for combos or additional movement.
![]()
![]()
![]()
![]()
![]()
The different ways you can combine and chain various skills for higher damage within 500 DP (Downpower). The downpower of Deku's abilities are as follows:
Alpha Skill: 50 DP (Basic Shot), 100 DP (Crouched Shot)
Beta Skill: 100 DP
Gamma Skill: 0 DP
Ground Melee: 100 DP (Melee 1), 50 DP (Melee 2, Melee 3 and Melee 4 Individually), 250 DP (Full Melee String)
Air Melee: 250 DP
The text of the combos below will be colored by how true they are, in this case, we will define as "True" combos that, without 3rd party or tuning interference, can only be escaped/interrupted by Overhaul and/or Mirio, as those are special cases.
Basic Text means that part of the combo is True on both GP and HP.
Green Text means that part of the combo is True if the target is on HP only or the hit Guardbreaks.
Blue Text means that part of the combo is True if the target is on GP only.
Red Text means that part of the combo is Untrue, and therefore the enemy can escape it.
The DMG of the following combos at max level and accounting for the character's strike role is classified under the following tags:
Basic DMG (100-149 DMG), Basic+ DMG (150-199)
Light DMG (200-249 DMG), Light+ DMG (250-299)
Medium DMG (300-349 DMG), Medium+ DMG (350-399)
High DMG (400-449 DMG), High+ DMG (450-499)
Heavy DMG (500-549 DMG), Heavy+ DMG (550-599)
Deadly DMG (600-649 DMG), Deadly+ DMG (650-699)
This combo incorporates your crouch shot, so be mindful that you’ll be out of ammo after the combo is over. The knockback of crouch shot could prove useful if you manage to land this on someone who’s chasing you however, as it could buy you an extra moment to reposition or flee while your opponent gets back up. Additional tip: If you find yourself struggling to land the crouch shot after the melees, two regular alphas will also knock down the enemy but give them a small window to act.

Due to air melee launching the opponent on HP damage, you can follow up with a single melee to stagger the opponent midair, leaving them wide open to your beta skill since they won’t be able to dodge roll in time.

Like a future combo, except this one depletes all your alpha ammunition, the upside is that you still have access to your beta to either apply more damage to your opponent or use it to reposition while your cooldowns refresh.

This is a strong combo that is relatively simple to perform but without level 9 gamma, you have no mobility resources afterwards. Only consider this when you’re facing only one opponent.
Nearly identical combo to the last, but a slightly different route.
Pretty much the same as a future combo, but seems to be less consistent overall.

This combo is resource heavy but does good damage, and guarantees a guardbreak.
Again, this is a more specific version of the last combo, but has higher damage.
A strong combo that utilizes all of Deku’s skills, be mindful that once again, this skill deprives you of your mobility in return for high damage.
This combo can nearly down every character in the game if they're on HP, but is a little tricky to perform, as you may not be able to get the jump gamma depending on the terrain you’re fighting in.

Assault Deku is not a combo-oriented character, so it’s wise to never fish for these combos because one mistake can cost you a match. It’s best to have them come naturally so that if they come up you can create a lot of pressure on the enemy so they either have to back off or you can finish them. As a general tip, Deku has a lot of freeform combos, some you can even mix and match what you do depending on the situation such as if you’re in a 1v1, 1v2, etcetera; the best thing to do is to keep the combo simple if there are multiple enemies or go all out if you can to give you and your team an advantage. You just have to play out the scenario with your own instincts or if you have the information then go from there as there is never a perfect answer to any situation.
Try to get into the habit of jumping and running around a lot as this character since you can fire off your alphas while doing so. You’ll be doing this because you’ll often be fighting in the mid range, allowing you to support both the front and backline of your team on the fly. Keeping your movement unpredictable will make you harder to hit, giving you more uptime in a given fight.
In any given fight you take, be observant of your surroundings for potential highground/vantage points you can reposition yourself with using your gamma or beta. High ground will give you an advantage against a large portion of the cast, as it’s easier for you to hit your shots on targets beneath you and will also cost your enemy resources to reach you.
Pings are crucial for keeping your team informed of what’s going on in a given match. Even if you have voice communication with your teammates, it’s still valuable to provide a visual to go alongside your communication. Ping as often as you can, whether it’s to help your team locate enemies, call for backup, or even just to tell them where you want to go. Be sure to keep an eye out for your allies' pings as well, and ensure that you respond to them, either saying yes or telling them to wait in order to give them a better idea of what you’re thinking.
If you notice one of your allies being overwhelmed, try to run in to help them whenever you can, landing enough of your alphas may dissuade your enemies from pursuing your teammate, or divert their attention to you instead. It’s also key to remember your crouch shot knocks enemies back and can function as a pressure relieving tool for your teammate from a longer range.
Due to your alpha’s extremely low downpower, Deku pairs amazingly with allies that can impair enemy movement. Characters that have grabs or stuns, such as Aizawa or Denki can create devastating team combos with Deku if you barrage the enemy with your alpha as your teammate is attacking. You may alternatively use your beta in this scenario if you’re close enough.


Strike Slots: Alpha Attack Power > HP Attack Power > Else
Assault Slots: GP Attack Power > HP Defense > Alpha Defense > Beta Defense > Gamma Defense > Else
Rapid Slots: Alpha Reload > Gamma Reload > Else
Support Slots: Max HP > Max GP > Else
Technical Slots: Alpha Attack Power > HP Defense > Alpha Reload
| The list of recommended special tunes (not ordered): | ||
|---|---|---|
 |
Space Hop This tuning is insanely powerful for this character as it allows him to get advantageous angles for firing his alpha from pretty much anywhere. It’s also good defensively for its ability to be used during your invincibility after a knockdown, as well as helping you get to higher ground without having to use your beta or gamma. |
|
 |
Critical Permeation This tuning is extremely valuable for its invulnerability for a short time when your guard is broken, often letting you get small healing drinks off before it goes away. If you weren’t completely knocked over when your GP was depleted, it’s possible to get a large healing drink off instead, giving you an upperhand in an otherwise tight spot. |
|
 |
Card Duplication This tuning helps combat one of your biggest weaknesses of having a mediocre early game, providing you 4 level cards upon a knockout as opposed to the usual 2. This helps you get to your level 9 skills faster and start contributing to your team more efficiently both in combat and with item distribution. |
|
 |
Wall Runner This tuning is very solid, as it helps you save charges on your beta and gamma for traversal and lets you be more unpredictable with your movement. It is a bit tricky to get the hang of, however. |
|
 |
Willpower A universally helpful tuning skill, being able to survive an attack that otherwise would have downed you might give your teammates just enough time to get a team heal off and save your life. |
|
 |
Fixer This skill has a lot of potential, but is currently held back by the lack of costumes that can really benefit from its effects as much as other characters. |
|
 |
HP Sucker This tuning is useful for especially aggressive players, providing a partial restoration of your health upon getting a down, helping you sustain yourself in a fight you might have otherwise not been able to survive. |
|
 |
GP Sucker Same benefits as HP Sucker, albeit a little less recovery than HP provides. |
|
 |
Revenge Strike Pretty simple, if your guard is broken you get an attack boost. There’s potential to turn a fight in your favor as a result. |
|
 |
Revenge Support Similar benefit to Revenge Strike, but more passive. Useful for survivability. |
|
 |
Ability Manifest As long as you remember to use your Ability Cards, this tuning can be quite useful, especially with Assault and Support cards. |
|
 |
Quick Reload This skill is very potent in the right hands, allowing you to have pseudo infinite alphas upon downing an enemy with your alpha for a short time, capable of being refreshed upon subsequent downs. Since your alpha is your best source of damage this tuning is definitely strong, but do note that you will be unable to use Lady Nagant’s normal tuning, alpha attack power, if you run this special tuning, sacrificing a little bit of your overall alpha damage for this upside. |
|
 |
Acceleration If you have a more close ranged playstyle, this tuning is strongly worth considering. This special tuning grants you faster movement speed and attack speed if you successfully connect a melee attack. Deku’s air melee being quick and Blackwhip’s ability to close the gap can make this process easier. |
This is the best costume you’ll get for Critical Permeation, combined with Revenge Support you trade slightly more optimal alpha tuning for more survivability.
This outfit is just very powerful, having a good amount of red slots on top of being able to run triple HP defense makes you tankier than usual when your guard is broken.


Another powerful costume, having even more red slots than the previous costume. It has some unique benefits however, standing out for its ability to run any Rapid Special Tuning you’d like and there’s an extra red hero slot to suit your needs.

This outfit doesn't hit as hard, but having two Rapid slots opens the door to some pretty powerful combinations. For example, Wall Runner + Card Duplication, Card Dupe + GP Sucker, etc. If you’re willing to trade a little bit of damage for additional utility, this costume should suit you well.
This outfit is capable of running lots of damage tunings, this costume also has great special tuning because of a blue slot of your choosing (Wall Runner or Card Dupe preferably) and powerful red special tuning options such as Willpower. Consider this if you don’t have Kung Fu.

This outfit in particular has excellent placement for its normal tuning slots. Alongside this costume's great alpha damage, this outfit can run Space Hop in its yellow slot, serving as one of the best costumes to use it with. Having a red hero slot is also useful again for skills like Willpower or Ability Manifest.

This costume is another option to consider if you want to prioritize survivability, without sacrificing too much alpha damage. The combination of Revenge Support and Hyper Regeneration can make you quite durable if you can secure guard breaks. These combined Special Tuning skills pair well together due to Revenge Support’s duration replenishing every time your guard is broken, which will naturally occur as you fight and activate Hyper Regeneration.
Of all budget builds Deku has, this is probably the best one he’s got. The one decent outfit he can use Fixer with for high alpha damage, if you’ve got no good PURs on Deku this outfit is definitely worth considering.

As broad advice across all match-ups, be on the lookout for moments where your enemy is stationary or recovering from the endlag of their attack to gamma (Blackwhip) them and give you and your team a big opening!

Difficulty Score: 🟡Even🟡
Mostly a battle over who has better aim, but superior positioning could also make the difference. If he’s close enough to hit you with his beta, be ready to roll and take advantage of their end lag!

Difficulty Score: 🟡Even🟡 / 🔴Unfavorable🔴
You have a longer range, and it’s important to use that to your advantage. When Full Bullet is within his effective alpha range you will usually have a difficult time in the alpha trade. If he knocks you onto the ground, use your invincibility to find safer spots to reposition yourself with either your beta or your gamma. Do your best to avoid letting him close the gap on you, as his close quarters game is vastly superior to yours. If the FB is reckless with their beta usage it could be a good opportunity to use your gamma for a combo! If you find yourself with the opportunity to knock Full Bullet out of his gamma, you can gain a massive advantage as he’ll be left with only one mobility skill left afterwards.

Difficulty Score: 🔴🔴Very Unfavorable🔴🔴
Both the grounded and aerial variants of his alpha beat you in an alpha trade. He can close the distance on you quite easily and once he’s got you there, he can repeatedly deny you opportunities to beta or gamma away to safety with the hard knockdown of his grounded alpha. Despite the difficulty of this matchup there are things you can do. Your beta has armor, so if you see that he’s approaching for a melee attack or is just close to you in general you can use it and have the potential to hit him hard. His own beta however can make this a bad interaction, as he simply may knock you over first. Do note that if you aren’t his target, he’s rather susceptible to consecutive alphas. He’s at his most vulnerable while performing his ground melee barrage or lock on attack with his gamma.

Difficulty Score: 🟡Even🟡
Very similar story to Assault Deku, whoever has better aim and or positioning will usually win. Keep an eye out for his betas and avoid them if possible, beta into alpha combos hurt a lot! It’s also worth noting that Bakugo’s alpha pierces through walls, which could cost you if you aren’t mindful. If you happen to knock him over, there’s a chance he’ll use his special action immediately to escape and use up his invincibility early, if you can interrupt this he probably will go down.

Difficulty Score: 🔴Unfavorable🔴
This character is very mobile and can be quite hard to hit, try not to panic and get the shots in where you can. Keep an eye out for his gamma, as it is particularly devastating to be hit by. Catching his Special Action on wakeup is also possible here just like it was for Strike Bakugo.

Difficulty Score: 🟡Even🟡
This character has very high damage combos that you have to avoid at all costs, but you can win. Timing your dodge rolls against her gamma is crucial, as is avoiding her beta projectile. While she’s throwing her betas at you and during her gamma animation, she’s wide open for you to pelt her with your alpha. If she closes the distance on you with her alpha and is trying to use her beta at close range, you can try to utilize the armor of your beta to endure her attack and hit her pretty hard for it.

Difficulty Score: 🟢Favorable🟢
Much like Rapid Ochaco, avoiding her gamma is important. Her attacks are on the slower side however, and are pretty reactable. Look for openings to chip at her with your alpha and especially if she whiffs a gamma, put the hurt on! As long as you don’t get reckless she shouldn’t be too much of a problem.

Difficulty Score: 🔴🔴Very Unfavorable🔴🔴
Recipro Iida is one of the hardest characters to land a hit on in the entire game, making it easy for him to close the distance on you and start up his powerful combos. Your best hope is to deal significant enough damage to him before he gets to you, and if you suspect he’s about to burnout then go after him. The armor on your beta might help you hit him back momentarily or just be a trade, no matter how you put it this matchup is truly a tough one.

Difficulty Score: 🔴Unfavorable🔴
The main issue with Strike Shoto is that his ranged damage output is good, and he’s superior in close quarters. Your goal should be to fight him from a distance, preferably out of his gamma range. Any mistake on your part can be quite brutal thanks to his gamma or even his beta if you’re close enough. If it’s possible to get above him, his ice wall can’t protect him from your alpha, which could provide the opening you need. Despite these problems there’s still always the possibility you can beat him in the aim duel.

Difficulty Score: 🟡Even🟡
This matchup can be tricky, but largely depends on how good your enemy is at spacing out their gamma and denying you space. If he’s indoors I would highly discourage you from contesting him, he will simply overwhelm you. If he happens to be outdoors then getting above him, while potentially costly on your resources, is your best chance of getting a good angle to shoot him with your alpha.

Difficulty Score: 🟢Favorable🟢
This character is very squishy, if your aim is good enough you can often make her think twice about fighting you. She’ll often be looking to catch you off guard so remain aware of your surroundings! If she does jump onto you and tries to do her aerial beta into ground beta, you can preemptively beta her approach. If you have downed one of her allies, be on the lookout for her attempt to revive with special action. If you happen to spot her before she can get to her teammate try to hit her with a crouch shot or anything you can to disrupt to give your team more time to finish off her teammate.

Difficulty Score: 🟢🟢Very Favorable🟢🟢
Assault Kirishima is quite scary if he gets in close, but this should almost never happen, as your mobility is so much better than his you can rather easily kite him to whittle down his health.

Difficulty Score: 🔴🔴Very Unfavorable🔴🔴
Strike Kirishima is a very difficult opponent, as he is highly mobile and has high burst damage. Try to deny him opportunities to approach with his alpha or landing on top of you with his beta. When he has his beta shield up, don’t bother shooting at it, as you will merely waste your ammo. Timing your rolls to avoid his beta slam is crucial, as he has follow-up opportunities if it connects. If you notice he’s going for a gamma and you manage to dodge, he has a tiny window where he is stationary and vulnerable to being shot.

Difficulty Score: 🟢Favorable🟢
This character only really becomes an issue for you if you get too close, but if you just stay back and play patiently she will lose the war of attrition. If she’s using her beta to charge at you, you can roll past her and get some alpha damage in. Do not follow her into buildings unless you are really confident she’s weakened enough.

Coming Soon...

Difficulty Score: 🟢Favorable🟢
You have a good ranged advantage on him and have him beat when it comes to mobility, if you can initiate the fight from higher ground he’ll often have to use one of his gammas to get to you. This character will absolutely destroy you if you get too close and get caught by his gamma so staying calm and evasive is key.

Difficulty Score: 🟢Favorable🟢
Tech Denki deals solid damage at long and close range, struggling a little bit at the midrange. Aim to play around this position when fighting him as your overall dps should be higher than his. His beta will open you up to lots of damage if you run into it, and will reveal your location to Denki and his allies so be sure to destroy it or stay back from them. It’s worth noting that while Denki’s special action is active, his lock-on from his alpha activates faster, so exercise caution if you realize it is active.

Difficulty Score: 🟣Unknown🟣
This character could be extremely easy for you to beat, or just so happen to have the perfect combination of Quirks to beat you, it’s hard to say.

Difficulty Score: 🟢Favorable🟢
This character can really test you patience, breaking her shield is very slow and isn’t the most realistic thing to accomplish. You do, however, have much better mobility than her. If you’re patient enough to play the long game, you’ll eventually win by beating her in the ranged battle.

Difficulty Score: 🔴🔴Very Unfavorable🔴🔴
Not only does this character have great mobility, but she’ll punish you hard if you shoot her recklessly and charge up her beta. If she uses her beta recklessly, you can attempt to grab her out of it with your gamma. Exercise extreme caution when combatting her, and keep your distance!

Difficulty Score: 🟢Favorable🟢
Ibara hits very hard, at the cost of having no mobility to speak of. Her attacks are also rather slow, so if you manage to dodge them, you have ample time to beam her down with alphas.

Difficulty Score: 🟢Favorable🟢
Good roll timing is all it takes to beat this character for the most part, if he uses his beta carelessly you can get real good damage in. The main thing to look out for on this character is his uncharged alpha, being harder to roll than the rest of his kit, but still doable.

Difficulty Score: 🔴🔴Very Unfavorable🔴🔴
The Mirio player will always have the upper hand, he can go in and out of intangibility so effortlessly it’s difficult to find an opening to hit him. If he’s greedy with his counter that’s usually your best chance to get meaningful damage on him, do note that the counter has a very short cooldown however so your opening must be brief.

Difficulty Score: 🔴Unfavorable🔴
This character is a little scary, as his alpha grab opens up the door to strong burst damage combos. Try your best to chip away at him from afar to deny his attempts to grab you. Focus hard on evasion in this matchup, as it’ll be a lot harder for him if you can stay out of grab range. If you happen to see him using his gamma, he cannot move, and it takes him some time to cancel the attack. This may allow you to down Tamaki with your alpha before he even realizes what happened.

Difficulty Score: 🟢Favorable🟢
This matchup can heavily swing depending on how you feel about your aim. If you are confident in your abilities, you can make Nejire explode due to her preferred position being up in the air. Be careful if you ever get knocked to the ground when facing her, as her gamma is quite good at denying your attempts to get back up.

Coming Soon...

Difficulty Score: 🟡Even🟡
If Shinso is within his effective range, he can put you in hitstun simulator, so it’s very important to keep your distance from him. If he whiffs on any of his attacks, there’s a good window to get good damage in on him. Having a teammate nearby against this character makes the battle a lot easier.

Difficulty Score: 🟢🟢Very Favorable🟢🟢
This character has very slow moves, leaving you plenty of opportunities to take him out with a barrage of alphas. He’s especially slow after using his beta, or attempting to use his special action to jump away. Note that his larger stature also makes him an easier target than most.

Difficulty Score: 🔴Unfavorable🔴
This character has very good map traversal, so you’ll need to take advantage of any opportunities to hit him. If he hasn’t completely ramped up his alpha, you’ll have a small window to hit him several times before he can retaliate. He also has the same vulnerability during his special action leap, and a larger hurtbox like Assault All Might. Catching this character while he’s running away with his beta is rather difficult. If you’re a cracked shot you might be able to get him in the midst of a getaway.

Difficulty Score: 🔴🔴Very Unfavorable🔴🔴
This character has superior numbers to you, and a kit tailored for any range. His alpha does respectable damage on top of dealing chip damage at an alarming rate, putting you in critical condition quickly. He has great mobility thanks to special action and beta, which while leaving him open for attack while performing, make him a bit hard to hit. His beta functions as a grab both on the ground and in the air, so make sure to keep your movement unpredictable. Attempting any combos on this character in particular is ill advised, as his gamma can still hurt you while he’s in hitstun. This matchup is tough, but finding your openings while he’s moving around is key to victory. Have confidence in your aim and you might just make it through.

Difficulty Score: 🔴Unfavorable🔴
This matchup is tricky, and can vary a lot due to the high skill ceiling of Aizawa. Like many matchups before, play the distance game, as he’s quite difficult to handle once he’s close. Aizawa has high mobility, high damage combos, and can deny you the opportunity to fight back through the use of his special action. Even if he is getting somewhat close, try not to panic, and stay unpredictable with your movement as you fight back.

Difficulty Score: 🟡Even🟡
A rather unpleasant character at most ranges, but particularly at close range, he deals explosive damage. Fighting him at range is preferred due to his alpha having a damage falloff at further distances. You can hit him pretty hard for his mistakes, such as when he misses with beta or gamma.

Difficulty Score: 🔴Unfavorable🔴
This character adds a lot of chaos to any fight he’s a part of, creating structures that can deny you favorable angles to attack from. This matchup is hard because it requires calculated aggression and proper cooldown management. Fighting him in open spaces is preferred, as he is often forced to build himself upwards to make landing his attacks easier. Knowing this, it’s important to not use up all of your skills too hastily, as it will then prove to be difficult to dodge him. Getting above him whenever possible will give you the biggest opportunity to score meaningful damage, but unless you’re absolutely certain you can secure the down, don’t overextend. Fighting this character indoors is a bad idea, as he will often trap you with his attacks.

Difficulty Score: 🟢Favorable🟢
This character can punish you pretty hard if you mindlessly rush at him. The biggest thing to look out for when facing endeavor is his beta, not only because it's quite large, but can hit you through walls. If he goes for his gamma he becomes stationary, take advantage of this and shoot him down. If your aim is sharp you should be able to win, just remain alert.

Difficulty Score: 🟢Favorable🟢
This character is similar to Strike Endeavor, as long as you’re careful and lookout for particular attacks, you should be fine. Particularly be on the lookout for his beta, as if you are caught by this move, you’ll get pulled into it and run the risk of taking a decent amount of damage. If you do get caught, making sure you don’t panic is essential. Time your roll to get past the outer rings or use your beta/ gamma to pull you up and out of the fire if the environment allows it. Another thing to note is that endeavor is quite vulnerable during his gamma, he has to finish throwing it before he can move again so it’s a perfect opportunity to deal massive damage to him with your alpha.

Difficulty Score: 🟢Favorable🟢
This character has high mobility but is vulnerable after using moves like his beta or his gamma. If you have good aim and know how to dodge in time, you will have no trouble defeating him.

Difficulty Score: 🟡Even🟡
A rather unpleasant opponent in close-range and mid-range combat, as he has many stunning attacks. If you can keep him back and dodge accordingly, you can punish him hard for any missed attacks, be especially observant for his beta, which leaves him stuck in place for quite some time after finishing the attack.

Difficulty Score: 🟢Favorable🟢
This character isn’t very threatening in her small form. Play evasively, ensuring you keep her far enough to avoid a beta, otherwise you’re vulnerable to combos. In big mode she’s a bit trickier to deal with as her attacks increase dramatically in size, proving to be quite challenging to escape from if you get too close. Try your best to run away and chunk her down from range, she will take less damage than normal while she’s in big form but she’ll still go down eventually.

Difficulty Score: 🟢Favorable🟢
You have superior mobility and range, giving Shigaraki a hard time. Look to shoot him from high vantage points, as all of his moves target the ground. His alpha can travel up some of these buildings but are rather reactable. Area denial is his specialty, so be sure to avoid enclosed spaces. As long as you remain patient, taking him down shouldn’t prove to be particularly difficult.

Difficulty Score: 🟡Even🟡
This matchup can play out very differently depending on where you engage. If you keep your distance, he will have to waste valuable cooldowns to get to you and at this range you are at your strongest. Avoid combatting this character in close range, as he has long lasting combos that will keep you stationary and vulnerable for his allies as well. Keep an eye out for his beta, as it is one of his best ways to start a combo but will also leave him vulnerable if he misses.

Difficulty Score: 🔴🔴Very Unfavorable🔴🔴
This character is extremely threatening at close range, having the ability to stunlock you with his alpha’s startup. His beta deals massive damage with nearly instantaneous startup so it’s integral that you keep your distance as much as possible. Wait for windows to alpha, as he does have a decent amount of ending lag on his attacks.This character’s built in healing mechanic on top of potential tuning abilities make him shockingly resilient, testing your patience. Taking him down will take quite some time, if you even can.

Difficulty Score: 🟣Unknown🟣
It is impossible to predict who will win, as he may have a quirk that can easily defeat you, but if you are fighting against his base kit, you should keep a medium distance, denying him opportunities to beta or gamma you. Stay relatively grounded if you can, as you can’t roll any attempts he makes at pulling you in while doing so. Finally, do not enter buildings against him because he has an advantage there.

Difficulty Score: 🟡Even🟡
This character is on the slower side, only really gaining good mobility if he uses a lot of his resources. When using Beta, he is momentarily stationary, allowing for easy shots. Be wary of his gamma however, as he gains stun resistance and damage reduction. While you technically can cancel this attack by using your gamma, it’s risky to do so, so only go for it if you’re really confident it’ll connect. Stay back and avoid his orbs when in this form and get your damage in whenever possible, as despite taking less damage in this form, his mobility is limited.

Difficulty Score: 🟡Even🟡
This fight depends on the situation. If your battle takes place in open terrain, it will not be difficult for you to win. He will often use a combination of his beta and gamma to block your alphas but he has long cooldowns, so he may run out of ammo in the process. Doing your best to get above him is beneficial, as his gamma cannot shield him from above. This is another character that performs best in enclosed spaces, and it is not wise to fight him there.

Difficulty Score: 🟢Favorable🟢
While this character can deal good damage to you if he’s close enough to use his beta, he doesn’t have a whole lot else going for him. He’s often weakening himself passively due to his gamma, which damages himself. His alpha does give him the ability to fight from a distance, but it only travels on the ground and leaves him open to attack. Having high ground on this character gives you a big advantage, as he’ll need to use his beta to reach you, starting a fight with less ammo. If your teammates happen to be hit by Dabi’s beta, he cannot move until he’s done finishing the attack and this is your best chance to shred his health down completely.

Difficulty Score: 🟢Favorable🟢
With only her base kit, this character can be quite slippery thanks to her beta. This attack also can hurt quite a bit if you let her get close enough to land it so try to stay back or roll past it if she’s heading your way! Her alpha can deplete your health rather quickly if you have predictable movement. It’s important to stay agile, and take advantage of the fact that you can sprint and jump around, getting alpha shots off in-between. Toga cannot do this nearly as well as you can, so you should be able to win an alpha war if that’s what it comes down to. Be sure to roll her gamma to avoid her transforming into you. Depending on what character she transforms into, and her skill on that character, this matchup can change up completely, so try your best to remain adaptable!

Difficulty Score: 🟢Favorable🟢
This character is dangerous if she can connect her beta, as it has good follow-up potential. Maintaining range when combatting her is preferred, as you’ll outdamage her and deny her the ability to use her beta or gamma without leaving herself vulnerable. Generally speaking, her attacks are solid for combat, but extremely unsuitable for retreating because she becomes very vulnerable during her gamma while also having a delay at the beginning and end of the animation.

Difficulty Score: 🟢🟢Very Favorable🟢🟢
This character is rather underwhelming in terms of mobility and damage output, be sure to dispose of his clone created by his beta quickly as it only takes one alpha to take out. His gamma, while a form of mobility, is pretty awful in terms of speed, so you should be able to damage him quite a lot if he’s using it to get away from you. He may use it to get a quick combo on you so keep him back at the mid range and you should beat him pretty easily. If he has a lot of clones from his special action, be a bit more careful.

Difficulty Score: 🔴Unfavorable🔴
This character doesn’t really hit you really hard but his beta can reflect your alphas back at you with increased power. As a result of his beta, the Compress often dictates the outcome of the encounter. Alongside this his gamma is an extremely quick form of mobility. It is worth noting that if you’ve knocked Compress down it’s possible to grab him out of his teleport attempt with your gamma.

Difficulty Score: 🟡Even🟡
A dangerous character in close combat due to his gamma, a large area of effect attack, capable of dealing significant damage. He can also knock you down with his alpha attack to close the distance on you. Overhaul can also heal himself, making him very resilient. When playing against him, look for positions on high ground and deal damage with your alpha. As long as you keep yourself at a safe distance, this matchup isn’t too bad.

Difficulty Score: 🟡Even🟡
This character is very slippery, and will often force you into a heavy chase to take him down, so it’s important not to get too hasty and get taken somewhere where he has the advantage. He also has good alpha damage to go in tandem with his high mobility. He will most likely keep you at a distance and wait for the best moment to attack. So keep an eye out for his gamma, as you can shoot it to destroy it. Patience and calculated doses of aggression are key to taking him down.

Difficulty Score: 🔴🔴Very Unfavorable🔴🔴
In terms of ranged damage she has you beat, do your best to keep yourself evasive to minimize the amount of alphas you’ll be hit by. If she goes for a beta, she becomes unable to move, make sure to punish this as much as possible if given the chance. Avoid close encounters with her as her grounded gamma is a powerful knockback move. Additionally, she has melee setups into her special action, which can cause massive damage. Her special action makes this matchup particularly brutal, turning a seemingly advantageous battle into a losing one with a well placed shot.